
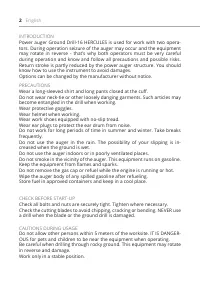
Мотобуры ADA GroundDrill-16 - инструкция пользователя по применению, эксплуатации и установке на русском языке. Мы надеемся, она поможет вам решить возникшие у вас вопросы при эксплуатации техники.
Если остались вопросы, задайте их в комментариях после инструкции.
"Загружаем инструкцию", означает, что нужно подождать пока файл загрузится и можно будет его читать онлайн. Некоторые инструкции очень большие и время их появления зависит от вашей скорости интернета.


6
English
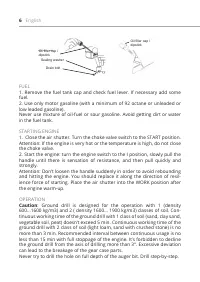
FUEL
1. Remove the fuel tank cap and check fuel lever. If necessary add some
fuel.
2. Use only motor gasoline (with a minimum of 92 octane or unleaded or
low leaded gasoline).
Never use mixture of oil-fuel or sour gasoline. Avoid getting dirt or water
in the fuel tank.
STARTING ENGINE
1. Close the air shutter. Turn the choke valve switch to the START position.
Attention: If the engine is very hot or the temperature is high, do not close
the choke valve.
2. Start the engine: turn the engine switch to the I position, slowly pull the
handle until there is sensation of resistance, and then pull quickly and
strongly.
Attention: Don’t loosen the handle suddenly in order to avoid rebounding
and hitting the engine. You should replace it along the direction of resil-
ience force of starting. Place the air shutter into the WORK position after
the engine warm-up.
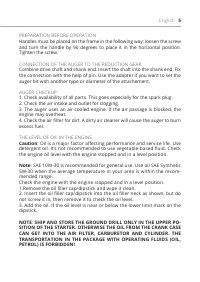
OPERATION
Caution
: Ground drill is designed for the operation with 1 (density
600...1600 kg/m3) and 2 ( density 1600... 1900 kg/m3) classes of soil. Con
-
tinuous working time of the ground drill with 1 class of soil (sand, clay sand,
vegetable soil, peat) doesn’t exceed 5 min. Continuous working time of the
ground drill with 2 class of soil (light loam, sand with crushed stone) is no
more than 3 min. Recommended interval between continuous usage is no
less than 15 min with full stoppage of the engine. It’s forbidden to decline
the ground drill from the axis of drilling more than 3°. Excessive deviation
can lead to the breakage of the gear case parts.
Never try to drill the hole on full depth of the auger bit. Drill step-by-step.
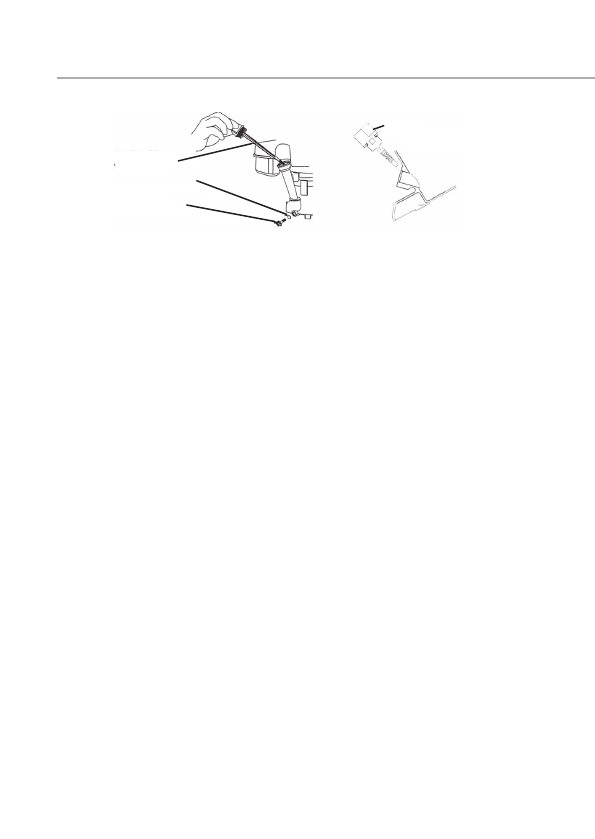
Oil filler cap /
dipstick
Sealing washer
Drain bolt
Oil filler cap /
dipstick
Содержание
- 15 ПОДГОТОВКА К РАБОТЕ
- 19 ТЕХНИЧЕСКОЕ ОБСЛУЖИВАНИЕ; Примечание; ЗАМЕНА МАСЛА
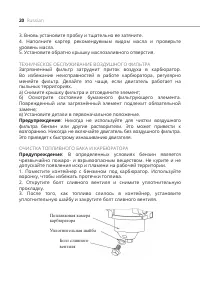
- 20 ТЕХНИЧЕСКОЕ ОБСЛУЖИВАНИЕ ВОЗДУШНОГО ФИЛЬТРА; ОЧИСТКА ТОПЛИВНОГО БАКА И КАРБЮРАТОРА; Предупреждение; Поплавковая камера
- 21 ТЕХНИЧЕСКОЕ ОБСЛУЖИВАНИЕ СВЕЧИ ЗАЖИГАНИЯ; ОБСЛУЖИВАНИЕ РЕДУКТОРА
- 25 ГАРАНТИЙНЫЙ ТАЛОН; По вопросам гарантийного обслуживания и технической поддержки
Характеристики

Остались вопросы?Не нашли свой ответ в руководстве или возникли другие проблемы? Задайте свой вопрос в форме ниже с подробным описанием вашей ситуации, чтобы другие люди и специалисты смогли дать на него ответ. Если вы знаете как решить проблему другого человека, пожалуйста, подскажите ему :)


