Мониторы 2E C3220B - инструкция пользователя по применению, эксплуатации и установке на русском языке. Мы надеемся, она поможет вам решить возникшие у вас вопросы при эксплуатации техники.
Если остались вопросы, задайте их в комментариях после инструкции.
"Загружаем инструкцию", означает, что нужно подождать пока файл загрузится и можно будет его читать онлайн. Некоторые инструкции очень большие и время их появления зависит от вашей скорости интернета.


– 4 –
EN
4
5
4
5
Operating Instructions
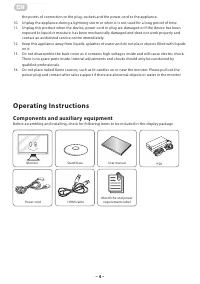
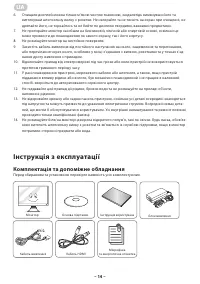
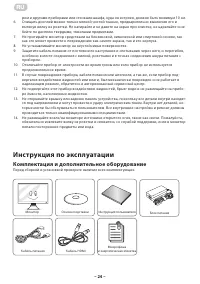
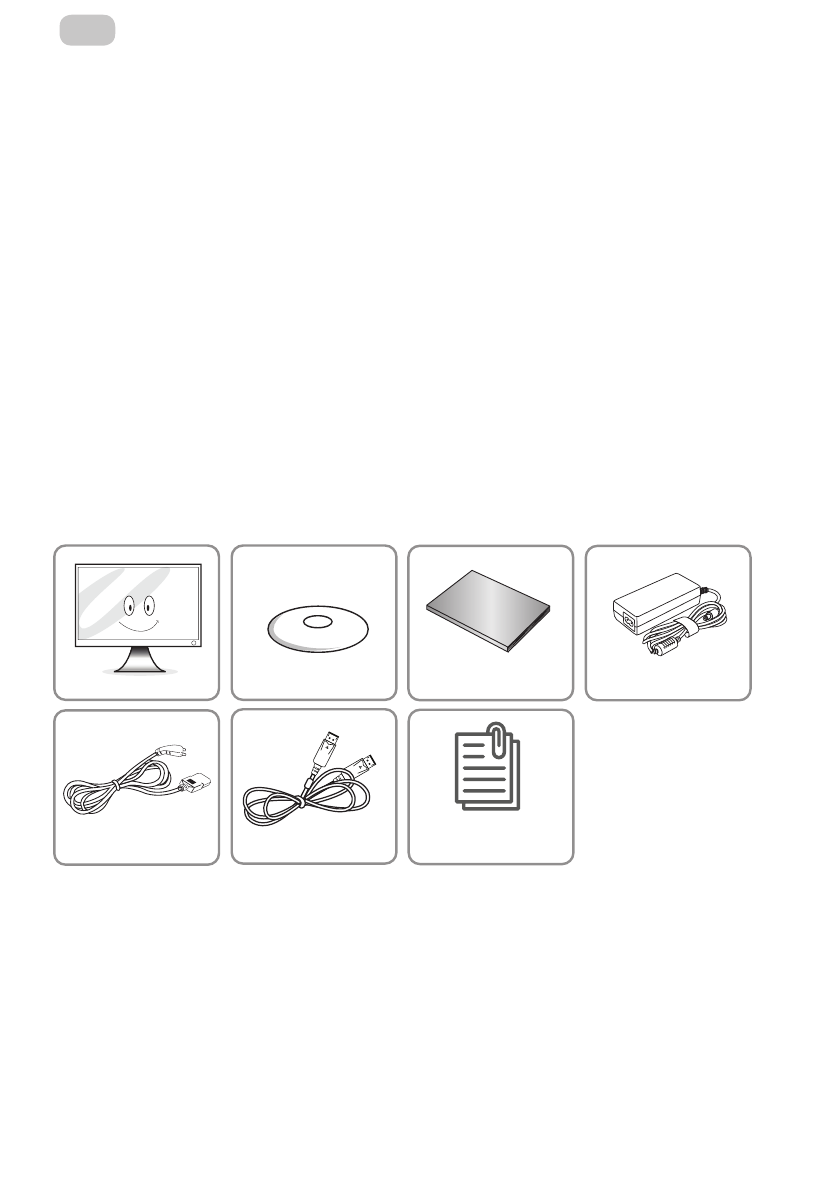
Components and auxiliary equipment
Before assembling and installing, check for following items to be included in this display package.
Monitor
Power cord
Stand base
HDMI cable
Microfiche and power
requirements label
User manual
4
5
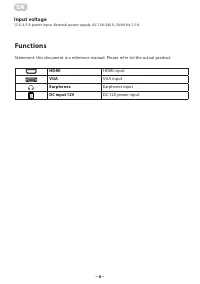
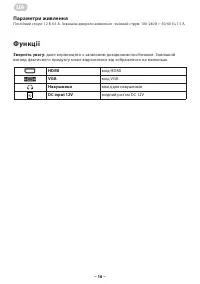
PSU
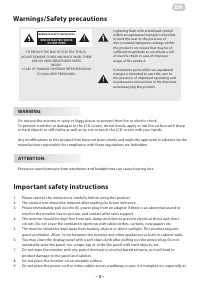
the points of connection to the plug, sockets and the power cord to the appliance.
10. Unplug the appliance during a lightning storm or when it is not used for a long period of time.
11. Unplug this product when the device, power cord or plug are damaged or if the device has been
exposed to liquid or moisture, has been mechanically damaged and does not work properly and
contact an authorized service centre immediately.
12. Keep this appliance away from liquids, splashes of water and do not place objects filled with liquids
on it.
13. Do not disassemble the back cover as it contains high voltages inside and will cause electric shock.
There is no spare parts inside. Internal adjustments and checks should only be conducted by
qualified professionals.
14. Do not place naked flame sources, such as lit candles on or near the monitor. Please pull out the
power plug and contact after sales support if there are abnormal objects or water in the monitor.
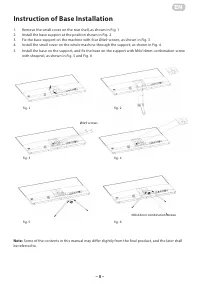
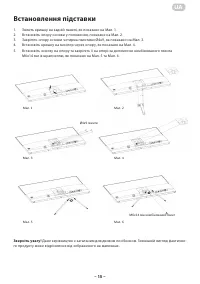
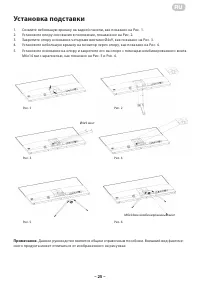
Instruction of Base Installation
1.
Remove the small cover on the rear shell, as shown in Fig. 1
2.
Install the base support at the position shown in Fig. 2
3.
Fix the base support on the machine with four Ø4x9 screws, as shown in Fig. 3
4.
Install the small cover on the whole machine through the support, as shown in Fig. 4
5.
Install the base on the support, and fix the base on the support with M6x14mm combination screw
with shrapnel, as shown in Fig. 5 and Fig. 6
Fig. 1
Fig. 2
Ø4x9 screws
Fig. 3
Fig. 4
M6x14mm combination screws
Fig. 5
Fig. 6
Note: Some of the contents in this manual may differ slightly from the final product, and the later shall be
referred to.
Содержание
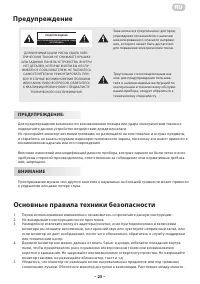
- 23 ВНИМАНИЕ; Предупреждение
- 24 Инструкция по эксплуатации; Комплектация и дополнительное оборудование
- 25 Установка подставки
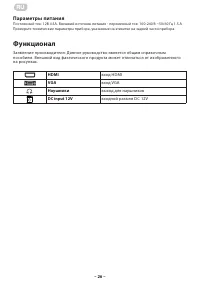
- 26 Параметры питания; Функционал
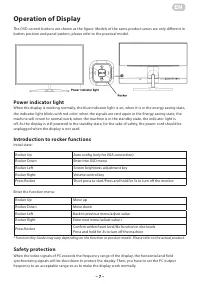
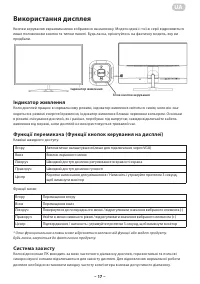
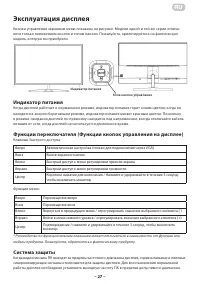
- 27 Эксплуатация дисплея; Индикатор питания
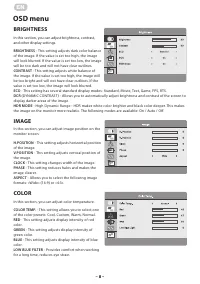
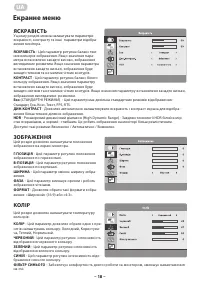
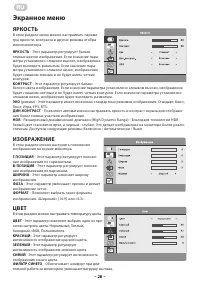
- 28 Экранное меню; ЯРКОСТЬ
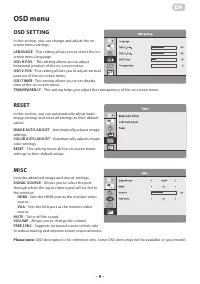
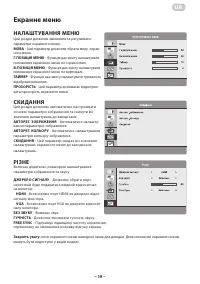
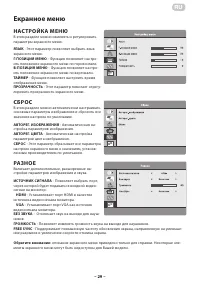
- 29 Екранное меню; НАС ТРОЙКА МЕНЮ
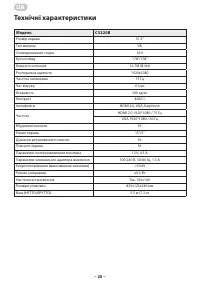
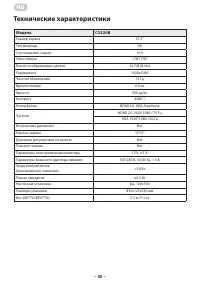
- 30 Технические характеристики
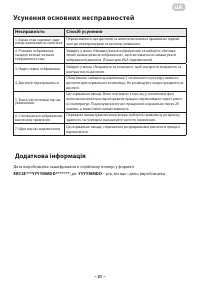
- 31 Неисправность
- 34 УСЛОВИЯ ГАРАНТИЙНОГО ОБСЛУЖИВАНИЯ; Уважаемый Покупатель! Поздравляем Вас с приобретением изде-; Подпись покупателя
- 35 Warranty card/Гарантійний талон/Гарантийный талон
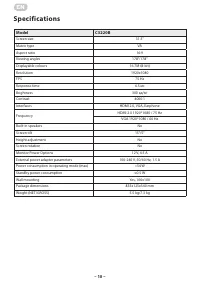
Характеристики

Остались вопросы?Не нашли свой ответ в руководстве или возникли другие проблемы? Задайте свой вопрос в форме ниже с подробным описанием вашей ситуации, чтобы другие люди и специалисты смогли дать на него ответ. Если вы знаете как решить проблему другого человека, пожалуйста, подскажите ему :)
