Метеостанции VITEK VT-6400 - инструкция пользователя по применению, эксплуатации и установке на русском языке. Мы надеемся, она поможет вам решить возникшие у вас вопросы при эксплуатации техники.
Если остались вопросы, задайте их в комментариях после инструкции.
"Загружаем инструкцию", означает, что нужно подождать пока файл загрузится и можно будет его читать онлайн. Некоторые инструкции очень большие и время их появления зависит от вашей скорости интернета.


ENGLISH
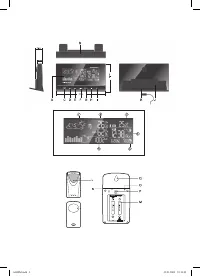
Wireless Weather Station VT-6400
Delivery set includes basic block (weather sta-
tion) equipped with built-in barometer, one
remote humidity and temperature sensor, and
AC-power adapter. Basic block is able com-
municating with tree humidity and temperature
sensors installed at different locations. Data
transmission from remote sensor is conducted
at frequency 4 MHz. Wireless weather sta-
tion can save minimal and maximal temperature
and humidity indications and estimate level of
comfort.
Weather station can display animated weather
forecast for the next 12-24 hours, temperature
and humidity inside room or at location of re-
mote sensor, current time, calendar, sunrise/
sunset time.
Basic block is equipped with daily and one-time
alarm clock with signal repetition function, and
also special sound signals in case of overrun-
ning preset temperature limits.
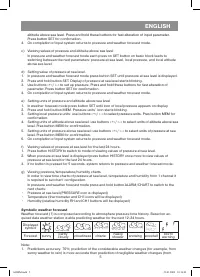
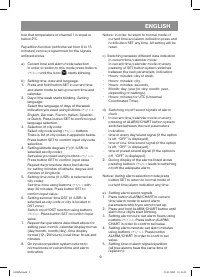
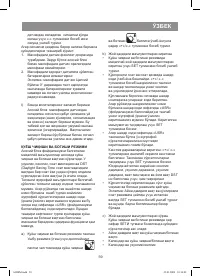
Description
Basic block
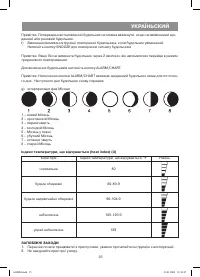
A. LCD
Displays symbol weather forecast (1),
temperature and humidity values inside
room or at any place of remote sensor
location (2), index of sensed temperature
(heat index) (), current time (4), sunrise/
sunset time (5), and pressure (6).
В. Signal Repeat/Backlight Switching On
Button (SNOOZE/LIGHT)
This button is used for switching on function
of signal repetition and turning on LCD
backlight.
С. Sound Signal/Chart Button (ALARM/
CHART)
This button is used for setting time of alarm
clock or extreme temperature values.
Press and hold this button in order to set/
switch off sound signal.
In order to display temperature or humidity
charts press and hold this button in weather
and atmosphere pressure forecast mode.
D. Settings Button (SET)
This button is used for selected parameters
confirmation.
Return to current mode.
Press and hold this button in order to
change temperature units (
º
С/
º
F), mind that
an adequate mode should be selected.
E. Memory Button (MEM)
Viewing registered temperature and
humidity values, and lunar calendar data.
F. Button for viewing changes (HISTORY)
Review of sea level atmosphere pressure
trend throughout last 24 hours.
G. Channel switching over button (CHANNEL)
This button is used for switching between
receive channels for data from different
remote sensors.
For cyclic mapping of temperature and
humidity data in different channels press
and hold this button until icon (
) appears.
H. Button “-“
This button is used for switching between
different modes clockwise.
Decreases input parameter, for fast
alteration of input parameter press and hold
this button.
Activates remote sensors data receive.
I.
Button “+”
This button is used for switching between
different modes anticlockwise.
Increases input parameter, for fast alteration
of input parameter press and hold this
button.
J. Batteries Compartment
Compartment is intended for installation of
4 batteries of UM- or АА type.
K. AC-Adapter jack
This jack is used for connection of AC-
power adapter supplying voltage 7,5В, and
current 200мА.
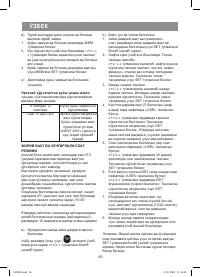
Temperature and humidity remote sensor
L. LED on Front Panel
When device is transferring data, LED blinks
one time.
When battery replacement is required, LED
blinks two times.
M. Battery Compartment
Compartment is intended for 2 batteries of
UM- or АА type.
N. Reset Button (RESET)
This button is used to reset sensor after
changing channel number.
O. Button for switching between Celsius/
Fahrenheit scale
P. Channels switch (CHANNEL)
This button is used for selecting channel of
data transfer before batteries installation.
Q. Hole for Mounting Device to Wall
6400IM.indd 3
23.01.2009 10:14:42
Содержание
- 14 РУССКИЙ; соответствующий режим.
- 15 ПЕРЕД НАЧАЛОМ РАБОТЫ; Используя гнездо; Замена батареек; b) Установка параметров давления при на-
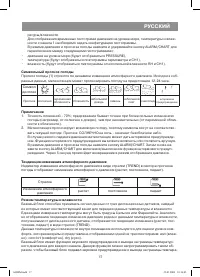
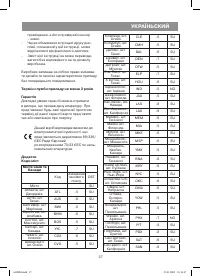
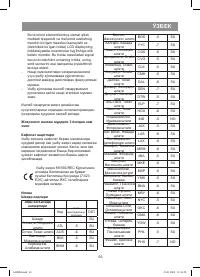
- 16 Для подтверждения выбранных
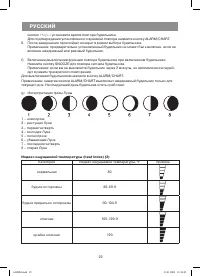
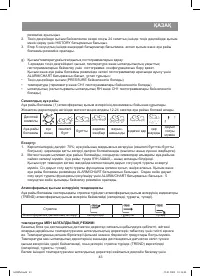
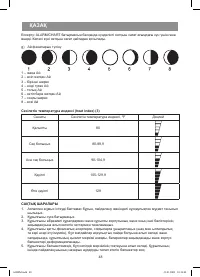
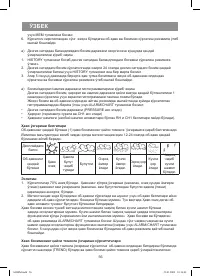
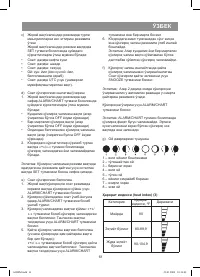
- 17 Символьный прогноз погоды; Символ; Примечание
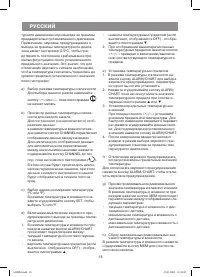
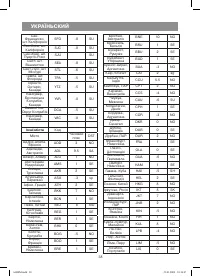
- 18 кнопку
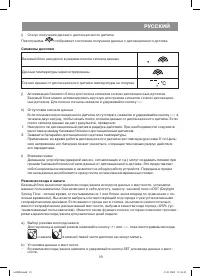
- 19 Символы дисплея; расстояние между базовым блоком и дистанционным датчиком.; Режим восхода и заката; заката
- 20 . Нажмите кнопку MEM или SET для возврата в режим восхода/заката.; Режим текущего времени и будильника; a) Выбор режима текущего времени и будильника
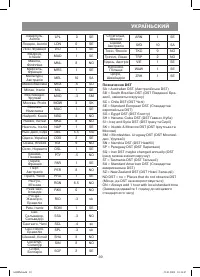
- 22 Нажмите кнопку SNOOZE для повтора сигнала будильника.
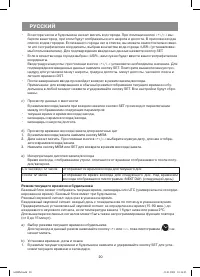
- 23 МЕРЫ ПРЕДОСТОРОЖНОСТИ
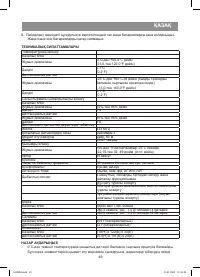
- 24 - Содержание этой инструкции не может; Срок службы прибора не менее 3-х лет
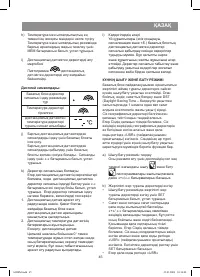
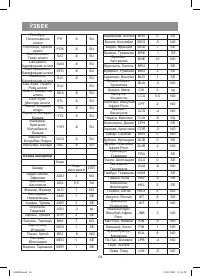
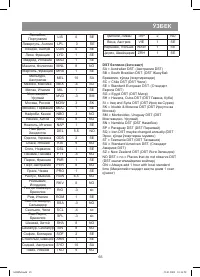
- 26 Обозначения DST
- 66 RUS; жасалғанын білдіреді.; UZ


