Метеостанции RST 02929 (Meteoscan Pro 929) - инструкция пользователя по применению, эксплуатации и установке на русском языке. Мы надеемся, она поможет вам решить возникшие у вас вопросы при эксплуатации техники.
Если остались вопросы, задайте их в комментариях после инструкции.
"Загружаем инструкцию", означает, что нужно подождать пока файл загрузится и можно будет его читать онлайн. Некоторые инструкции очень большие и время их появления зависит от вашей скорости интернета.


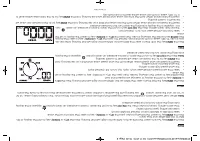


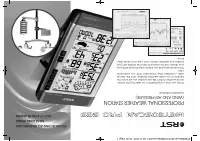

RST 02929 PRO 4
Set up Guide
Before
placing and installing all components of the weather station at ther
e final destination, please set up the weather stati
on with all parts
being nearby for testing the correct function.
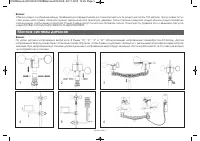
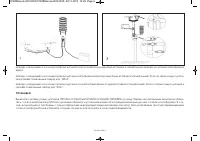
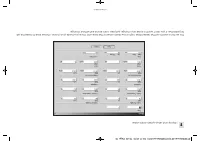
Setting up the base station and transmitter
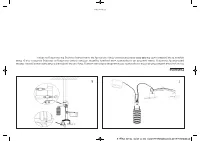
Insert two pieces of LR6 (AA size) batteries into the tr
ansmitter , the LED located in the middle fr
ont case of transmitter will
be turned on for 4 sec-
onds, then it will be off and start to work normally
. The transmitter will make a data tr
ansmission and then start ra
dio contro
lled time re
ception ro
u-
tine. If time signal can be detected correctly
, the LED will start to flash 5 times, and then the LED will be on for 20s, indicating time signal has been
found correctly
. When time signal is bad and re
ception is not possible, the transmitter will terminate r
adio contr
olled time re
ception within one
minute and resume normal mode. When ther
e is a data transmission happened, the LED will be on for 20ms. During r
adio contr
olled time r
ecep-
tion period, there is no tr
ansmission and normal transmission will only r
esume after time re
ception ro
utine is complete. The longest time for r
adio
controlled time r
eception is 5 minutes.
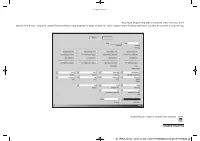
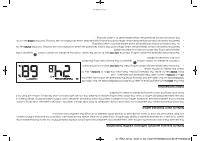
After inserting the batteries into the W eather Station, all L
CD segments will be turned on for a fe
w seconds, all possible display segments ar
e
turned on for checking.
After this, the weather station will make initial measur
ement and start to re
gister the transmitter (the r
adio r
eception icon w
ill be turned on). Do
not press any ke
y before outdoor sensor data r
eceiv
ed, otherwise the outdoor sensor learning mode will be terminated. When outdoor tr
ansmit-
ter has been register
ed, the base station will automatically switch to the normal display mode from which all further settings
can be performed
by the user .
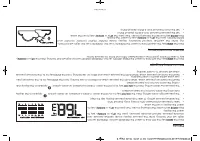
If no RCC signal is detected in the initial setup, the transmitter will try once ev
ery hour to get an RCC signal until a signal is r
eceiv
ed. Once the
transmitter r
eceiv
es the RCC signal it will transmit the signal to the monitor
. On the monitor the RCC icon will be display
ed, if the monitor doesn’t
re
ceive the RCC signal or loses the signal the RCC icon will not be display
.
Register transmitter
If no outdoor weather data is display
ed or the signal to the sensors is lost during setting up, mounting, changing of batteries to the sensor or plug-
ging or unplugging cables, simply press and hold the
DOWN/-
key for 4 seconds and a short beep will sound to synchr
onize the base station to
sensors. Without being synchronized, w
eather data will not be re
ceived.
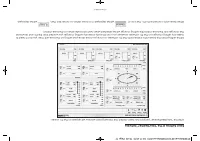
Note:
The best condition for re
ception is at night, between midnight and 6:00am – when ther
e is less atmospheric interference.
Note:
Commonly the ra
dio communication between r
eceiv
er and transmitter in the open field can r
each a distance of up to 330 feet pro
viding
that there ar
e no interfering obstacles such as buildings, trees, v
ehicles, high vo
ltage lines, etc.
Radio interferences such as PC scr
eens, ra
dios or TV sets can, in bad cases, entirely cut off r
adio communication. Please take
this into consider-
ation when choosing standing or mounting locations.
01929Manual-2010:01929Manual-2010 08.11.2010 15:28 Page 4
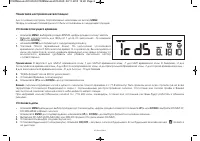
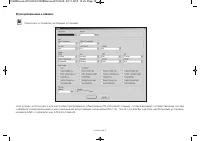
Содержание
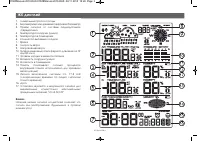
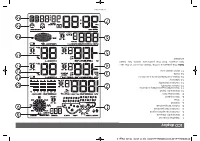
- 2 Основные термины
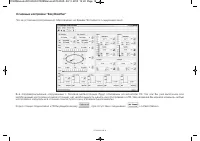
- 3 ЖК дисплей
- 4 Руководство по установке; Установка базовой станции и передатчика
- 5 Монтаж системы датчиков
- 6 Установка
- 7 Руководство по настройке; Программирование
- 8 Пошаговая настройка метеостанции:; Установка текущего времени; Установка даты
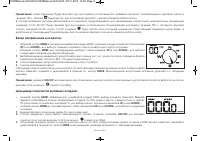
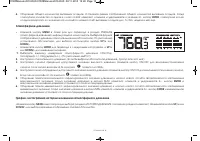
- 11 Температура воздуха в помещении
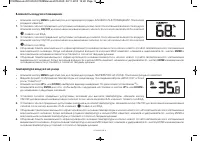
- 12 Влажность воздуха в помещении; Температура воздуха на улице
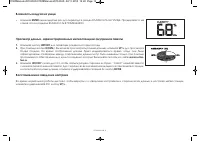
- 13 Влажность воздуха на улице; Восстановление заводских настроек
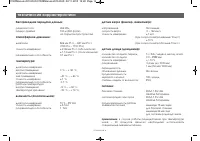
- 14 технические харрактеристики
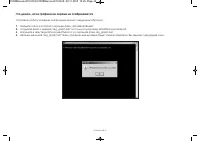
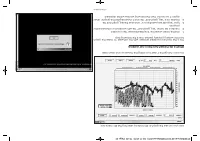
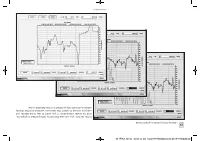
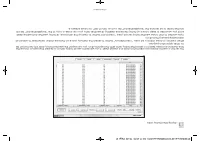
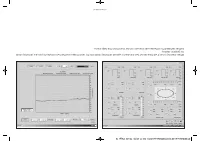
- 15 Подключение ПК
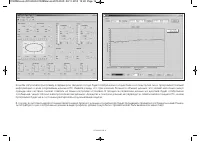
- 17 Руководство по установке EasyWeather на ПК
- 18 Основные настройки “EasyWeather”
- 19 Функциональные клавиши:
- 25 Что делать, если графики на экране не отображаются
- 27 Правовая информация


