Материнские платы MSI A520 - инструкция пользователя по применению, эксплуатации и установке на русском языке. Мы надеемся, она поможет вам решить возникшие у вас вопросы при эксплуатации техники.
Если остались вопросы, задайте их в комментариях после инструкции.
"Загружаем инструкцию", означает, что нужно подождать пока файл загрузится и можно будет его читать онлайн. Некоторые инструкции очень большие и время их появления зависит от вашей скорости интернета.


37
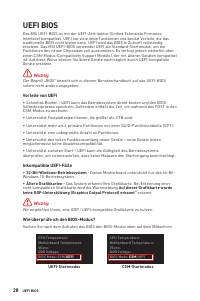
UEFI BIOS
▶
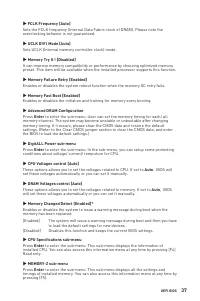
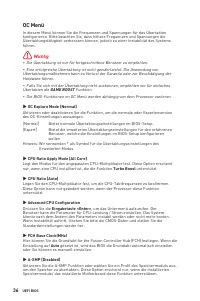
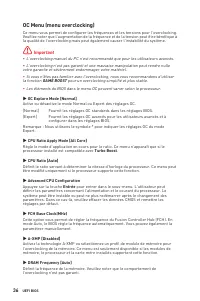
FCLK Frequency [Auto]
Sets the FCLK frequency (Internal Data Fabric clock of DRAM). Please note the
overclocking behavior is not guaranteed.
▶
UCLK DIV1 Mode [Auto]
Sets UCLK (Internal memory controller clock) mode.
▶
Memory Try It ! [Disabled]
It can improve memory compatibility or performance by choosing optimized memory
preset. This item will be available when the installed processor supports this function.
▶
Memory Failure Retry [Enabled]
Enables or disables the system reboot function when the memory OC retry fails.
▶
Memory Fast Boot
[Enabled]
Enables or disables the initiation and training for memory every booting.
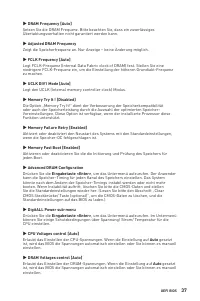
▶ Advanced DRAM Configuration
Press
Enter
to enter the sub-menu. User can set the memory timing for each/ all
memory channel. The system may become unstable or unbootable after changing
memory timing. If it occurs, please clear the CMOS data and restore the default
settings. (Refer to the Clear CMOS jumper section to clear the CMOS data, and enter
the BIOS to load the default settings.)
▶
DigitALL Power sub-menu
Press
Enter
to enter the sub-menu. In the sub-menu, you can setup some protecting
conditions about voltage/ current/ temputure for CPU.
▶
CPU Voltages control
[Auto]
These options allows you to set the voltages related to CPU. If set to
Auto
, BIOS will
set these voltages automatically or you can set it manually.
▶
DRAM Voltages control [Auto]
These options allows you to set the voltages related to memory. If set to
Auto
, BIOS
will set these voltages automatically or you can set it manually.
▶
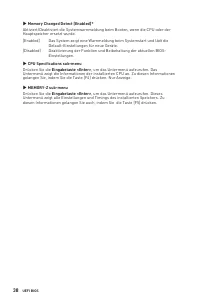
Memory Changed Detect [Enabled]*
Enables or disables the system to issue a warning message during boot when the
memory has been replaced.
[Enabled]
The system will issue a warning message during boot and then you have
to load the default settings for new devices.
[Disabled]
Disables this function and keeps the current BIOS settings.
▶ CPU Specifications sub-menu
Press
Enter
to enter the sub-menu. This sub-menu displays the information of
installed CPU. You can also access this information menu at any time by pressing [F4].
Read only.
▶
MEMORY-Z sub-menu
Press
Enter
to enter the sub-menu. This sub-menu displays all the settings and
timings of installed memory. You can also access this information menu at any time by
pressing [F5].
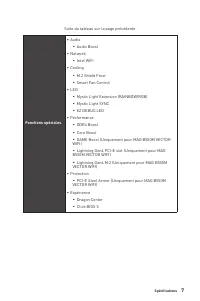
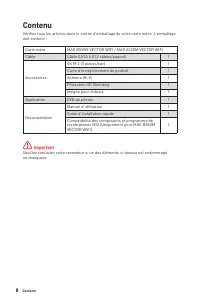
Содержание
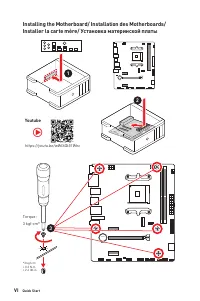
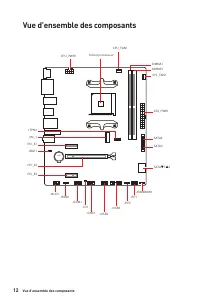
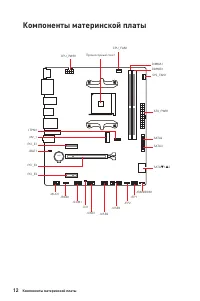
- 6 Installing the Motherboard/ Installation des Motherboards/
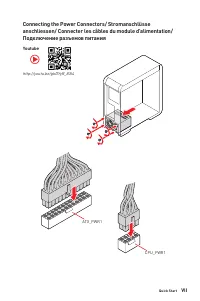
- 7 VII; Connecting the Power Connectors/ Stromanschlüsse
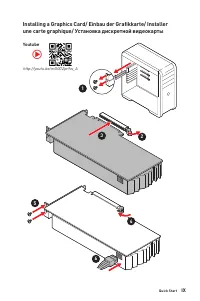
- 9 IX; Installing a Graphics Card/ Einbau der Grafikkarte/ Installer
- 127 Содержание
- 128 Безопасное использование продукции
- 129 Технические характеристики
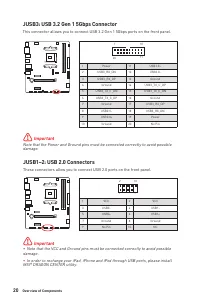
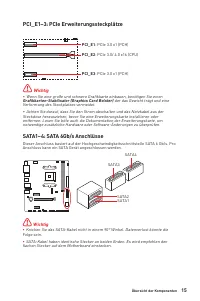
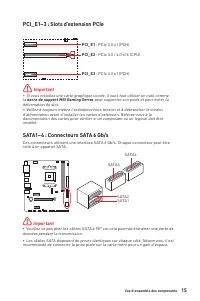
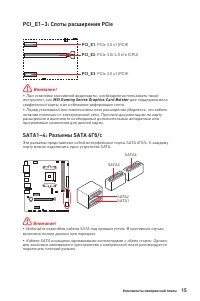
- 130 Подключение; RAID; USB; LAN
- 132 Center
- 133 Эксклюзивные
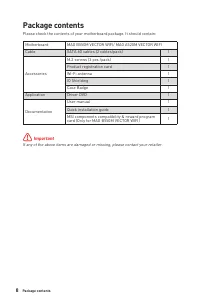
- 134 Комплект поставки
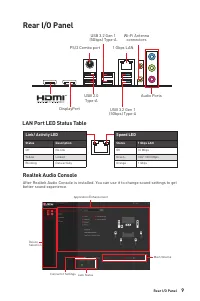
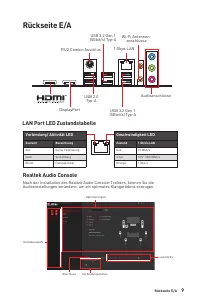
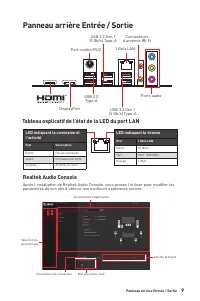
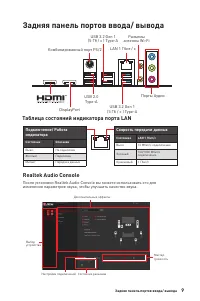
- 135 Задняя панель портов ввода/ вывода; индикатора; Таблица состояний индикатора порта LAN
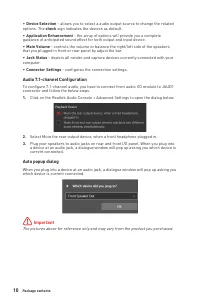
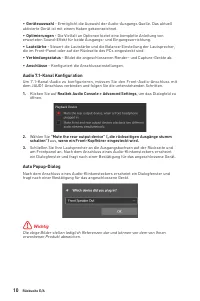
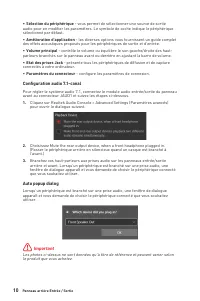
- 136 ∙ Выбор устройства; Автоматическое всплывающее диалоговое окно
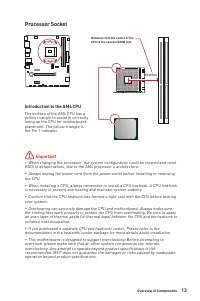
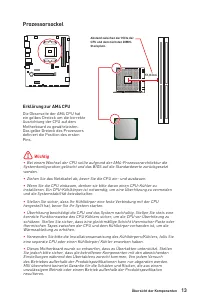
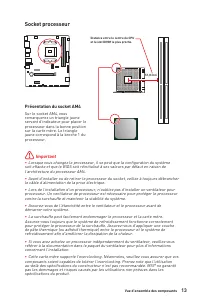
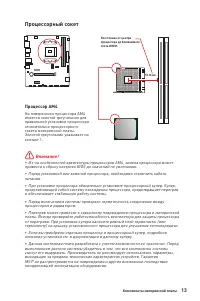
- 139 Процессор AM4
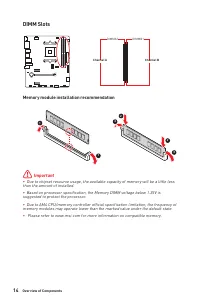
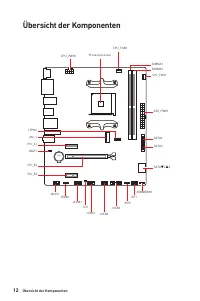
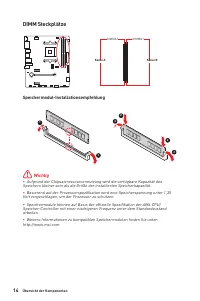
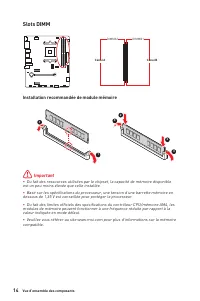
- 140 Слоты DIMM; Рекомендации по установке модулей памяти
- 141 MSI Gaming Series Graphics Card Bolster
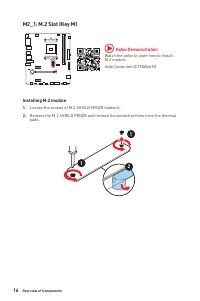
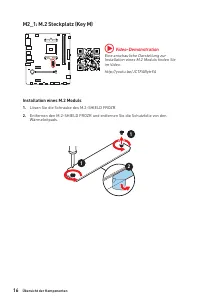
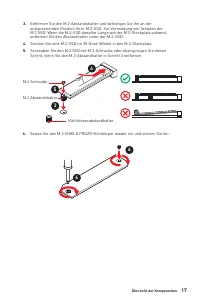
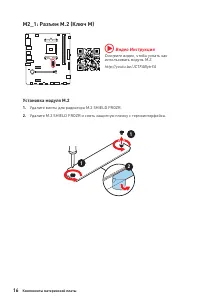
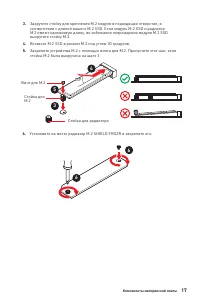
- 142 Установка модуля M.2; Видео Инструкция
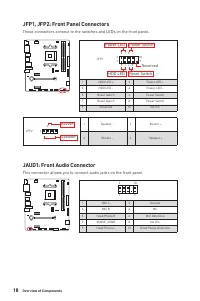
- 144 JAUD1: Разъем аудио передней панели
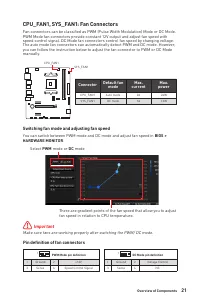
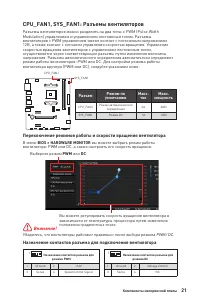
- 147 Разъем; Переключение режимов работы и скорости вращения вентилятора; Назначение контактов разъема для подключения вентилятора
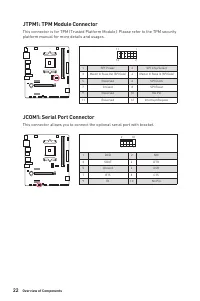
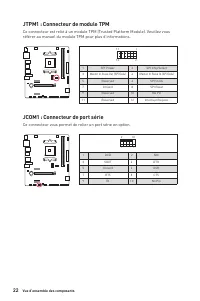
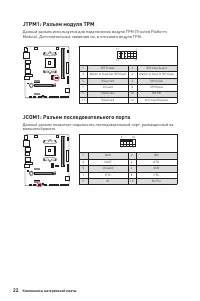
- 148 JCOM1: Разъем последовательного порта
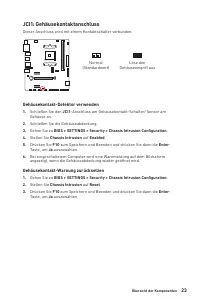
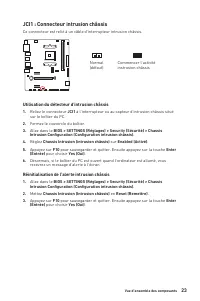
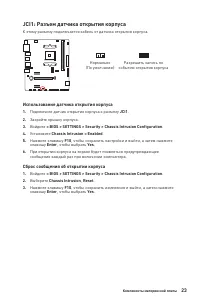
- 149 JCI1: Разъем датчика открытия корпуса; Использование датчика открытия корпуса
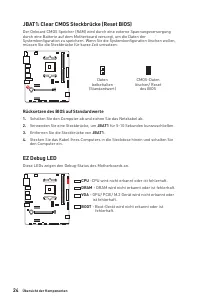
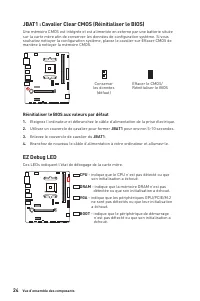
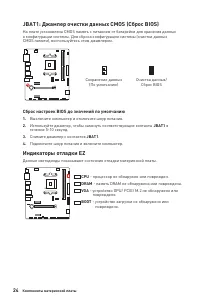
- 150 Сброс настроек BIOS до значений по умолчанию; Индикаторы отладки EZ
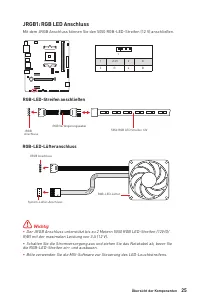
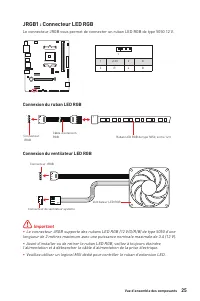
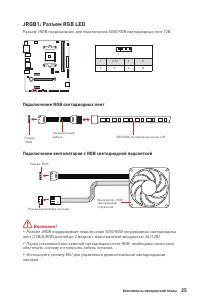
- 151 JRGB1: Разъем RGB LED; Подключение RGB светодиодных лент
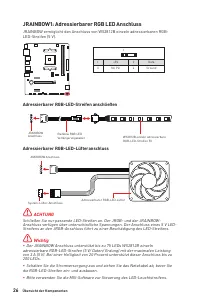
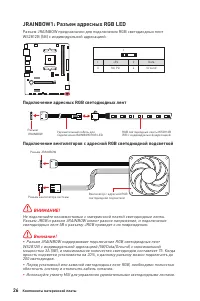
- 152 JRAINBOW1: Разъем адресных RGB LED; Подключение адресных RGB светодиодных лент
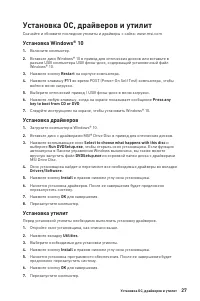
- 153 Установка ОС, драйверов и утилит; Установка Windows® 10
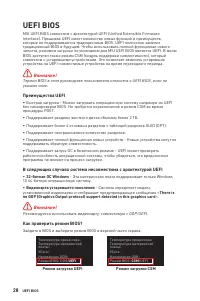
- 154 Преимущества UEFI; ∙ 32-битная ОС Windows; Как проверить режим BIOS?; Режим загрузки UEFI
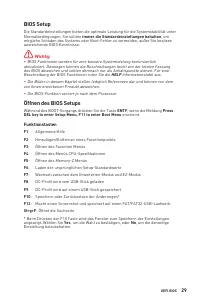
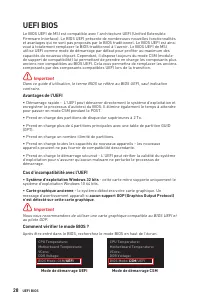
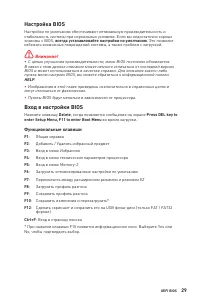
- 155 Настройка BIOS; всегда устанавливайте настройки по умолчанию; Вход в настройки BIOS; Функциональные клавиши
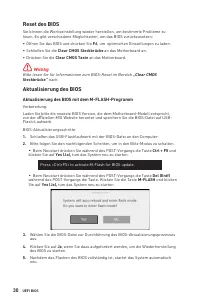
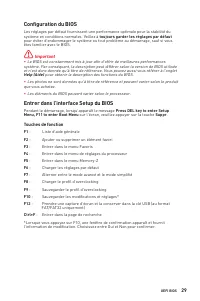
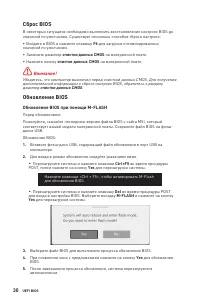
- 156 Сброс BIOS; очистки данных CMOS; Обновление BIOS; Обновление BIOS при помощи M-FLASH; Yes
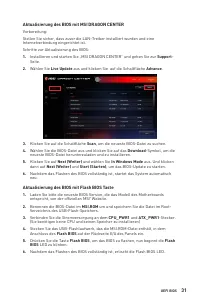
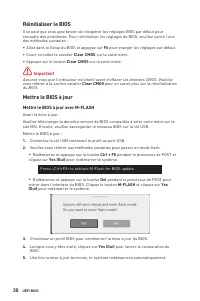
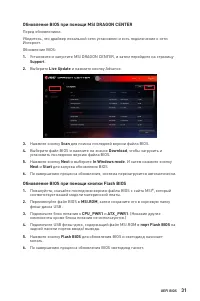
- 157 Обновление BIOS при помощи MSI DRAGON CENTER; порт Flash BIOS
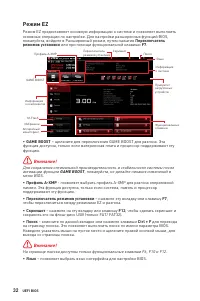
- 158 Режим EZ
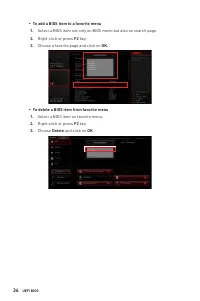
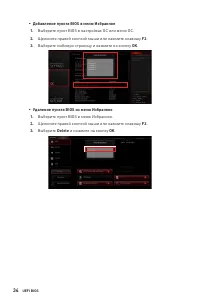
- 160 ▪ Добавление пункта BIOS в меню Избранное
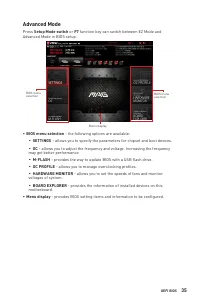
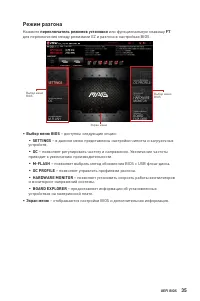
- 161 Режим разгона; переключатель режимов установки; ∙ Выбор меню BIOS
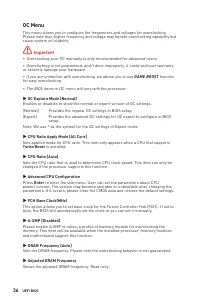
- 162 Меню OC
- 164 Enter
- 166 ii
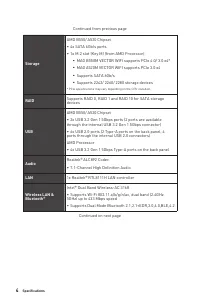
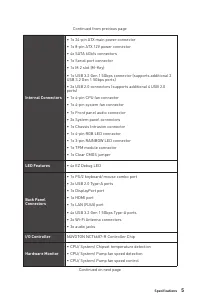
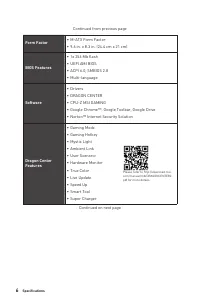
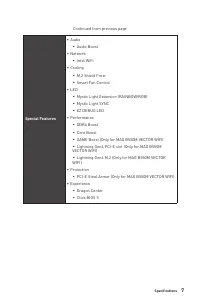
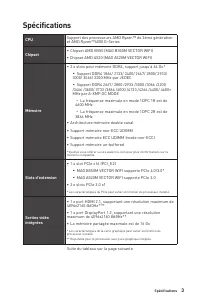
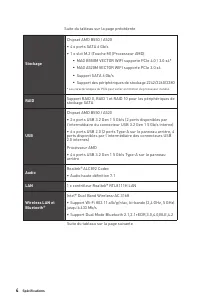
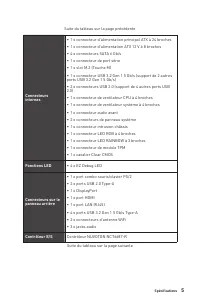
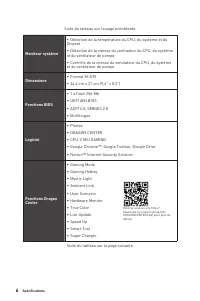
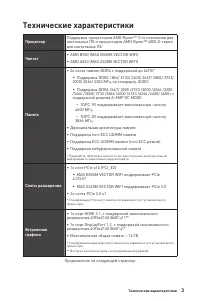
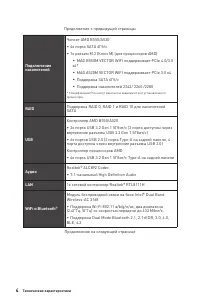
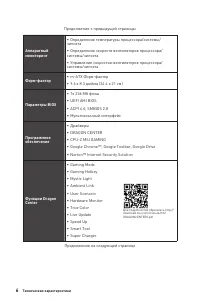
Характеристики

Остались вопросы?Не нашли свой ответ в руководстве или возникли другие проблемы? Задайте свой вопрос в форме ниже с подробным описанием вашей ситуации, чтобы другие люди и специалисты смогли дать на него ответ. Если вы знаете как решить проблему другого человека, пожалуйста, подскажите ему :)


