Материнские платы GIGABYTE GA 8I915G Pro rev 1 x - инструкция пользователя по применению, эксплуатации и установке на русском языке. Мы надеемся, она поможет вам решить возникшие у вас вопросы при эксплуатации техники.
Если остались вопросы, задайте их в комментариях после инструкции.
"Загружаем инструкцию", означает, что нужно подождать пока файл загрузится и можно будет его читать онлайн. Некоторые инструкции очень большие и время их появления зависит от вашей скорости интернета.


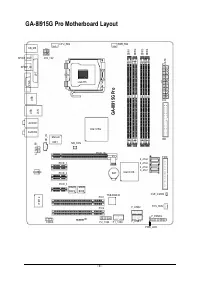


GA-8I915G Pro M otherboard
- 14 -
English
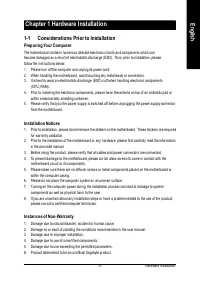
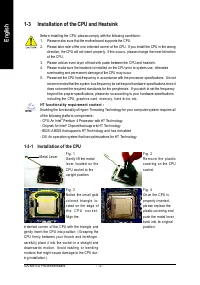
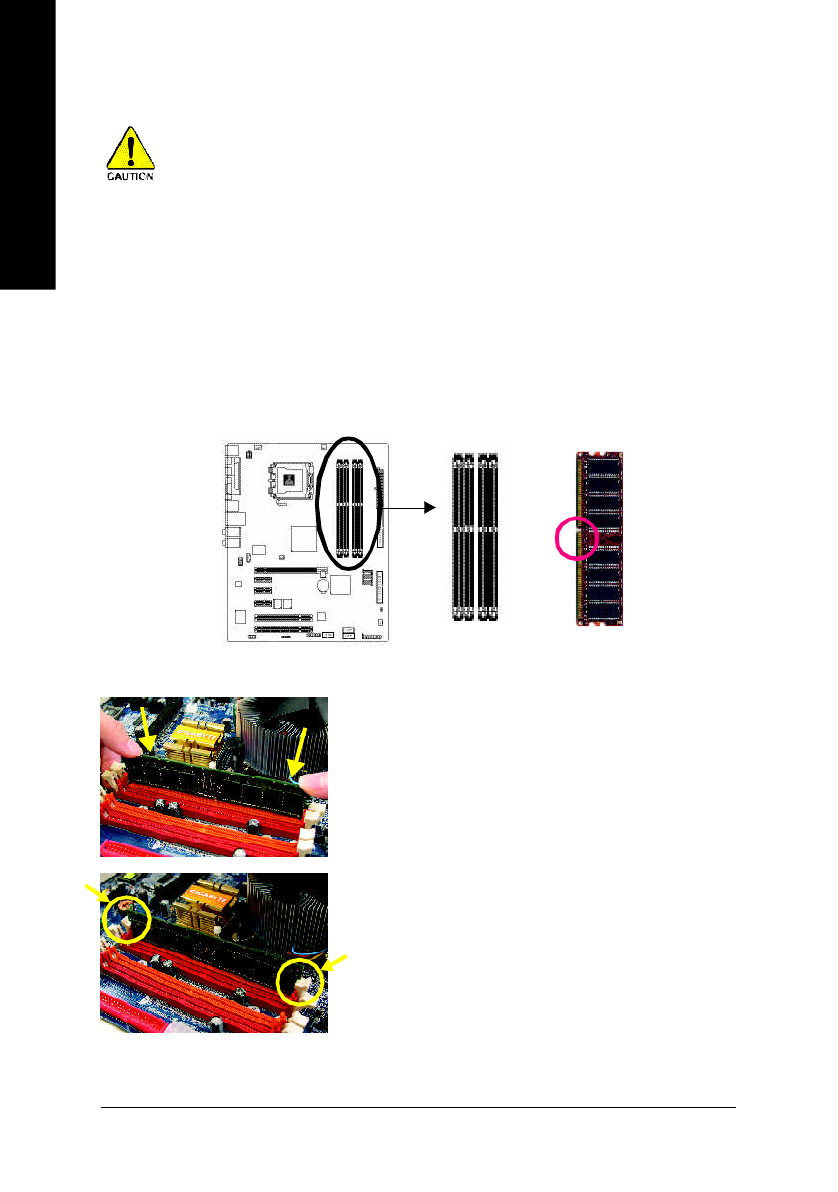
B efore ins tal li ng the memor y modules , pleas e c ompl y with the fol l owing c ondi ti ons :
1 . P lease mak e s ure that the memor y used is suppor ted by the mother boar d. It i s rec ommended that
me mo r y o f s i mi l a r c a pa c i ty , s pe c i fi c a ti on s an d br an d be u s e d.
2 . B e fo r e i ns ta l l i n g or r em ov i ng m em or y mo du l e s , p l e as e m ak e s u r e t ha t th e c o mp ut er
p ow er i s s wi tc he d o ff t o p r e v e nt ha r d wa r e da ma ge .
3 . M em or y mo d ul es h av e a f oo l p r oo f i n s e r ti on d es i gn . A m e mo r y m od u l e c an b e
i ns tal l ed i n on l y on e di r e c ti on . If y ou ar e una bl e to i ns er t the modul e, pl eas e s wi tc h the
di r e c t i o n.
Notch
DDR
1-4
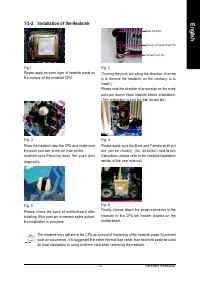
Installation of Memory
The m otherboard has 4 dua l inline m em ory m odu le (DIM M ) sockets. The BIOS will autom a tically de tects
m em ory type and size. To install the m em ory m odule, just push it vertically into the DIM M socket. The DIM M
m odule can only fit in one direction due to th e notch. M em ory size can vary between sockets.
Fig.1
The DIM M socket has a notch, so the DIM M m em ory m odule can
only fit in one direction. Insert the DIM M m em ory m odule vertically
into th e DIM M socket. Then push it down.
Fig.2
Clo se the plastic clip at both e dges o f the DIM M sockets to lock
the DIM M m odule.
Reverse the installation steps when you wish to rem ove the DIM M
m odule.


