
Материнские платы ASRock H610M-ITX/ac - инструкция пользователя по применению, эксплуатации и установке на русском языке. Мы надеемся, она поможет вам решить возникшие у вас вопросы при эксплуатации техники.
Если остались вопросы, задайте их в комментариях после инструкции.
"Загружаем инструкцию", означает, что нужно подождать пока файл загрузится и можно будет его читать онлайн. Некоторые инструкции очень большие и время их появления зависит от вашей скорости интернета.


21
English
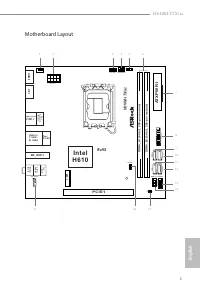
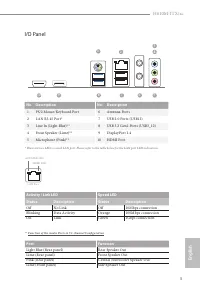
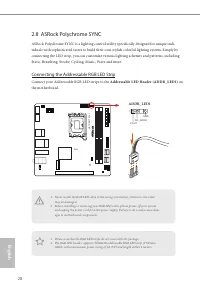
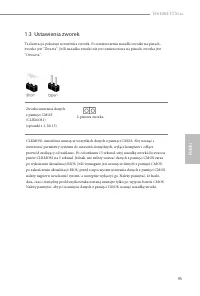
H610M-ITX/ac
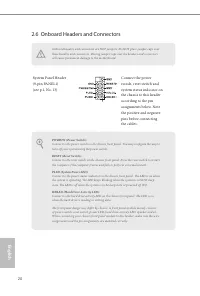
J_SENS E
OUT2_L
1
MIC_RET
PRESENCE#
GND
OUT2_R
MIC2_R
MIC2_L
OUT_RET
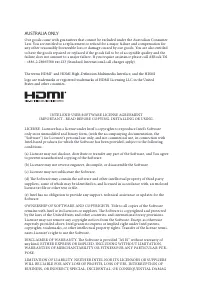
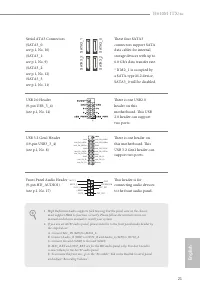
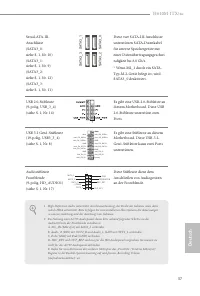
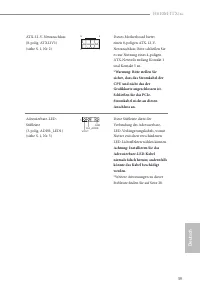
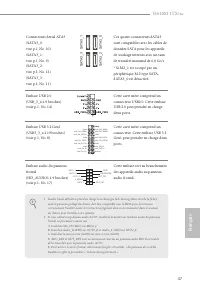
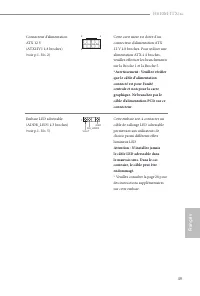
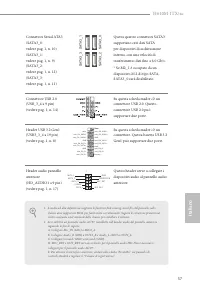
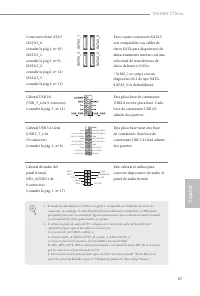
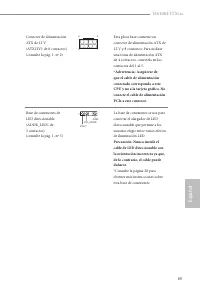
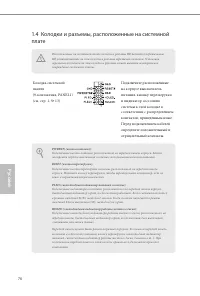
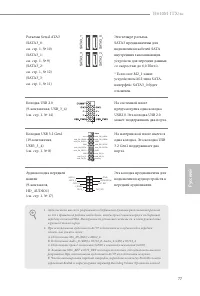
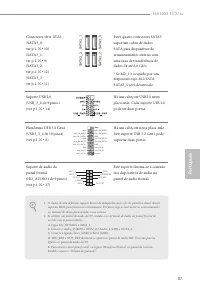
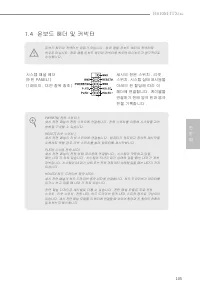
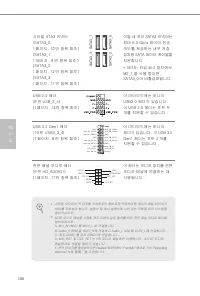
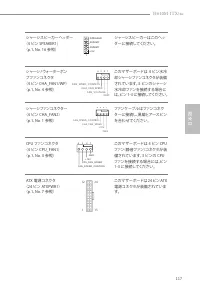
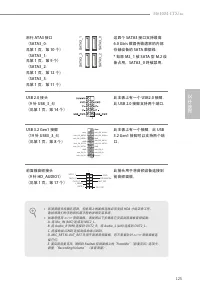
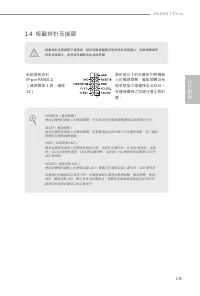
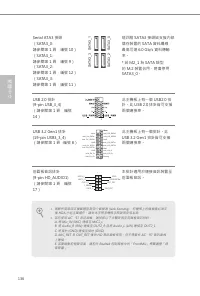
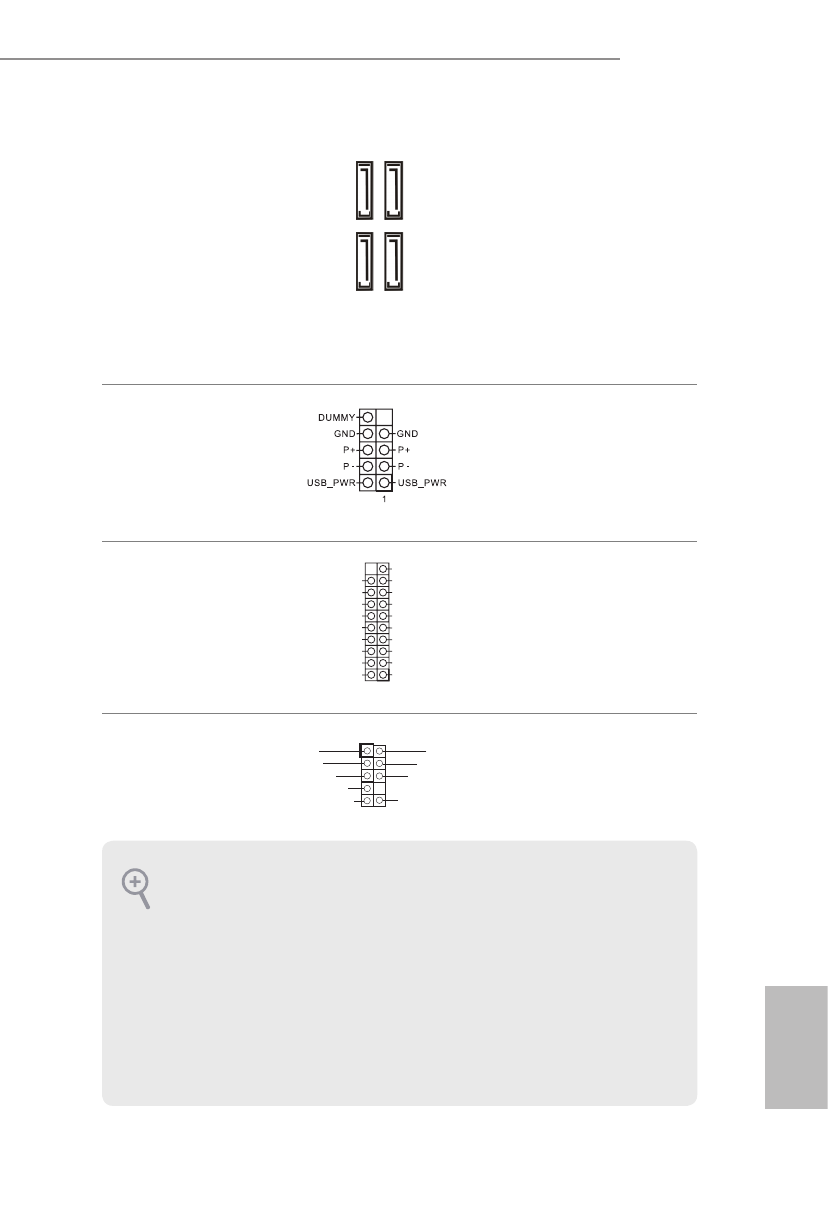
Serial ATA3 Connectors
(SATA3_0:
see p.1, No. 10)
(SATA3_1:
see p.1, No. 9)
(SATA3_2:
see p.1, No. 12)
(SATA3_3:
see p.1, No. 11)
These four SATA3
connectors support SATA
data cables for internal
storage devices with up to
6.0 Gb/s data transfer rate.
* If M2_1 is occupied by
a SATA-type M.2 device,
SATA3_0 will be disabled.
USB 2.0 Header
(9-pin USB_3_4)
(see p.1, No. 14)
There is one USB2.0
header on this
motherboard. This USB
2.0 header can support
two ports.
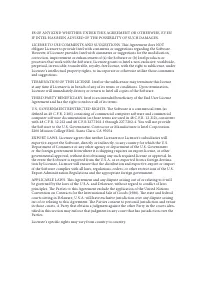
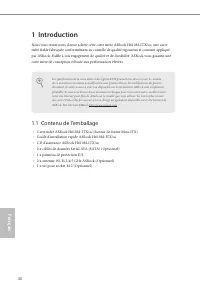
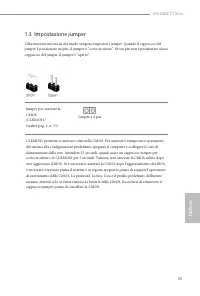
USB 3.2 Gen1 Header
(19-pin USB3_3_4)
(see p.1, No. 8)
There is one header on
this motherboard. This
USB 3.2 Gen1 header can
support two ports.
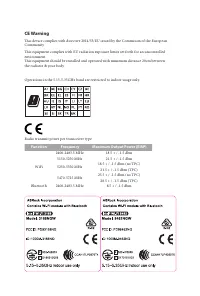
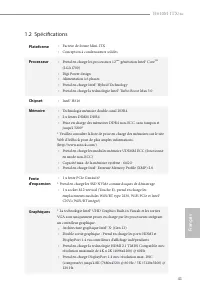
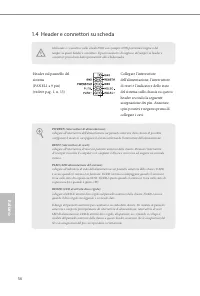
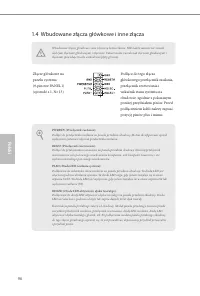
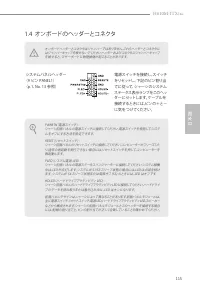
Front Panel Audio Header
(9-pin HD_AUDIO1)
(see p.1, No. 17)
This header is for
connecting audio devices
to the front audio panel.
SA
TA3_3
SA
TA3_2
SA
TA3_1
SA
TA3_0
1
I n t A _ P B _ D +
D u m m y
I n t A _ P B _ D -
G N D
I n t A _ P B _ S S T X +
G N D
I n t A _ P B _ S S T X -
I n t A _ P B _ S S R X +
I n t A _ P B _ S S R X -
V b u s
V b u s
V b u s
I n t A _ PA _ S S R X -
I n t A _ PA _ S S R X +
G N D
I n t A _ PA _ S S T X -
I n t A _ PA _ S S T X +
G N D
I n t A _ PA _ D -
I n t A _ PA _ D +
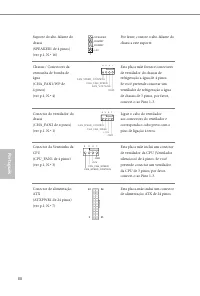
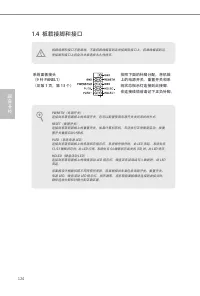
1. High Definition Audio supports Jack Sensing, but the panel wire on the chassis
must support HDA to function correctly. Please follow the instructions in our
manual and chassis manual to install your system.
2. If you use an AC’97 audio panel, please install it to the front panel audio header by
the steps below:
A. Connect Mic_IN (MIC) to MIC2_L.
B. Connect Audio_R (RIN) to OUT2_R and Audio_L (LIN) to OUT2_L.
C. Connect Ground (GND) to Ground (GND).
D. MIC_RET and OUT_RET are for the HD audio panel only. You don’t need to
connect them for the AC’97 audio panel.
E. To activate the front mic, go to the “FrontMic” Tab in the Realtek Control panel
and adjust “Recording Volume”.
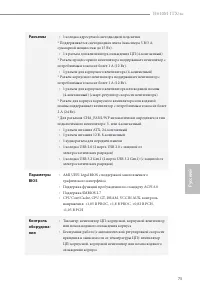
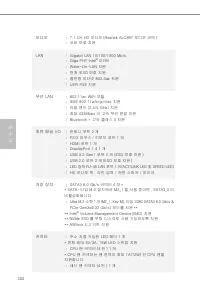
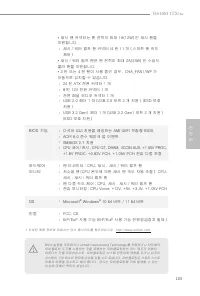
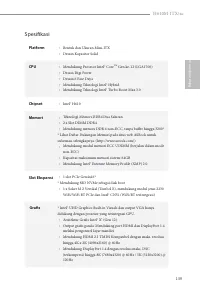
Характеристики

Остались вопросы?Не нашли свой ответ в руководстве или возникли другие проблемы? Задайте свой вопрос в форме ниже с подробным описанием вашей ситуации, чтобы другие люди и специалисты смогли дать на него ответ. Если вы знаете как решить проблему другого человека, пожалуйста, подскажите ему :)
