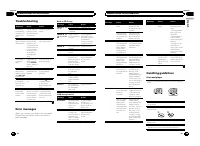
Магнитолы Pioneer DEH-2300UB (UBB) - инструкция пользователя по применению, эксплуатации и установке на русском языке. Мы надеемся, она поможет вам решить возникшие у вас вопросы при эксплуатации техники.
Если остались вопросы, задайте их в комментариях после инструкции.
"Загружаем инструкцию", означает, что нужно подождать пока файл загрузится и можно будет его читать онлайн. Некоторые инструкции очень большие и время их появления зависит от вашей скорости интернета.


2
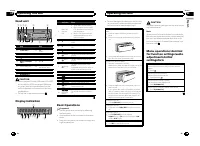
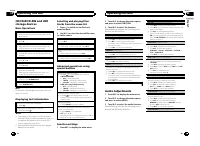
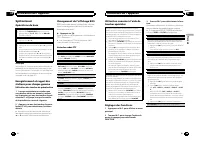
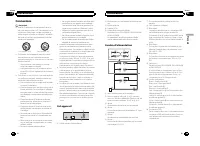
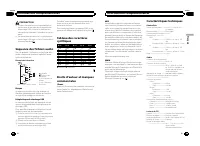
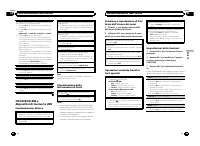
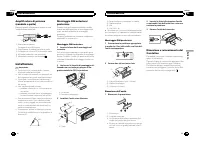
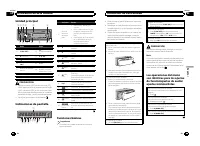
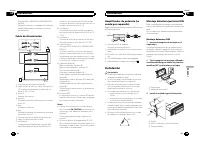
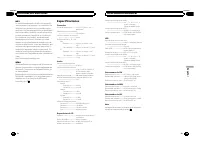
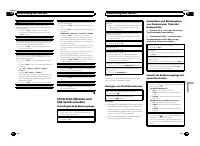
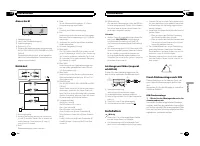
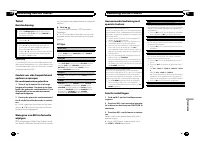
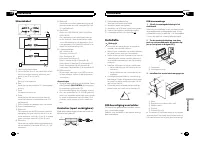
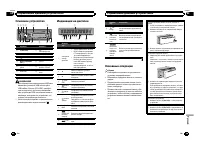
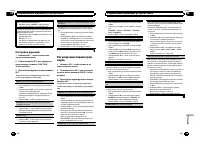
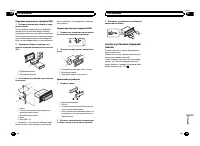
Power amp (sold separately)
3
Connect with RCA cable (sold separately)
4
To Rear output or subwoofer output
5
Rear speaker or subwoofer
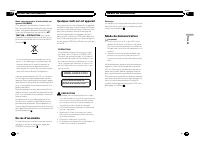
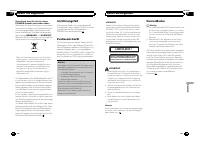
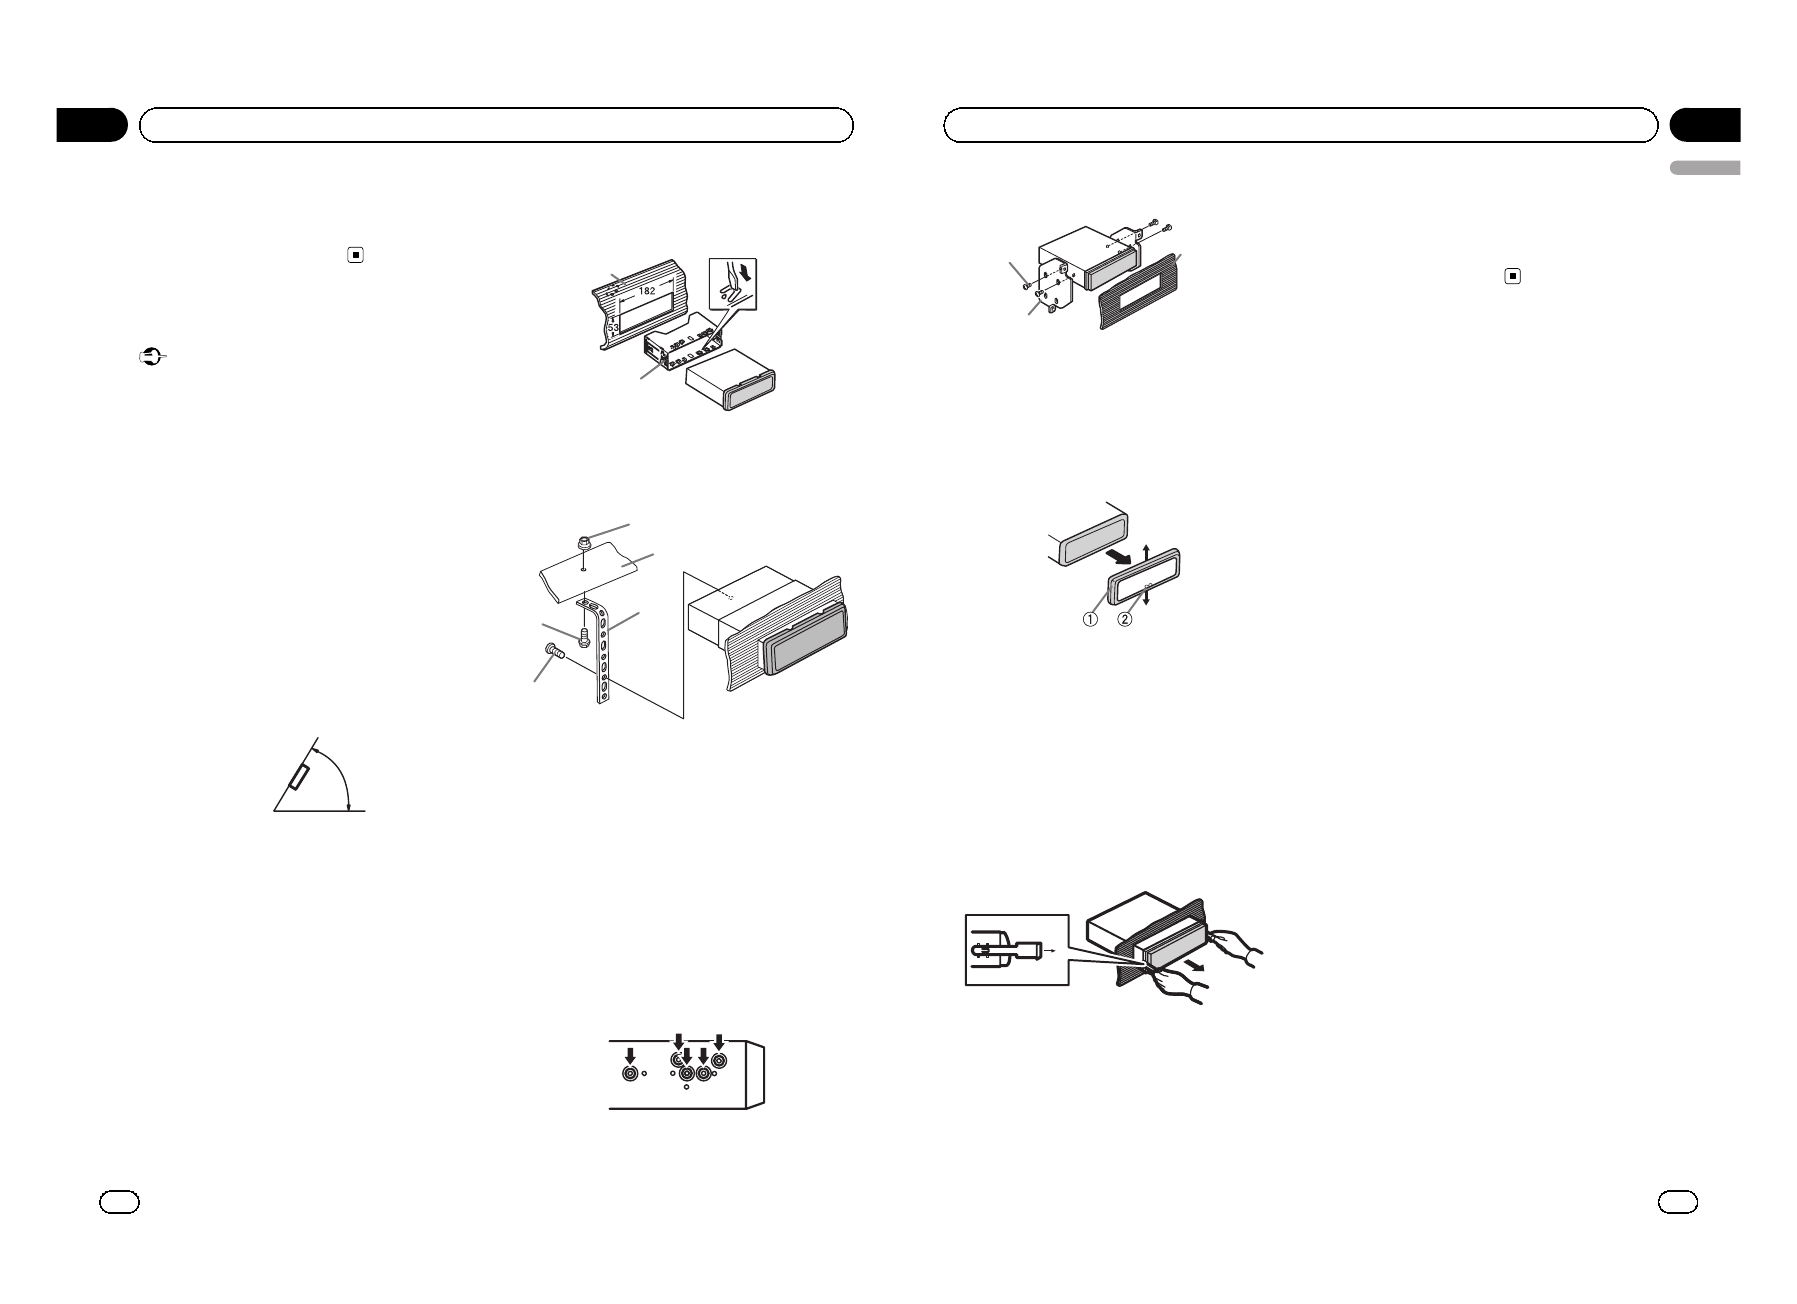
Installation
Important
!
Check all connections and systems before
final installation.
!
Do not use unauthorized parts as this may
cause malfunctions.
!
Consult your dealer if installation requires dril-
ling of holes or other modifications to the vehi-
cle.
!
Do not install this unit where:
—
it may interfere with operation of the vehi-
cle.
—
it may cause injury to a passenger as a re-
sult of a sudden stop.
!
The semiconductor laser will be damaged if it
overheats. Install this unit away from hot
places such as near the heater outlet.
!
Optimum performance is obtained when the
unit is installed at an angle of less than 60°.
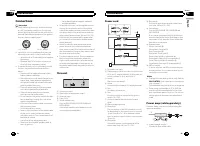
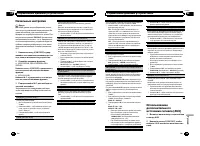
60°
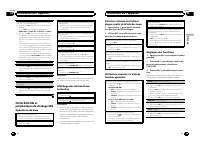
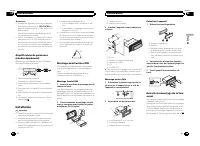
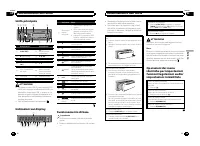
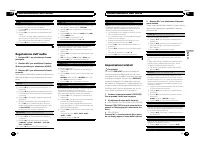
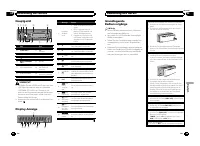
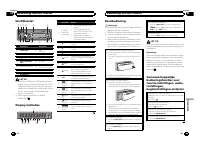
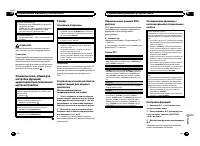
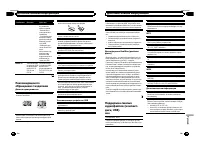
DIN front/rear mount
This unit can be properly installed using either
front-mount or rear-mount installation.
Use commercially available parts when instal-
ling.
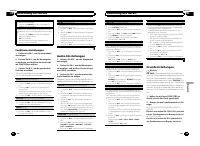
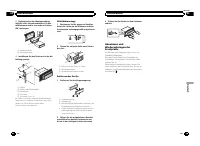
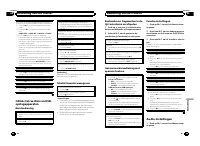
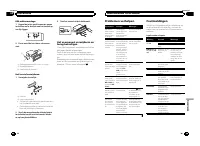
DIN Front-mount
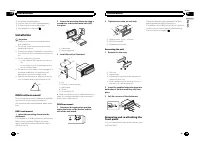
1
Insert the mounting sleeve into the
dashboard.
For installation in shallow spaces, use the sup-
plied mounting sleeve. If there is enough
space, use the mounting sleeve that came
with the vehicle.
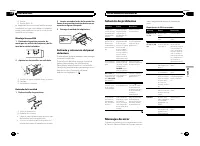
2
Secure the mounting sleeve by using a
screwdriver to bend the metal tabs (90°)
into place.
1
2
1
Dashboard
2
Mounting sleeve
3
Install the unit as illustrated.
1
2
3
4
5
1
Nut
2
Firewall or metal support
3
Metal strap
4
Screw
5
Screw (M4 × 8)
#
Make sure that the unit is installed securely in
place. An unstable installation may cause skip-
ping or other malfunctions.
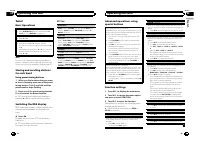
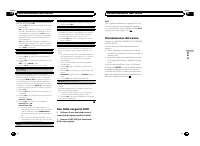
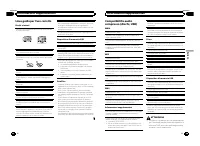
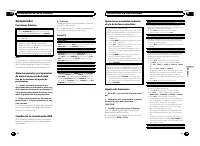
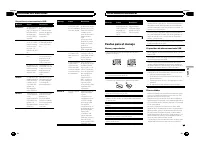
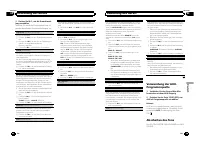
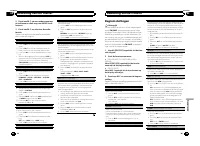
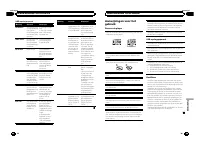
DIN Rear-mount
1
Determine the appropriate position
where the holes on the bracket and the
side of the unit match.
En
14
Section
03
Installation
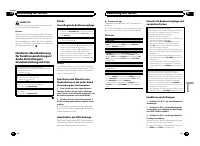
2
Tighten two screws on each side.
1
2
3
1
Tapping screw (5 mm × 8 mm)
2
Mounting bracket
3
Dashboard or console
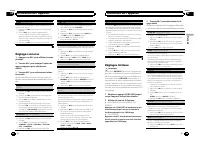
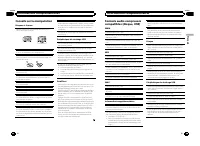
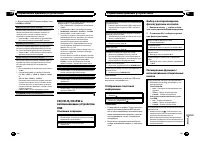
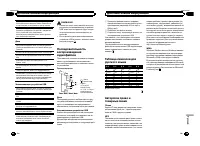
Removing the unit
1
Remove the trim ring.
1
Trim ring
2
Notched tab
!
Releasing the front panel allows easier ac-
cess to the trim ring.
!
When reattaching the trim ring, point the
side with the notched tab down.
2
Insert the supplied extraction keys into
both sides of the unit until they click into
place.
3
Pull the unit out of the dashboard.
Removing and re-attaching the
front panel
You can remove the front panel to protect your
unit from theft.
Press the detach button and push the front
panel upward and pull it toward you.
For details, refer to
Removing the front panel to
protect your unit from theft
and
Re-attaching
the front panel
on page 5.
En
15
English
Section
03
Installation
Содержание
- 70 Благодарим Вас; за покупку этого изде; Держите; Сведения об этом устройстве; RDS; ЛАЗЕРНЫЙ ПРОДУКТ КЛАСС 1; ВНИМАНИЕ; Демонстрационный режим; Важно; ACC; Перед началом эксплуатации
- 71 Основное устройство; USB; Индикация на дисплее; Основные операции; Управление данным устройством
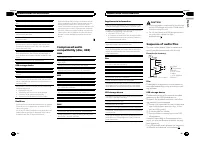
- 72 Примечание; Переключение режима; PTY; Список; Настройка функций; FUNCTION
- 73 запоминающие устройства; дорожек из списка
- 75 Начальные настройки; Затем выполните следующие действия
- 76 Приглушение звука; Только для; Установка
- 77 ISO; DIN
- 78 Снятие передней панели в
- 79 Сообщения об ошибках; Прежде чем обратиться к торговому пред; Встроенный проигрыватель компакт; Дополнительная информация; Дополнительная информация
- 81 Pioneer; Диск
- 82 Технические характеристики
Характеристики

Остались вопросы?Не нашли свой ответ в руководстве или возникли другие проблемы? Задайте свой вопрос в форме ниже с подробным описанием вашей ситуации, чтобы другие люди и специалисты смогли дать на него ответ. Если вы знаете как решить проблему другого человека, пожалуйста, подскажите ему :)


