Магнитолы Hyundai Electronics H-CMMD4049 - инструкция пользователя по применению, эксплуатации и установке на русском языке. Мы надеемся, она поможет вам решить возникшие у вас вопросы при эксплуатации техники.
Если остались вопросы, задайте их в комментариях после инструкции.
"Загружаем инструкцию", означает, что нужно подождать пока файл загрузится и можно будет его читать онлайн. Некоторые инструкции очень большие и время их появления зависит от вашей скорости интернета.

14
Operation
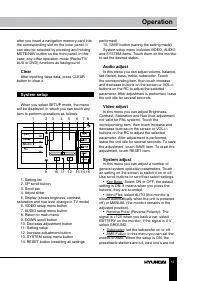
allowed. When you select OFF, it will search
continually.
• Local Area: You can select Europe, USA,
Russia or Japan, to search the stations quickly
in your current area.
• Local: In this menu you can search local
stations. When selected ON, the strong signal
local stations can be received; when selected
OFF, week signal out-of-town stations may be
received.
• Goto Frequency: Selecting ON, you
can use GOTO button on the RC to select a
station’s frequency directly in radio mode.
• Clock System: Set 12-hour or 24-hour
clock display mode.
• Time set: This option is to adjust the time.
Touch hour, minute or second figures, then
use touchable UP/DOWN arrows to set the
selected item.
• Version: In this menu you can see the
current version information.
• Screen Adjust: After you touch this item,
a cross appears in the center of the display
and a tip above: “Carefully press and briefly
hold stylus on the center of the target. Repeat
as the target moves around the screen”.
Press the cross at place 1, then it will move
to another corner, press it again. Now it will
move to the third position, press it, then the
last but one and the last position. After you
pressed the green cross five times, a tip will
appear advising as follows: to save the new
calibration, tap the screen; to return to previous
calibration wait for 30 seconds.
The calibration procedure is useful when
some malfunction occur with the touch screen,
and it needs adjustment.
• RT Scroll: You can select SLOW,
NORMAL or FAST RDS scroll speed.
• TA Volume: You can select LOW,
NORMAL or HIGH TA volume.
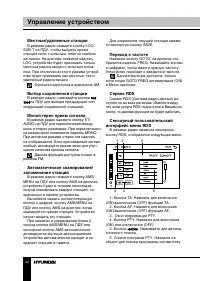
• Region: To set the AF searching region, the
default setting is ON. You can also set it to OFF.
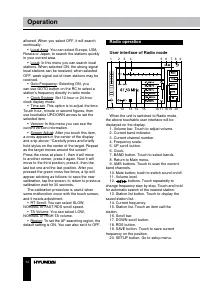
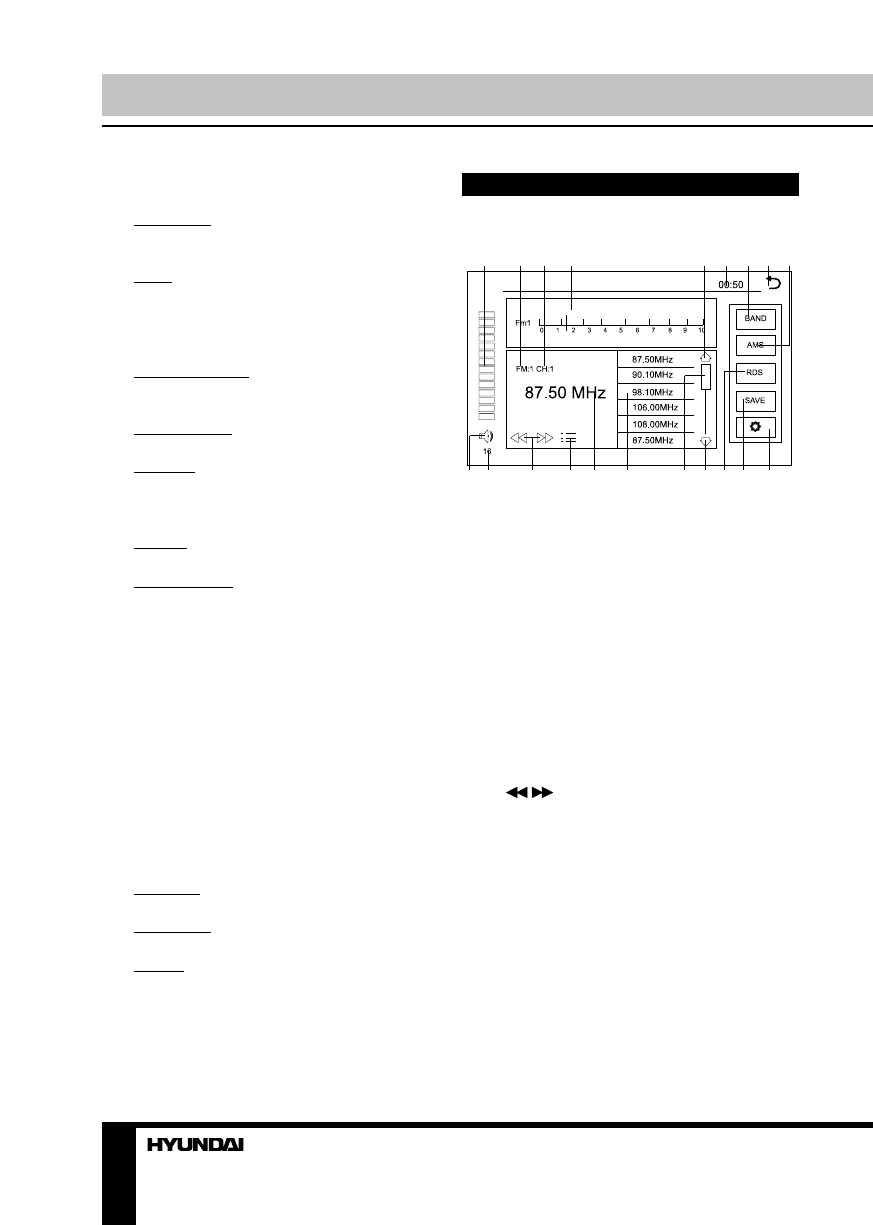
Radio operation
User interface of Radio mode
1
2
3
4
5 6 7 8 9
10 11
12
13 14
15
16 17 18 19 20
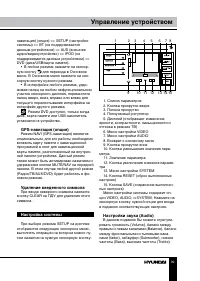
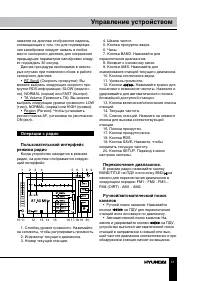
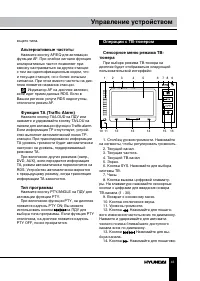
When the unit is switched to Radio mode,
the above touchable user interface will be
displayed on the display.
1. Volume bar. Touch to adjust volume.
2. Current band indicator.
3. Current channel number.
4. Frequency scale.
5. UP scroll button.
6. Clock.
7. BAND button. Touch to select bands.
8. Return to Main menu.
9. AMS buttons. Touch to scan the current
band channels.
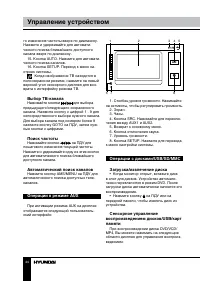
10. Mute button; touch to switch sound on/off.
11. Volume level.
12.
/
buttons. Touch repeatedly to
change frequency step by step. Touch and hold
for automatic search of the nearest station.
13. Station list button. Touch to display the
saved station list.
14. Current frequency.
15. Station list. Touch an item call the
station.
16. Scroll bar.
17. DOWN scroll button.
18. RDS button.
19. SAVE button. Touch to save current
frequency on the position.
20. SETUP button. Go to setup menu.
Содержание
- 26 Уважаемый покупатель!; Установка/Подключение
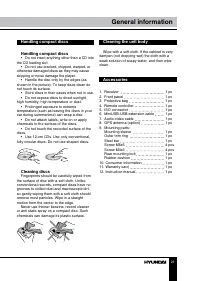
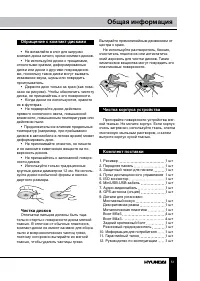
- 27 накопителя/карты памяти; Общая информация; Обращение с компакт-дисками
- 28 Утилизация изделия
- 29 • Убедитесь, что источник питания и
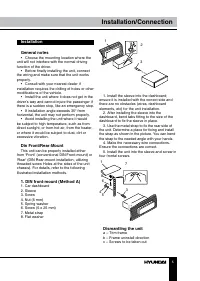
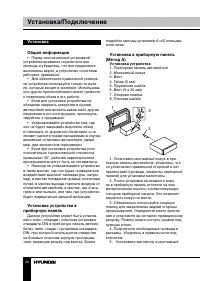
- 30 Установка; Установка устройства
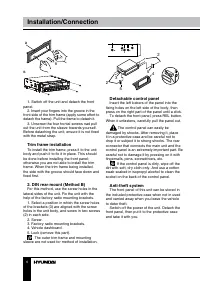
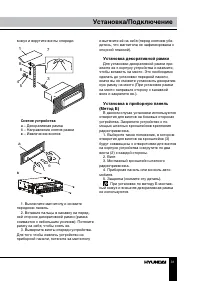
- 31 кожух и вкрутите винты спереди.; Снятие устройства; Выключите магнитолу и снимите; Установка декоративной рамки; Для установки декоративной рамки при-; Установка в приборную панель; В данном случае установки используются
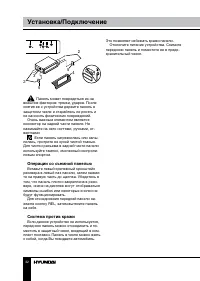
- 32 Операции со съемной панелью
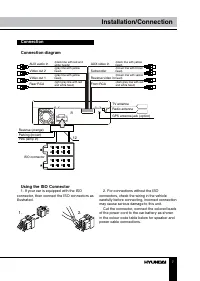
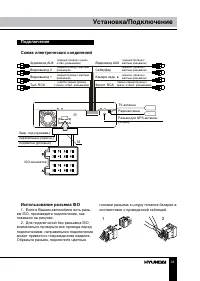
- 33 Подключение; Использование разъема ISO; Для подключений без разъемов ISO
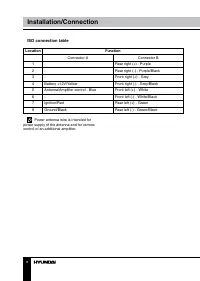
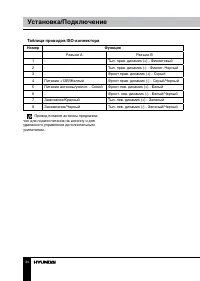
- 34 Таблица проводов ISO-коннектора; Номер; Разъем A
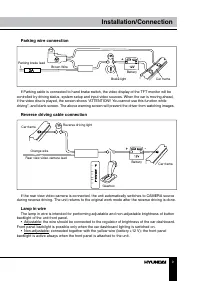
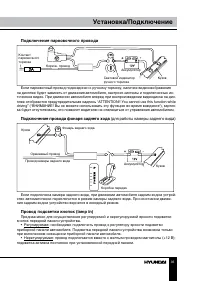
- 35 Подключение парковочного провода; кнопок передней панели устройства.
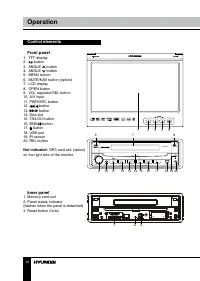
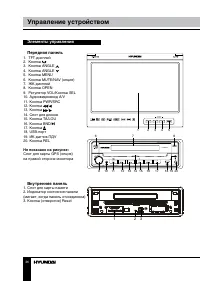
- 36 Элементы управления; Не показано на рисунке:; Внутренняя панель
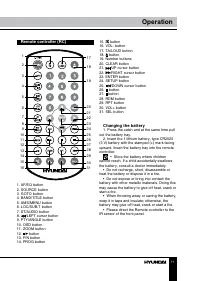
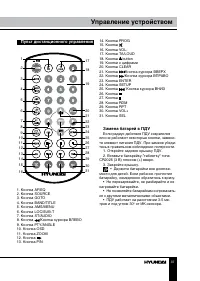
- 37 Пульт дистанционного управления
- 38 Основные операции
- 39 Удаление введенного символа
- 40 В данном подменю Вы можете отрегулиро-
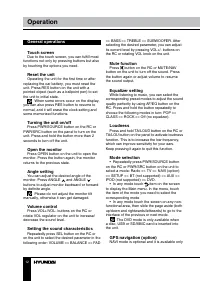
- 41 Операции с радио
- 43 Альтернативные частоты
- 44 Поиск частоты
- 45 Интерфейс управления
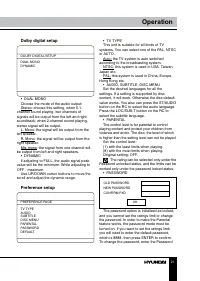
- 48 Настройка DVD
- 49 Установка DOLBY; Дополнительные настройки
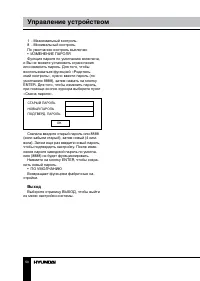
- 50 Сначала введите старый пароль или 8888; Выход; Выберите страницу ВЫХОД, чтобы выйти
- 51 Управление устройством
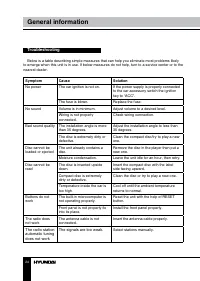
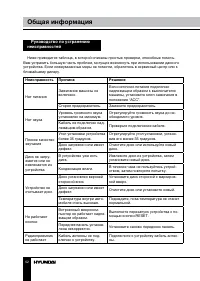
- 52 Руководство по устранению; Неисправность
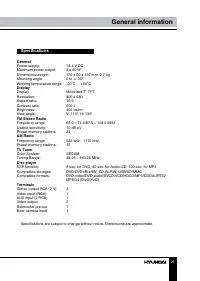
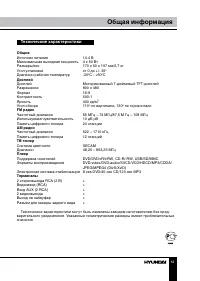
- 53 Технические характеристики

