
Кусторезы Makita DUM604ZX - инструкция пользователя по применению, эксплуатации и установке на русском языке. Мы надеемся, она поможет вам решить возникшие у вас вопросы при эксплуатации техники.
Если остались вопросы, задайте их в комментариях после инструкции.
"Загружаем инструкцию", означает, что нужно подождать пока файл загрузится и можно будет его читать онлайн. Некоторые инструкции очень большие и время их появления зависит от вашей скорости интернета.


16 ENGLISH
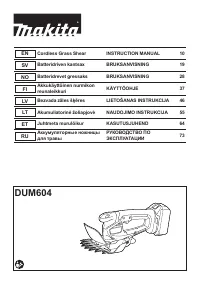
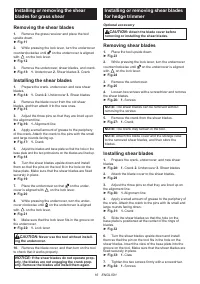
Installing or removing the shear
blades for grass shear
Removing the shear blades
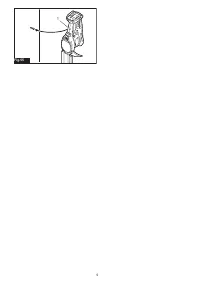
1.
Remove the grass receiver and place the tool
upside down.
►
Fig.11
2.
While pressing the lock lever, turn the undercover
counterclockwise until on the undercover is aligned
with
on the lock lever.
►
Fig.12
3.
Remove the undercover, shear blades, and crank.
►
Fig.13:
1.
Undercover
2.
Shear blades
3.
Crank
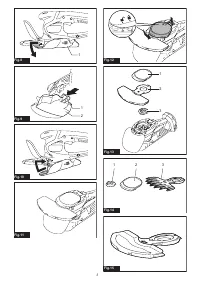
Installing the shear blades
1.
Prepare the crank, undercover, and new shear
blades.
►
Fig.14:
1.
Crank
2.
Undercover
3.
Shear blades
2.
Remove the blade cover from the old shear
blades, and then attach it to the new ones.
►
Fig.15
3.
Adjust the three pins so that they are lined up on
the alignment line.
►
Fig.16:
1.
Alignment line
4.
Apply a small amount of grease to the periphery
of the crank. Attach the crank to the pins with the small
and large rounds facing up.
►
Fig.17:
1.
Crank
5.
Adjust the blades and base plate so that the hole in the
base plate and the two protrusions on the blades are lined up.
►
Fig.18
6.
Turn the shear blades upside down and install
them so that the pins on the tool fit in the hole on the
base plate. Make sure that the shear blades are fixed
securely in place.
►
Fig.19
7.
Place the undercover so that
on the under-
cover is aligned with
on the lock lever.
►
Fig.20
8.
While pressing the undercover, turn the under-
cover clockwise until on the undercover is aligned
with
on the lock lever.
►
Fig.21
9.
Make sure that the lock lever fits in the groove on
the undercover.
►
Fig.22:
1.
Lock lever
CAUTION:
Never use the tool without install-
ing the undercover.
10.
Remove the blade cover, and then turn on the tool
to check that it works properly.
NOTICE:
If the shear blades do not operate prop
-
erly, the blades are not engaging the crank prop
-
erly. Remove the blades and install them again.
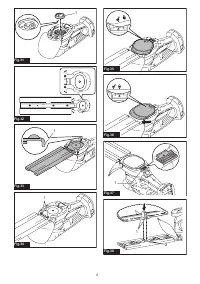
Installing or removing shear blades
for hedge trimmer
Optional accessory
CAUTION:
Attach the blade cover before
removing or installing the shear blades.
Removing shear blades
1.
Place the tool upside down.
►
Fig.23
2.
While pressing the lock lever, turn the undercover
counterclockwise until on the undercover is aligned
with
on the lock lever.
►
Fig.24
3.
Remove the undercover.
►
Fig.25
4.
Loosen two screws with a screwdriver and remove
the shear blades.
►
Fig.26:
1.
Screws
NOTE:
The shear blades can be removed without
removing the screws.
5.
Remove the crank from the shear blades.
►
Fig.27:
1.
Crank
NOTE:
The crank may remain in the tool.
NOTE:
Attach the blade cover and the storage case
to the removed shear blades, and then store the
blades.
Installing shear blades
1.
Prepare the crank, undercover, and new shear
blades.
►
Fig.28:
1.
Crank
2.
Undercover
3.
Shear blades
2.
Attach the blade cover to the shear blades.
►
Fig.29
3.
Adjust the three pins so that they are lined up on
the alignment line.
►
Fig.30:
1.
Alignment line
4.
Apply a small amount of grease to the periphery of
the crank. Attach the crank to the pins with its small and
large rounds facing down.
►
Fig.31:
1.
Crank
5.
Slide the shear blades so that the hole on the
base plate is positioned at the center of the rings of
blades.
►
Fig.32
6.
Turn the shear blades upside down and install
them so that the pin on the tool fits in the hole on the
shear blades. Insert the claw of the base plate into the
groove on the tool. Make sure that the shear blades are
fixed securely in place.
►
Fig.33:
1.
Claw
7.
Tighten the two screws firmly with a screwdriver.
►
Fig.34:
1.
Screws
Содержание
- 73 ТЕХНИЧЕСКИЕ ХАРАКТЕРИСТИКИ; Символы; Назначение
- 74 МЕРЫ БЕЗОПАСНОСТИ; Сохраните брошюру с инструк
- 75 СОХРАНИТЕ ДАННЫЕ; Правила техники безопасности
- 76 Важные правила техники
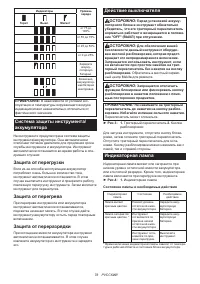
- 77 ОПИСАНИЕ РАБОТЫ
- 78 Система защиты инструмента/
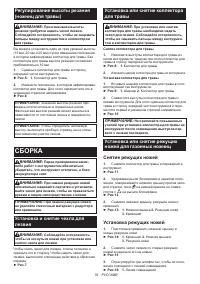
- 79 СБОРКА; Снятие режущих ножей
- 80 Установка или снятие режущих; Снятие режущих ножниц
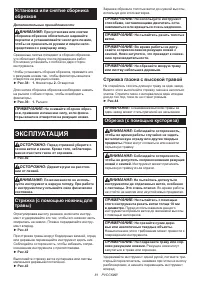
- 81 Установка или снятие сборника; ЭКСПЛУАТАЦИЯ; Стрижка (с помощью ножниц для
- 82 ОБСЛУЖИВАНИЕ; Очистка инструмента; ДОПОЛНИТЕЛЬНЫЕ
Характеристики

Остались вопросы?Не нашли свой ответ в руководстве или возникли другие проблемы? Задайте свой вопрос в форме ниже с подробным описанием вашей ситуации, чтобы другие люди и специалисты смогли дать на него ответ. Если вы знаете как решить проблему другого человека, пожалуйста, подскажите ему :)


