
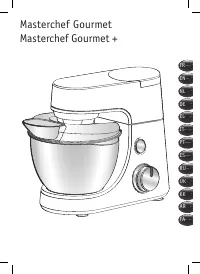
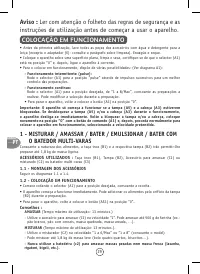
Кухонные комбайны Moulinex QA5101 Masterchef Gourmet - инструкция пользователя по применению, эксплуатации и установке на русском языке. Мы надеемся, она поможет вам решить возникшие у вас вопросы при эксплуатации техники.
Если остались вопросы, задайте их в комментариях после инструкции.
"Загружаем инструкцию", означает, что нужно подождать пока файл загрузится и можно будет его читать онлайн. Некоторые инструкции очень большие и время их появления зависит от вашей скорости интернета.


EN
8
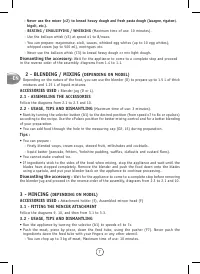
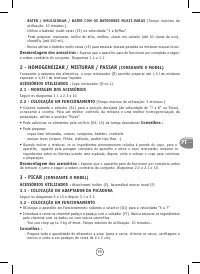
Tips :
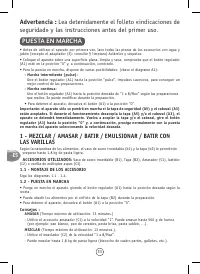
- Prepare all of the foodstuffs to be minced (for meat, remove the bones, gristle and tendons
and cut it into pieces of approximately 2 x 2 cm).
- Make sure that frozen meat is thoroughly thawed.
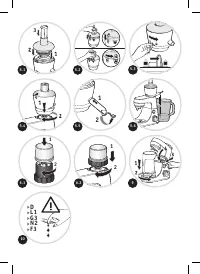
Dismantling the accessory :
Wait for the appliance to come to a complete stop and proceed
in the reverse order of the assembly diagrams 10, from 3.3 to 3.1 and then 9.
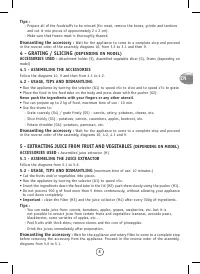
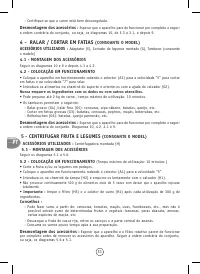
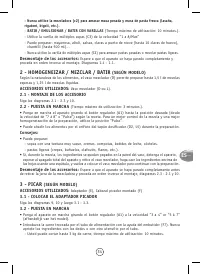
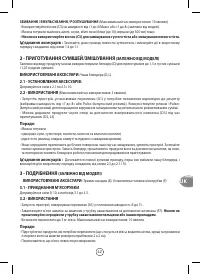
4 - GRATING / SLICING
(DEPENDING ON MODEL)
ACCESSORIES USED :
Attachment holder (E), Assembled vegetable slicer (G), Drums (depending on
model)
4.1 - ASSEMBLING THE ACCESSORIES
Follow the diagrams 10, 9 and then from 4.1 to 4.2.
4.2 - USAGE, TIPS AND DISMANTLING
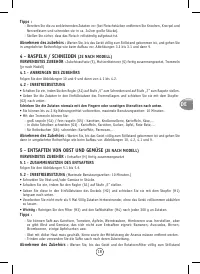
• Run the appliance by turning the selector (A1) to speed «5» to slice and to speed «7» to grate.
• Place the food in the feed tube on the body and press down with the pusher (G2).
Never push the ingredients with your fingers or any other utensil.
• You can prepare up to 2 kg of food, maximum time of use : 10 min.
• Use the drums to:
- Grate coarsely (G4) / grate finely (G5) : carrots, celery, potatoes, cheese, etc.
- Slice thickly (G3) : potatoes, carrots, cucumbers, apples, beetroot, etc.
- Potato shredder (G6): potatoes, parmesan, etc.
Dismantling the accessory :
Wait for the appliance to come to a complete stop and proceed
in the reverse order of the assembly, diagrams 10, 4.2, 4.1 and 9.
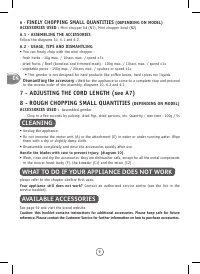
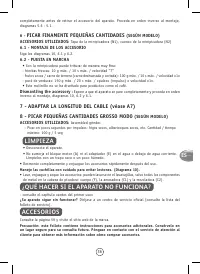
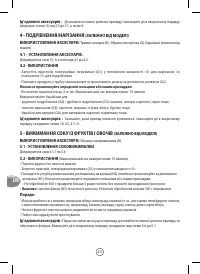
5 - EXTRACTING JUICE FROM FRUIT AND VEGETABLES
(DEPENDING ON MODEL)
ACCESSORIES USED :
Assembled juice extractor (H)
5.1 - ASSEMBLING THE JUICE EXTRACTOR
Follow the diagrams from 5.1 to 5.6.
5.2 - USAGE, TIPS AND DISMANTLING
(maximum time of use: 10 minutes.)
• Cut the fruits and/or vegetables into pieces.
• Run the appliance by turning the selector (A1) to speed «5».
• Insert the ingredients down the feed tube in the lid (H2) push them slowly using the pusher (H1).
• Do not process 500 g of food more than 5 times continuously, without allowing your appliance
to cool down completely
•
Important :
clean the filter (H3) and the juice collector (H4) after every 300g of ingredients.
Tips :
- You can make juice from: carrots, tomatoes, apples, grapes, raspberries, etc. but it is
not possible to extract juice from certain fruits and vegetables: bananas, avocado pears,
blackberries, some varieties of apples, etc…
- Peel fruits with thick skins; remove stones and the core of pineapples.
- Drink the juices immediately after preparation.
Dismantling the accessory :
Wait for the appliance and rotary filter to come to a complete stop
before removing the accessory from the appliance. Proceed in the reverse order of the assembly,
diagrams from 5.6 to 5.1.
Содержание
- 43 перемешивания легкого теста.; Порядок разборки принадлежностей:; - ИСПОЛЬЗОВАНИЕ МЯСОРУБКИ; Никогда не проталкивайте
- 44 - ВЫЖИМАНИЕ СОКОВ ИЗ ФРУКТОВ И ОВОЩЕЙ
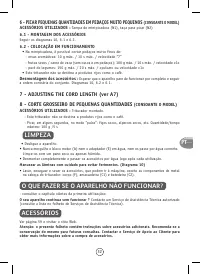
- 45 - ИЗМЕЛЬЧЕНИЕ НЕБОЛЬШИХ КОЛИЧЕСТВ ПРОДУКТОВ; - РЕГУЛИРОВКА ДЛИНЫ ШНУРА; ОЧИСТКА; ЧТО ДЕЛАТЬ, ЕСЛИ ПРИБОР НЕ РАБОТАЕТ; ПРИНАДЛЕЖНОСТИ; дополнительной информации о том, как приобрести аксессуары.
Характеристики

Остались вопросы?Не нашли свой ответ в руководстве или возникли другие проблемы? Задайте свой вопрос в форме ниже с подробным описанием вашей ситуации, чтобы другие люди и специалисты смогли дать на него ответ. Если вы знаете как решить проблему другого человека, пожалуйста, подскажите ему :)


