Кронштейны для мониторов Chief (DMA1B) - инструкция пользователя по применению, эксплуатации и установке на русском языке. Мы надеемся, она поможет вам решить возникшие у вас вопросы при эксплуатации техники.
Если остались вопросы, задайте их в комментариях после инструкции.
"Загружаем инструкцию", означает, что нужно подождать пока файл загрузится и можно будет его читать онлайн. Некоторые инструкции очень большие и время их появления зависит от вашей скорости интернета.

DMA Series
Installation Instructions
8
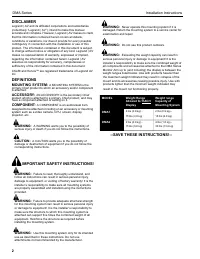
WARNING:
Exceeding the weight capacity can result in
serious personal injury or damage to equipment! It is the
installer’s responsibility to make sure the combined weight of
all components and accessories attached to the DMA Series
Monitor Arm up to (and including) the display is between the
weight ranges listed below. Use with products heavier than
the maximum weight indicated may result in collapse of the
mount and its accessories causing possible injury. Use with
products lighter than the minimum weight indicated may
result in the mount not functioning properly.
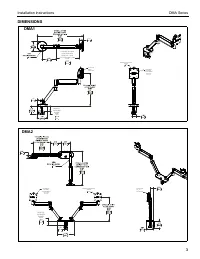
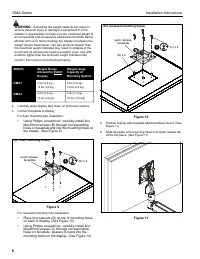
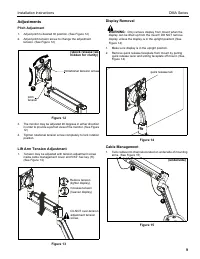
2.
Carefully place display face down on protective surface.
3.
Connect faceplate to display
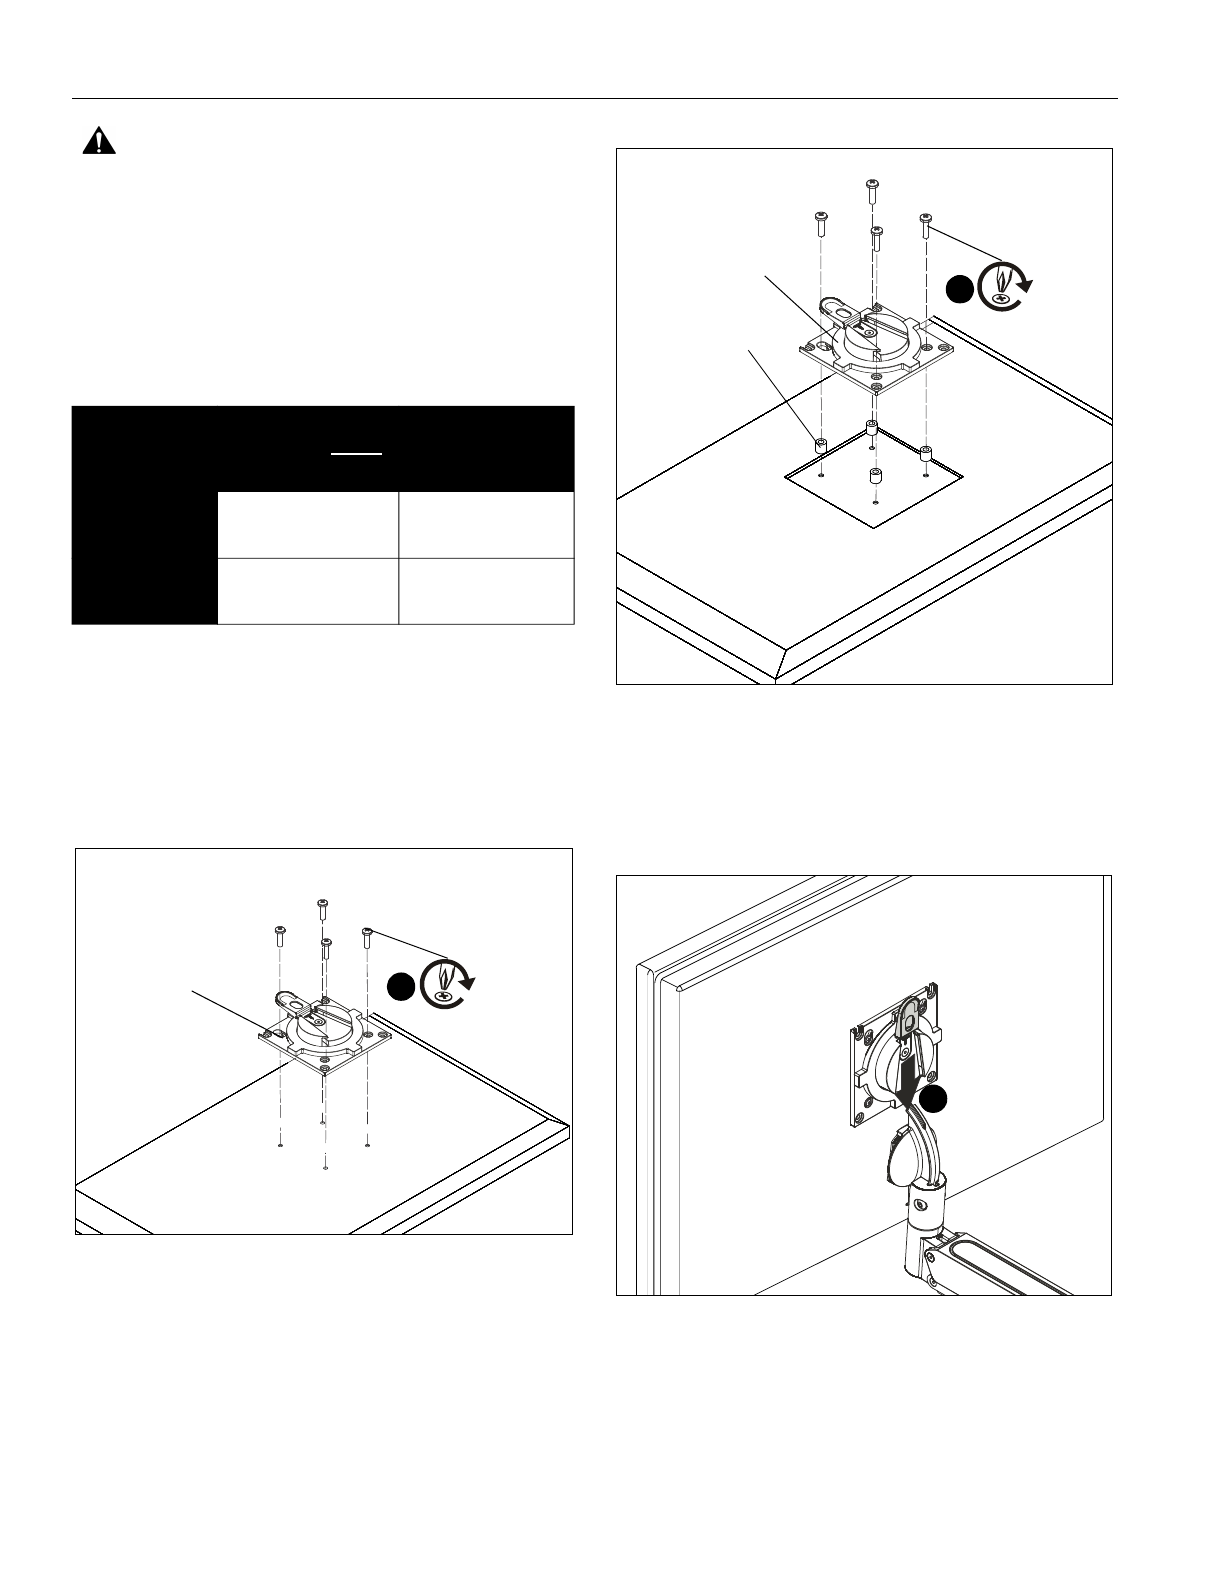
For flush mounting hole installation:
•
Using Phillips screwdriver, carefully install four
M4x10mm screws (B) through corresponding
holes on faceplate and into the mounting holes on
the display. (See Figure 9)
Figure 9
For recessed mounting hole installation:
•
Place four spacers (D) on top of mounting holes
on back of display. (See Figure 10)
•
Using Phillips screwdriver, carefully install four
M4x20mm screws (C) through corresponding
holes on faceplate, spacers (D) and into the
mounting holes on the display. (See Figure 10)
Figure 10
4.
Position display with faceplate attached above mount. (See
Figure 11)
5.
Slide faceplate onto mounting head until quick release tab
clicks into place. (See Figure 11)
Figure 11
MODEL
Weight Range
Allowed for EACH
Display
Weight range
Capacity of
Mounting System
DMA1
2 lbs (0.9 kg) -
15 lbs (6.8 kg)
2 lbs (0.9 kg) -
15 lbs (6.8 kg)
DMA2
2 lbs (0.9 kg) -
15 lbs (6.8 kg)
4 lbs (1.8 kg) -
30 lbs (13.6 kg)
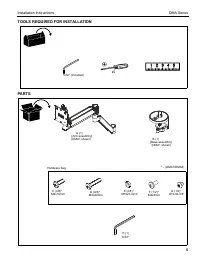
(for flush mounting holes)
(B) x 4
quick release
faceplate
3
(for recessed mounting holes)
(C) x 4
(D) x 4
quick release
faceplate
3
5
Характеристики

Остались вопросы?Не нашли свой ответ в руководстве или возникли другие проблемы? Задайте свой вопрос в форме ниже с подробным описанием вашей ситуации, чтобы другие люди и специалисты смогли дать на него ответ. Если вы знаете как решить проблему другого человека, пожалуйста, подскажите ему :)


