Кондиционеры Timberk T-AC07-S28 - инструкция пользователя по применению, эксплуатации и установке на русском языке. Мы надеемся, она поможет вам решить возникшие у вас вопросы при эксплуатации техники.
Если остались вопросы, задайте их в комментариях после инструкции.
"Загружаем инструкцию", означает, что нужно подождать пока файл загрузится и можно будет его читать онлайн. Некоторые инструкции очень большие и время их появления зависит от вашей скорости интернета.


IM2019
8
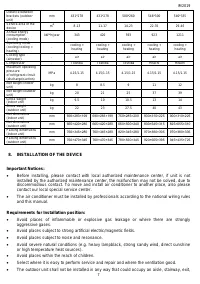
fire escape, catwalk or any other public area.
The outdoor unit shall be installed as far as possible from the doors and windows of the
neighbors as well as the green plants.
Requirements of the mounting structure:
The mounting rack must meet the relevant national or industrial standards in terms of
strength with welding and connection areas rustproofed.
The mounting rack and its load carry surface shall be able to withstand 4 times or above
the weight of the unit.
The mounting rack of the outdoor unit shall be fastened with expansion bolt.
Ensure the secure installation regardless of what type of wall on which it is installed, to
prevent potential dropping that could hurt people.
Electrical Safety Requirements:
Be sure to use the rated voltage and air conditioners dedicated circuit for the power supply,
and the power cable diameter must meet the national requirements.
If the rated current of the device is greater than or equal to 16A, it is necessary to use a
connection to the mains with the organization of an individual line and install an ELCB. For
the connecting line, a cable with a cross section of 1.5 -2 mm
2
and circuit breakers are
used.
The minimum clearance between the air conditioner and the combustibles is 1.5 m.
The interconnection cord enables connect the indoor and outdoor units. You must first
choose the right cable size before preparing it for connection.
Cable Types:
Indoor Power Cable (if applicable): H05VV-F;
Interconnection cord: H07RN-F or H05RN-F;
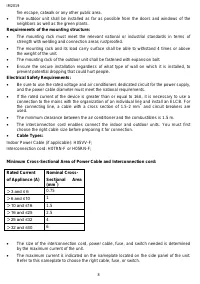
Minimum Cross-Sectional Area of Power Cable and Interconnection cord:
Rated Current
of Appliance (A)
Nominal Cross-
Sectional
Area
(mm
2
)
>
3 and ≤ 6
0.75
>
6 and ≤10
1
>
10 and ≤16
1.5
>
16 and ≤25
2.5
>
25 and ≤32
4
>
32 and ≤40
6
The size of the interconnection cord, power cable, fuse, and switch needed is determined
by the maximum current of the unit.
The maximum current is indicated on the nameplate located on the side panel of the unit.
Refer to this nameplate to choose the right cable, fuse, or switch.
Содержание
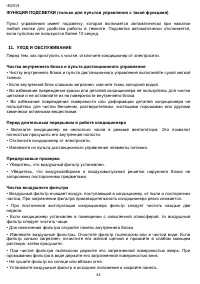
- 28 Не используйте принадлежности, не входящие в комплект поставки.; НАЗНАЧЕНИЕ ПРИБОРА; Охлаждение
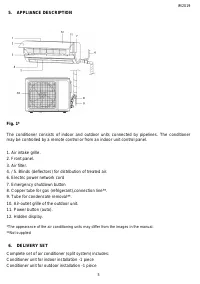
- 29 ОПИСАНИЕ ПРИБОРА; Воздухозаборная решетка
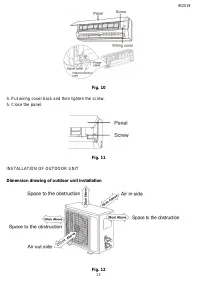
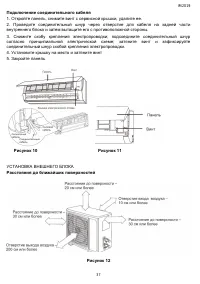
- 31 МОНТАЖ ПРИБОРА; Избегайте мест с сильным электромагнитным излучением.
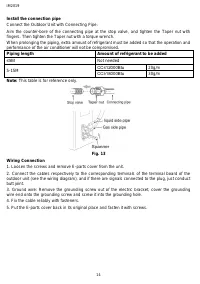
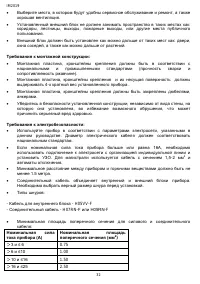
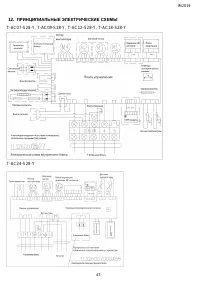
- 33 Требования к заземлению:; Прибор с классом электрозащиты I, должен быть правильно заземлен.; Рисунок 2
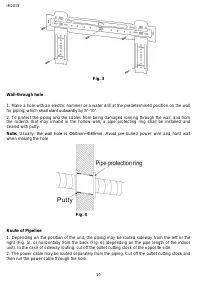
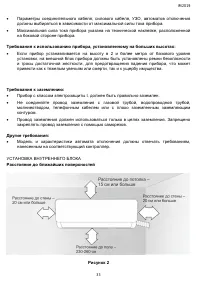
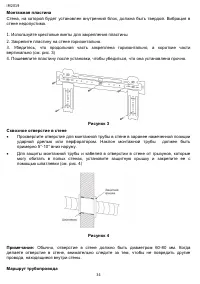
- 34 Монтажная пластина; Используйте крестовые винты для закрепления пластины; Рисунок 3; Обычно, отверстие в стене должно быть диаметром 60-80 мм. Когда
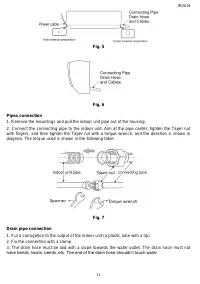
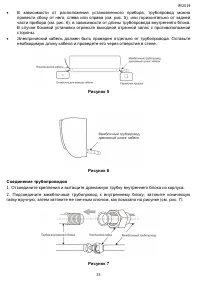
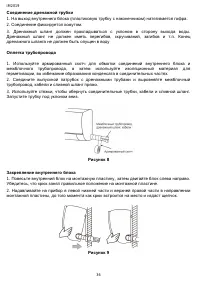
- 36 Соединение дренажной трубки; Соединение фиксируется хомутом.; Рисунок 8
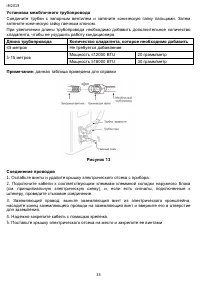
- 38 ≤5 метров; Соединение проводов; Ослабьте винты и удалите крышку электрического отсека с прибора.
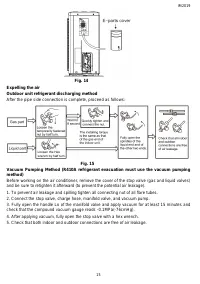
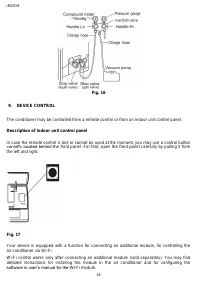
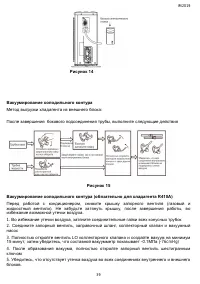
- 39 Метод выгрузки хладагента из внешнего блока:
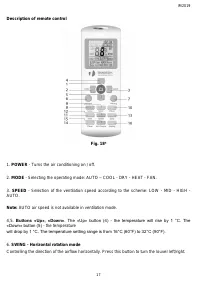
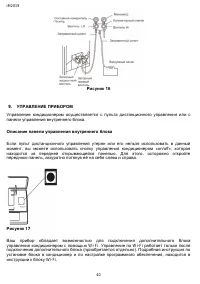
- 40 УПРАВЛЕНИЕ ПРИБОРОМ
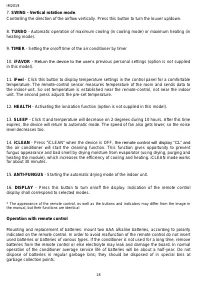
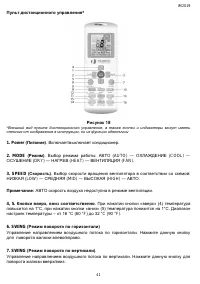
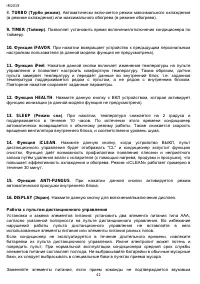
- 41 отличия от изображения в инструкции, но их функции идентичны; . Выбор скорости вращения вентилятора в соответствии со схемой:
- 43 При помощи нажатия кнопок «; РЕЖИМ ОСУШЕНИЯ
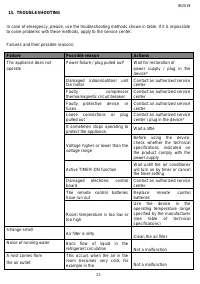
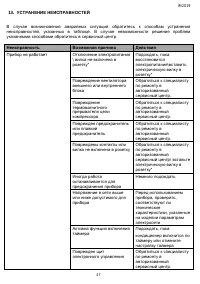
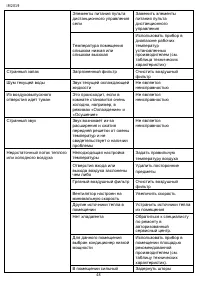
- 47 Прибор не работает
- 49 УТИЛИЗАЦИЯ, СРОК СЛУЖБЫ, ГАРАНТИЙНЫЙ СРОК
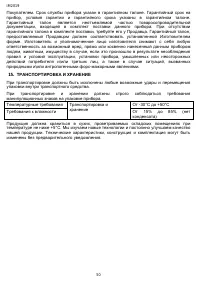
- 50 ТРАНСПОРТИРОВКА И ХРАНЕНИЕ


