Кондиционеры Daikin FAQ-C9 - инструкция пользователя по применению, эксплуатации и установке на русском языке. Мы надеемся, она поможет вам решить возникшие у вас вопросы при эксплуатации техники.
Если остались вопросы, задайте их в комментариях после инструкции.
"Загружаем инструкцию", означает, что нужно подождать пока файл загрузится и можно будет его читать онлайн. Некоторые инструкции очень большие и время их появления зависит от вашей скорости интернета.


English
9
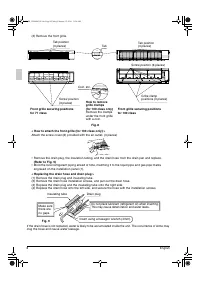
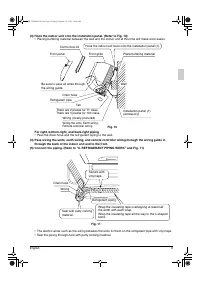
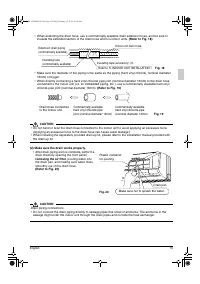
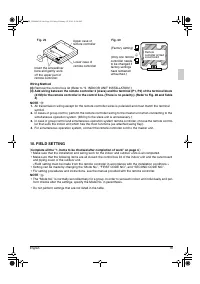
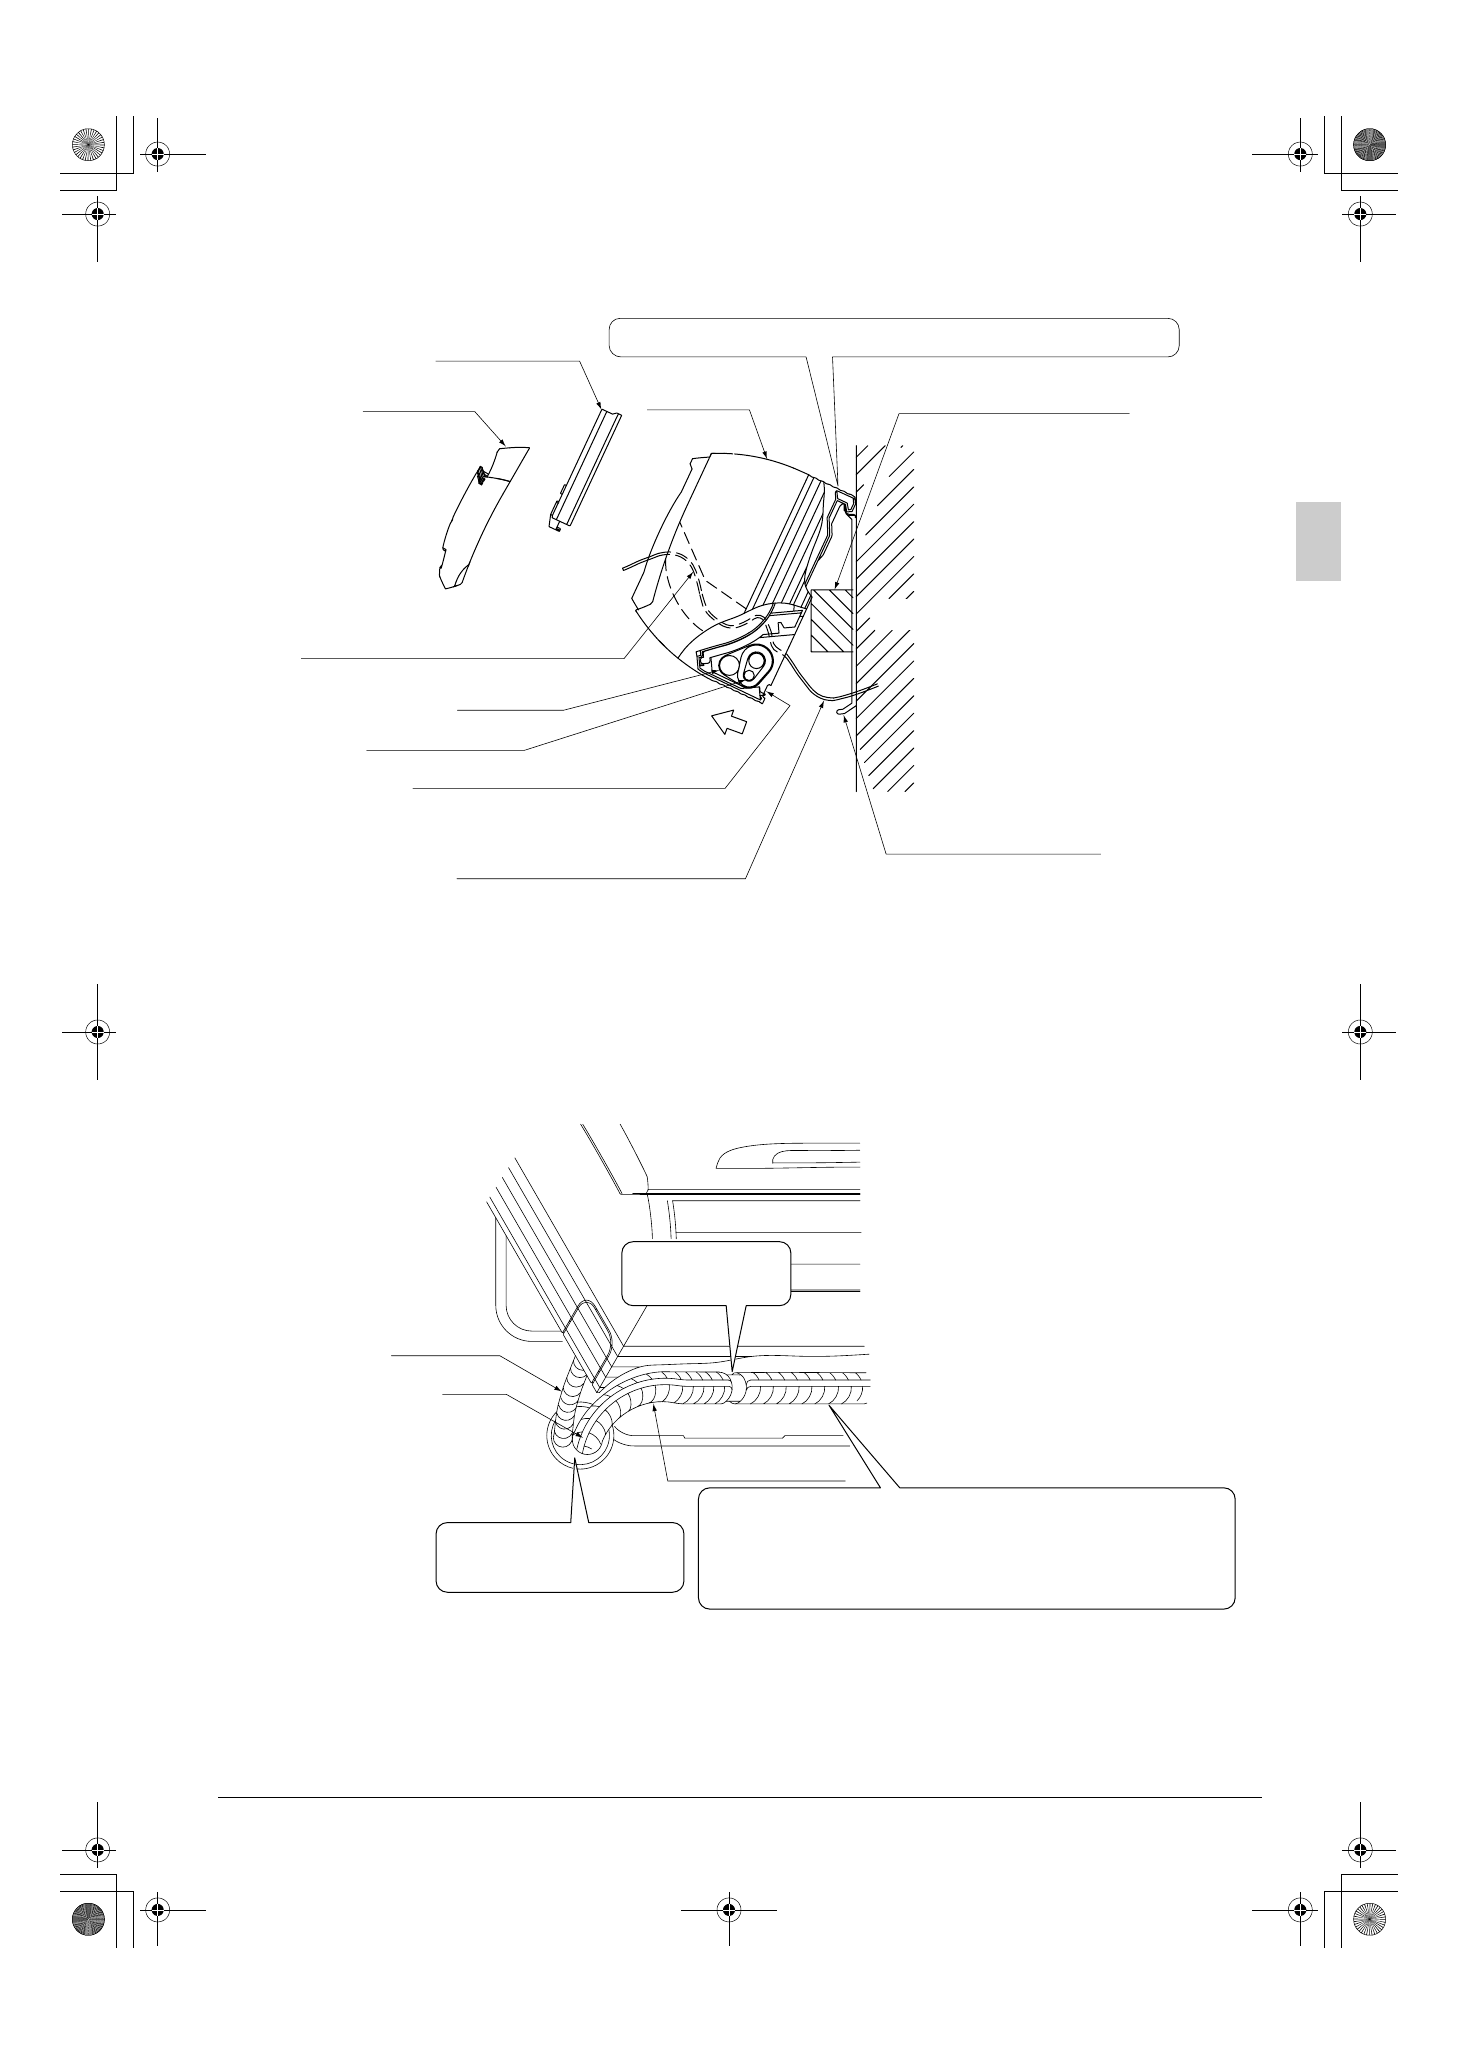
(3) Hook the indoor unit onto the installation panel. (Refer to Fig. 10)
•
Placing buffering material between the wall and the indoor unit at this time will make work easier.
For right, bottom-right, and back-right piping
•
Pass the drain hose and the refrigerant piping to the wall.
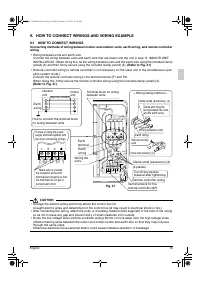
(4) Pass wiring the units, earth wiring, and remote controller wiring through the wiring guide in
through the back of the indoor unit and to the front.
(5) Connect the piping. (Refer to “6. REFRIGERANT PIPING WORK” and Fig. 11)
•
The electric wires such as the wiring between the units fix them on the refrigerant pipe with vinyl tape.
•
Seal the piping through-hole with putty corking material.
Refrigerant pipe
Be sure to pass all wires through
the wiring guide.
Tab
There are 2 places for 71 class.
There are 3 places for 100 class.
Wiring (locally procured)
Wiring the units, Earth wiring,
Remote controller wiring
Installation panel (1)
(accessory)
Front panel
Front grille
Control box lid
Place buffering material
Hook the indoor unit hook onto the installation panel (1).
Fig. 10
Wall
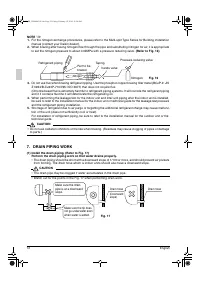
Drain hose
Wrap the insulating tape overlapping at least half
the width with each wrap.
Wrap the insulating tape all the way to the L-shaped
bend.
Seal with putty corking
material.
Drain hose
Wiring
Fig. 11
Refrigerant piping
Secure with
vinyl tape.
01_EN_3P184443-9U.fm Page 9 Friday, February 12, 2016 11:24 AM


