Коммутаторы D-Link DGS-1510-52XMP/A1A - инструкция пользователя по применению, эксплуатации и установке на русском языке. Мы надеемся, она поможет вам решить возникшие у вас вопросы при эксплуатации техники.
Если остались вопросы, задайте их в комментариях после инструкции.
"Загружаем инструкцию", означает, что нужно подождать пока файл загрузится и можно будет его читать онлайн. Некоторые инструкции очень большие и время их появления зависит от вашей скорости интернета.


5
E
N
G
L
IS
H
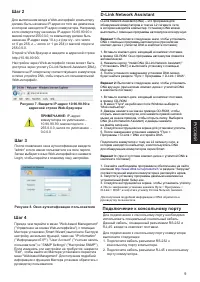
switch, enter the “admin” for the default user name and
password for the Switch and press the Enter key.
Additional Information
If you are encountering problems setting up your
network, please refer to the user manual that came
with the switch. It contains many more rules, charts,
explanations, and examples to help you get your network
up and running.
Additional help is available through our offices listed at
the back of the user manual or online. To find out more
about D-Link products or marketing information, please
visit the website
.
Warranty Information
The D-Link Limited Lifetime Warranty information
is available at
.
Telnet Management
Users may also access the switch through Telnet using
your PC’s Command Prompt. To access it from your
computer, users must first ensure that a valid connection
is made through the Ethernet port of the Switch and your
PC, and then click Start > Programs > Accessories >
Command Prompt on your computer. Once the console
window opens, enter the command telnet 10.90.90.90
(depending on configured IP address) and press Enter
on your keyboard. You should be directed to the opening
console screen for the Command Line Interface of the
1. Connect the RS-232 end of the console cable to the
Serial Port of the management PC.
2. Connect the RJ-45 end of the console cable to the
Console Port of the Switch.
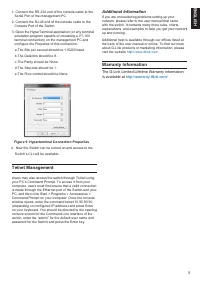
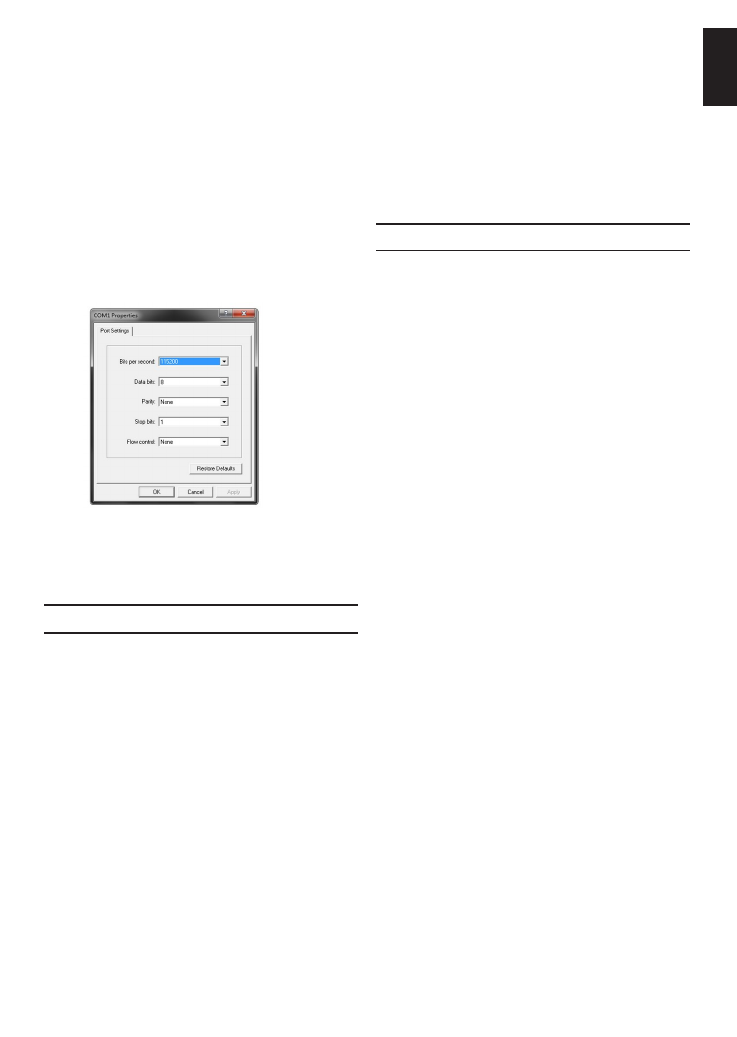
3. Open the HyperTerminal application (or any terminal
emulation program capable of emulating a VT-100
terminal connection) on the management PC and
configure the Properies of this connection.
a.The Bits per second should be 115200 baud.
b.The Data bits should be 8.
c.The Parity should be None.
d.The Stop bits should be 1.
e.The Flow control should be None.
Figure 9. Hyperterminal Connection Properties
4. Now the Switch can be turned on and access to the
Switch’s CLI will be available.
Содержание
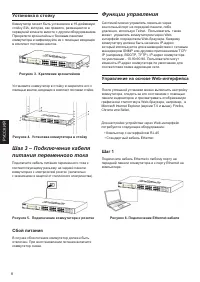
- 7 Шаг 1 – Распаковка; Установка на стол или поверхность; Рисунок 1. Крепление резиновых ножек; Заземление коммутатора; Рисунок 2. Подключение провода заземления
- 8 Установка в стойку; Рисунок 3. Крепление кронштейнов; Сбой питания; Функции управления; Управление на основе Web-интерфейса
- 9 Подключение к консольному порту
- 10 Управление на основе Telnet; Дополнительная информация
- 11 Технические характеристики
- 12 Техническая поддержка через Интернет:; Հայաստան
Характеристики

Остались вопросы?Не нашли свой ответ в руководстве или возникли другие проблемы? Задайте свой вопрос в форме ниже с подробным описанием вашей ситуации, чтобы другие люди и специалисты смогли дать на него ответ. Если вы знаете как решить проблему другого человека, пожалуйста, подскажите ему :)


