
Кофеварка PROFI-COOK PC-ES 1209 Inox - инструкция пользователя по применению, эксплуатации и установке на русском языке. Мы надеемся, она поможет вам решить возникшие у вас вопросы при эксплуатации техники.
Если остались вопросы, задайте их в комментариях после инструкции.
"Загружаем инструкцию", означает, что нужно подождать пока файл загрузится и можно будет его читать онлайн. Некоторые инструкции очень большие и время их появления зависит от вашей скорости интернета.


PC-ES1209_IM_new
17.08.20
58
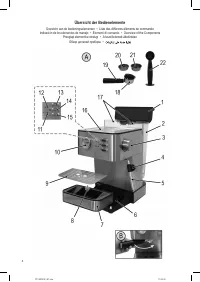
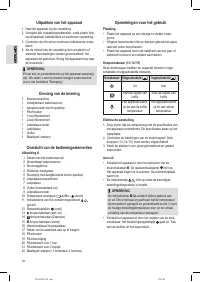
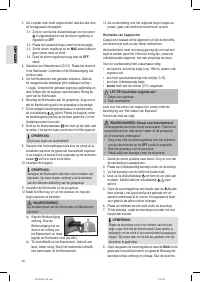
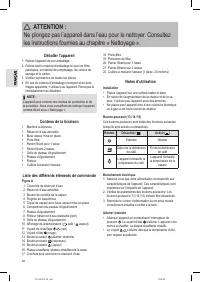
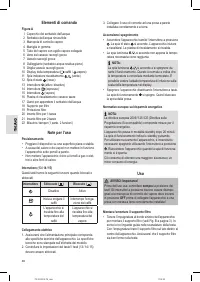
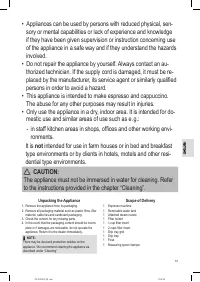
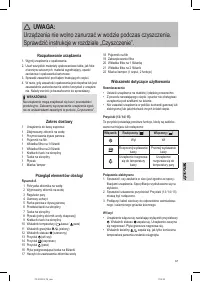
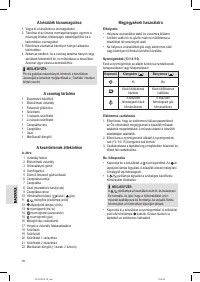
Overview of the Components
Figure A
1 Water tank lid
2 Removable water tank
3 Steam control knob
4 Rubber handle
5 Steam pipe with attached steam nozzle
6 Drip tray compartment
7 Drip tray
8 Float (residual water tank full)
9 Drip tray grid
10 Temperature display ( coffee / steam)
11 Heater indicator lamp
(green)
12 Operating control lamp
(red)
13
pressure switch (on / off)
14 pressure switch (espresso)
15 pressure switch (steam)
16 Warming plate / cup tray
17 Hooks to hang up the water tank
18 Filter holder
19 Filter safeguard
20 Filter insert for 1 cup
21 Filter insert for 2 cups
22 Measuring spoon / tamper (1 part, 2 functions)
Notes for Use
Placement
•
Place the appliance on a stable and level surface.
•
Due to rising heat and vapours do not operate the appli
-
ance under wall cabinets.
• Do not place the appliance in close proximity to a gas or
electric stove or any other heat source.
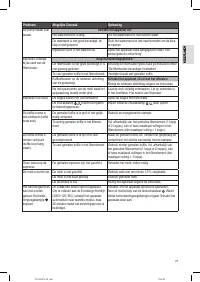
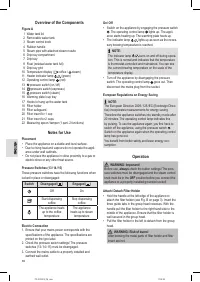
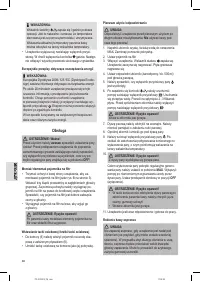
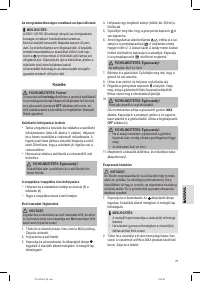
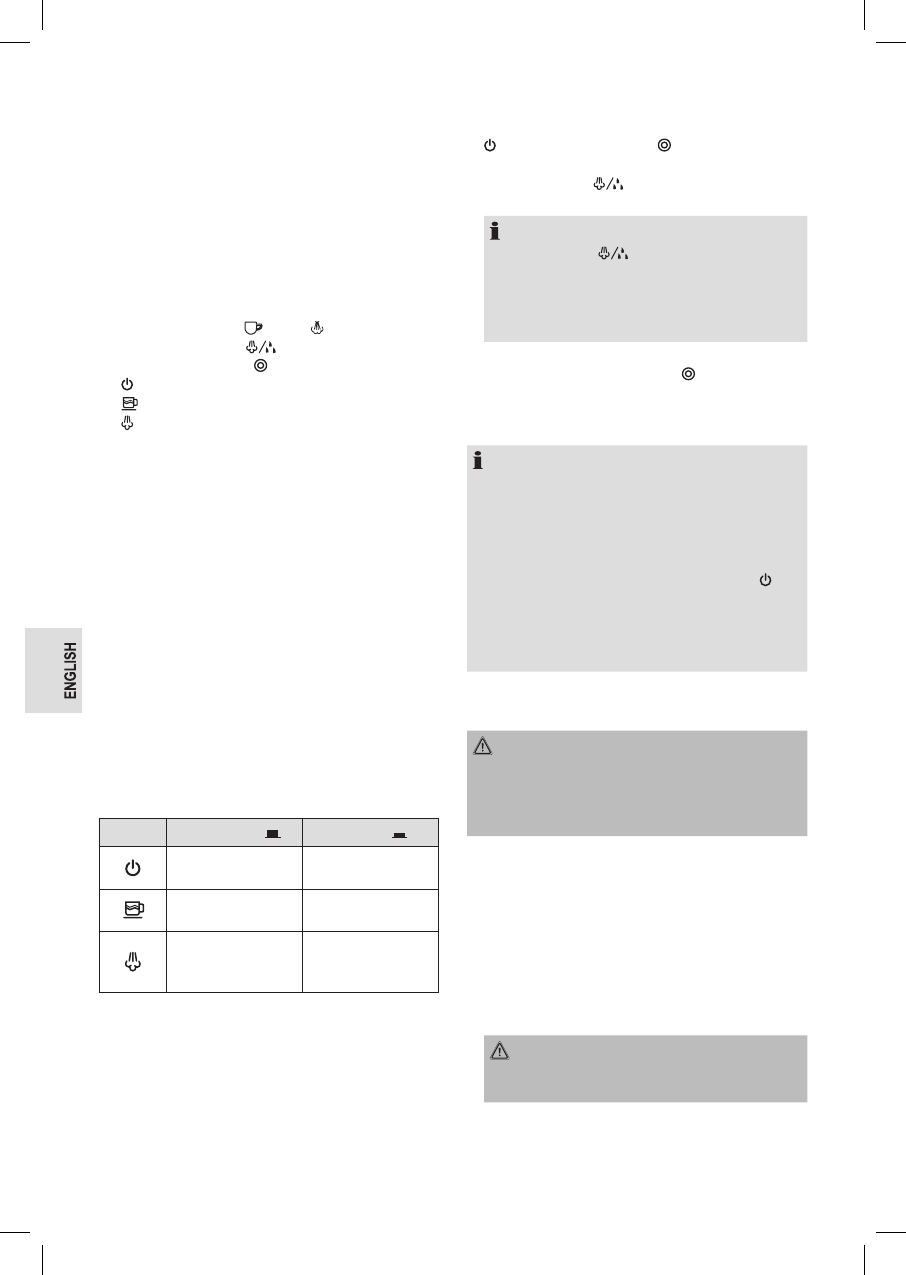
Pressure Switches (13 / 14 / 15)
These pressure switches have the following functions when
locked in place or disengaged:
Switch
Disengaged ( )
Engaged ( )
Off
On
Start dispensing
coffee
Stop dispensing
coffee
The appliance heats
up to the coffee
temperature
The appliance
heats up to steam
temperature
Electric Connection
1. Ensure that your mains power corresponds with the
specifications of the appliance. The specifications are
printed on the type label.
2.
Check the pressure switch settings! The pressure
switches (13 / 14 / 15) must be disengaged.
3. Connect the mains cable to a properly installed and
earthed wall outlet.
On / Off
• Switch on the appliance by engaging the pressure switch
. The operating control lamp lights up. The appli
-
ance starts heating up. The warming plate heats up.
•
The Indicator lamp
lights up as soon as the neces-
sary brewing temperature is reached.
NOTE:
The indicator lamp
turns on and off during opera-
tion. This is normal and indicates that the temperature
is thermostat-controlled and maintained. You can see
the current brewing temperature on the scale of the
temperature display.
•
Turn off the appliance by disengaging the pressure
switch. The operating control lamp goes out. Then
disconnect the mains plug from the socket.
European Regulations on Energy Saving
NOTE:
The European Directive 2009 / 125 / EC (Ecodesign Direc
-
tive) incorporates measurements for energy saving.
Therefore the appliance switches into standby mode after
20 minutes. The operating control lamp indicates this
by pulsing. To use the appliance again, you first have to
switch off the appliance, using the pressure switch .
Switch on the appliance again when the operating control
lamp has gone out.
You benefit from better safety and lower energy con
-
sumption.
Operation
WARNING: Important!
Before use,
always
check the button settings! The pres
-
sure switches must be disengaged and the steam control
knob must be in the
OFF
position before you connect the
appliance to a properly installed grounded socket!
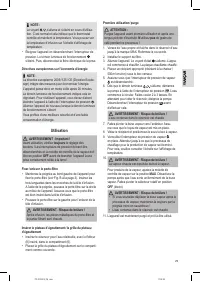
Attach / Detach Filter Holder
•
Hold the handle at the left edge of the appliance to
attach the filter holder (see Fig. B on page 3). Insert the
three guide tabs in the group head recesses. With the
handle pull the filter holder to the right hand side to the
middle of the appliance. Ensure that the filter holder is
well secured in the group head.
•
Pull the filter holder to the left to detach from the group
head.
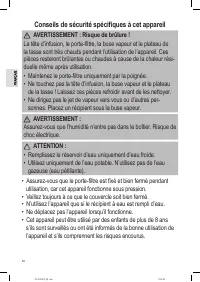
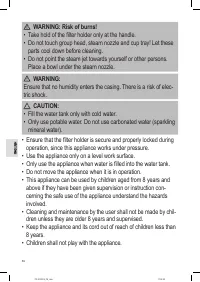
WARNING: Risk of burns!
After brewing the metal parts of filter holder and filter
insert are hot.


