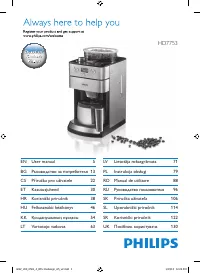
Кофеварка Philips HD7753 - инструкция пользователя по применению, эксплуатации и установке на русском языке. Мы надеемся, она поможет вам решить возникшие у вас вопросы при эксплуатации техники.
Если остались вопросы, задайте их в комментариях после инструкции.
"Загружаем инструкцию", означает, что нужно подождать пока файл загрузится и можно будет его читать онлайн. Некоторые инструкции очень большие и время их появления зависит от вашей скорости интернета.


10
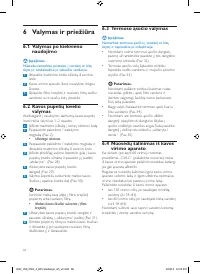
6.4 Descaling the coffeemaker
When the message ‘CALC’ appears on the display
(after approx. 60 brewing processes), you need
to descale the coffeemaker, as scale can clog the
coffeemaker.
Regular descaling prolongs the life of the
coffeemaker and guarantees optimal brewing
results and a constant brewing time for a long
time. Descale the coffeemaker :
•
ever y 120 brewing cycles if you use soft water
(up to 18dH).
•
ever y 60 brewing cycles if you use hard water
(over 18dH).
You can contact your local water board for
information about the water hardness in your
area.
D
Note:
If you do not know the water hardness in your
area and are unable to contact your local water
board, we advise you to descale the appliance
ever y time the ‘CALC’ message appears on the
display.
D
Note:
To remove the ‘CALC’ message from the display,
press the 4-10 cups button and the STRENGTH
button simultaneously.
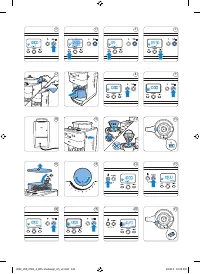
1
Open the water reser voir lid.
2
Fill the water reser voir with 7 cups of white
vinegar (5% acetic acid) and 3 cups of
water (Fig. 36).
3
Place a paper filter (no. 4) in the filter basket
and close the filter basket holder.
4
Put the empty thermos jug in the
appliance (Fig. 7).
5
Put the mains plug in the wall socket.
6
Press the star t/standby button (Fig. 2).
7
Press the pre-ground coffee button to switch
off the grinder. Then press the star t/standby
button to star t the brewing process. (Fig. 8)
8
Wait until half of the vinegar-water solution
has flowed into the jug. Then press the star t/
standby button to stop the brewing process
and let the solution act for at least 15 minutes.
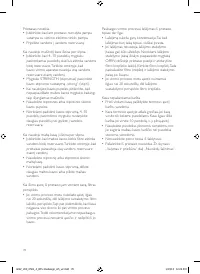
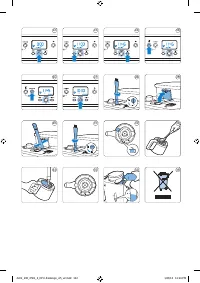
4
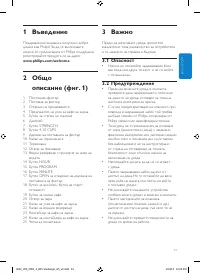
Inser t the flat end of the cleaning brush
handle into the lock of the coffee bean
chute and turn the lock to the ‘open’
position. (Fig. 28)
5
Open the lid of the coffee bean
chute (Fig. 29).
6
Use the cleaning brush to brush ground
coffee residues into the lower par t of the
chute (Fig. 30).
E
Tip:
Place a paper filter or the permanent filter
in the filter basket to collect the ground
coffee.
• The ground coffee residues fall into the filter
basket.
7
Close the lid of the coffee bean chute and
turn the lock to the ‘locked’ position (Fig. 31).
8
Remove the paper filter with the ground
coffee residues and throw it away. If you used
the permanent filter, empty and clean it.
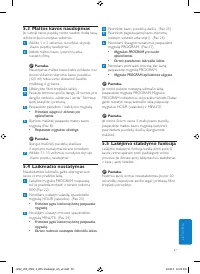
6.3 Cleaning the thermos jug
B
Warning:
Do not immerse the thermos jug in water
or any other liquid and do not clean it in the
dishwasher.
•
To remove the lid from the thermos jug, turn
it by its lever to the ‘remove lid’ symbol. Then
pull the lid off the jug (Fig. 32).
•
Clean the inside of the thermos jug with a
soft brush, hot water and some washing-up
liquid (Fig. 33).
E
Tip:
To remove stubborn brown deposits, fill the
jug with hot water and add a spoonful of
sodium carbonate. Let the sodium carbonate
do its work for some time.
•
After cleaning, rinse the thermos jug with
fresh hot water (Fig. 34).
•
To put the lid on the thermos jug, inser t the
two projections of the lid into the openings
in the rim of the jug. Then turn the lid to the
right to the ‘closed/brewing’ symbol. (Fig. 35)
4222_200_0561_4_DFU-Redeisgn_A5_v2.indd 10
1/23/13 12:24 PM


