
Кофеварка BRAYER BR1102 - инструкция пользователя по применению, эксплуатации и установке на русском языке. Мы надеемся, она поможет вам решить возникшие у вас вопросы при эксплуатации техники.
Если остались вопросы, задайте их в комментариях после инструкции.
"Загружаем инструкцию", означает, что нужно подождать пока файл загрузится и можно будет его читать онлайн. Некоторые инструкции очень большие и время их появления зависит от вашей скорости интернета.


8
9
EN
EN
•
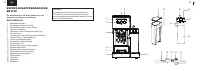
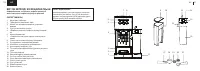
Unpack the coffee maker and remove all the packaging
materials.
• Keep the original package.
• Check the delivery set.
• Read the safety measures and operating
recommendations.
•
Examine the coffee maker for damages, in case of
damage do not plug it into the mains.
•
Make sure that the specifications of power supply
voltage specified on the lower panel of the unit
correspond to the specifications of your mains. When
the unit is used in the mains with 60 Hz frequency, it
does not need any additional settings.
•
Wipe the surface of the coffee maker body with a clean,
slightly damp cloth to remove dust.
•
Before using the coffee maker for the first time, wash all
removable parts (1, 2, 9, 10, 14, 16, 18, 19, 20, 21) with
warm water and neutral detergent and dry them.
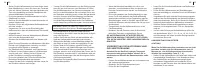
BEFORE USING THE UNIT
ATTENTION!
If you switch the coffee maker on and don’t perform
any actions, the coffee maker will switch off in 15
minutes. To switch the coffee maker on press any
button (5, 7, 8).
•
Place the coffee maker on a steady flat heat-resistant
surface, the distance from the side walls of the coffee
maker should be at least 20 cm, and the gap above the
coffee maker should be at least 30 cm.
•
Do not use the coffee maker under kitchen shelves of
cupboards. They can be damaged by the steam released
during the coffee maker operation.
•
The coffee maker should be placed out of reach of small
children.
Attention!
Before making coffee for the first time it is
recommended to wash the broiler, the cappuccinator lid (14)
and the milk container (16).
• Make sure that the removable tray (1) and the tray grid
(2) are installed to their places.
• Remove the lid (9), remove the water tank (10).
• Fill the tank (10) with cold water up to the maximal level
mark, install the tank (10) back to its place.
Note:
the tank (10) is intended for water only, do not fill the
tank (10) with other liquids, such as milk.
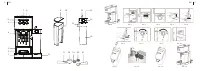
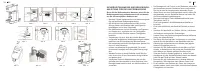
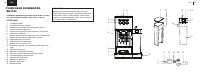
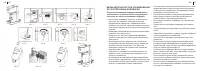
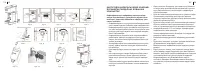
• Take the container (16), pull it towards yourself and
remove it, remove the cappuccinator lid (14) from the
container (16) (pic. 1). Fill the container with water up to
the maximal level mark.
Note:
the cappuccinator container (16) is intended for milk
only, do not fill the container (16) with other liquids, use
water only in the cappuccinator lid (14) washing mode.
• Install the cappuccinator lid (14) on the container (16)
and install the cappuccinator back to its place until the
lock clicking.
Note:
after installing the container (16) with the lid (14) back
to its place always check if it is installed and fixed properly.
• Set the milk supply intensity control knob (15) to the
middle position.
•
Install one of the coffee filters (19 or 20) into the filter
holder (18) matching the ledge on the filter (19 or 20)
with the hole on the holder (18) and turn the filter (19 or
20) counter/clockwise. Do not add ground coffee into
the filter (19 or 20) when preparing the coffee maker
for work.
•
Install the filter holder (18) into the installation place «
» and turn the handle (4) to the right as far as it will
go « » (pic. 2, 3, 4).
• Place a cup of suitable height and capacity of at least
300 ml on the tray grid (2).
• Direct the cappuccinator pipe (13) into the cup using
the cappuccinator pipe angle adjustment bar (12).
• Insert the power plug into the mains socket.
•
Switch the coffee maker on by setting the power switch
(11) «0/I» to the position «I», the indicator (6) will light
up and start flashing.
•
When the coffee maker is ready for operation, the light
indicator (6) will glow constantly.
• To switch the cleaning mode on press the
«Cappuccino»-button (7) twice.
•
After you finish cleaning the coffee maker, switch the
coffee maker off by setting the switch (11) «0/I» to the
position «0».
• Pour the water out of the cup, take the container (16),
pull it towards yourself and remove (pic. 1), remove the
cappuccinator lid (14) from the container (16), pour the
remaining water from the container (16). Slightly lift the
front part of the tray (1) and remove it, pour the water
out of it and install the tray (1) back to its place.
•
Turn the filter holder handle (4) to the left and remove it
(pic. 2, 3, 4). Wait until the filter holder (18) cools down
completely and remove the installed filter (19 or 20)
turning it counter/clockwise. Wash the filter (19 or 20)
and install it into the filter holder (18).
• If necessary, clean the boiler and the cappuccinator lid
(14) several times.
•
After cleaning the coffee maker is ready for operation.
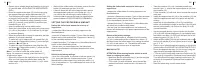
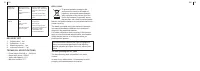
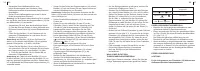
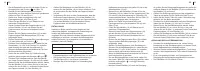
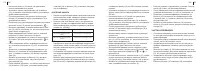
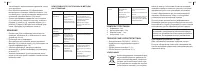
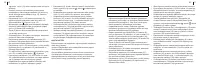
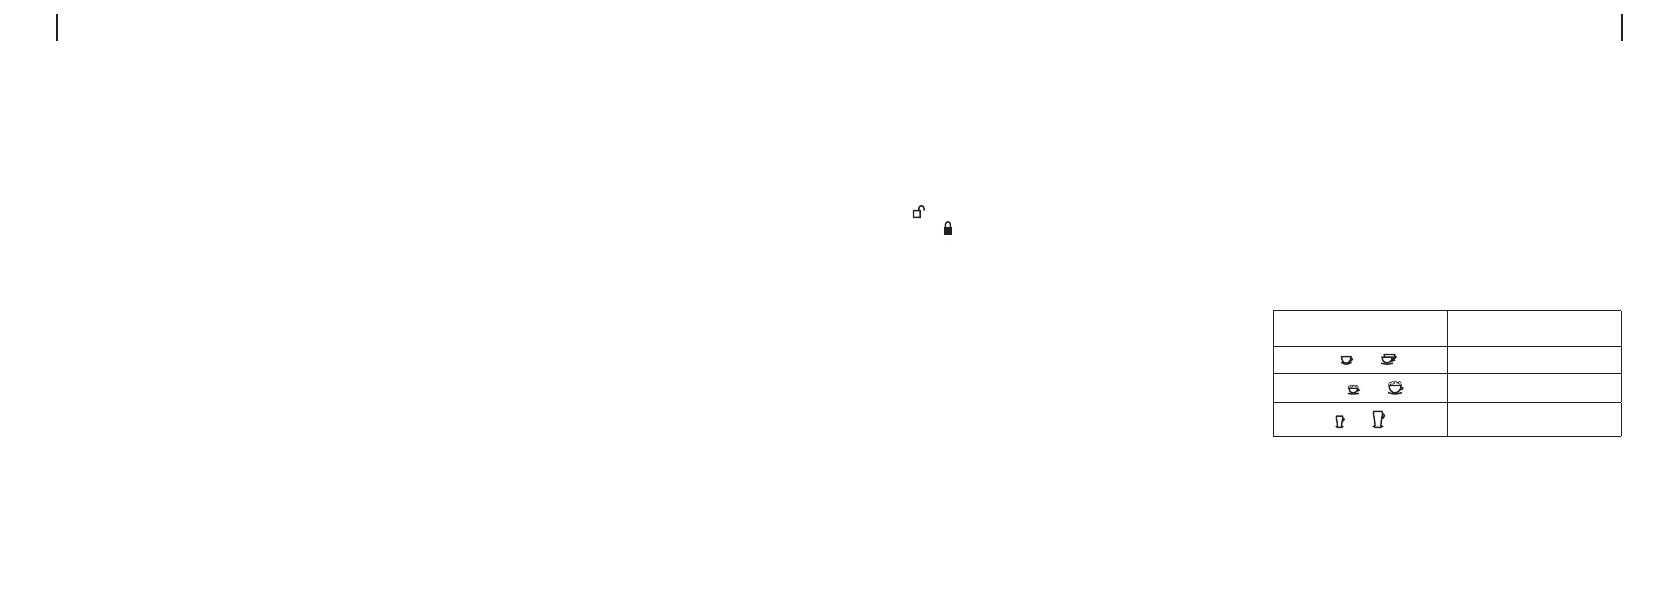
CHOOSING THE APPROPRIATE CUP
•
Before making coffee, please, select a cup of
appropriate capacity according to the table:
Drink
Estimated amount of the ready
drink
Espresso:
оne /
double
60 ml/119 ml
Cappuccino:
оne /
double
178 ml/355 ml
Latte: one / double
296 ml/474 ml
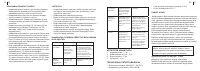
RULES OF MAKING ESPRESSO
•
Use fresh-ground coffee beans or ground coffee for
«espresso» coffee makers.
•
Make even and slightly tamp the ground coffee in the
filter (19 or 20), you can do it with the back side of the
measuring spoon (21) (pic. 5, 6, 7).
Содержание
- 21 Перед использованием кофеварки внимательно
- 22 ПОДГОТОВКА КОФЕВАРКИ К РАБОТЕ
- 23 ВЫБОР ПРАВИЛЬНОГО ОБЪЁМА ЧАШКИ; ПРАВИЛА ПРИГОТОВЛЕНИЯ ЭСПРЕССО
- 26 ПРИГОТОВЛЕНИЕ МОЛОЧНОЙ ПЕНКИ; ЧИСТКА КАПУЧИНАТОРА
- 27 УДАЛЕНИЕ НАКИПИ; ЧИСТКА КОФЕВАРКИ
- 28 ХРАНЕНИЕ; НЕИСПРАВНОСТИ, ИХ ПРИЧНИЫ И МЕТОДЫ; КОМПЛЕКТ ПОСТАВКИ; УТИЛИЗАЦИЯ
Характеристики

Остались вопросы?Не нашли свой ответ в руководстве или возникли другие проблемы? Задайте свой вопрос в форме ниже с подробным описанием вашей ситуации, чтобы другие люди и специалисты смогли дать на него ответ. Если вы знаете как решить проблему другого человека, пожалуйста, подскажите ему :)


Здравствуйте! Очень люблю свою кофеварку , но стала подводить она меня. Вместо пенки бежит только молоко.Что делать?