
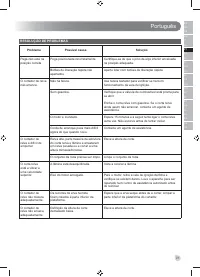
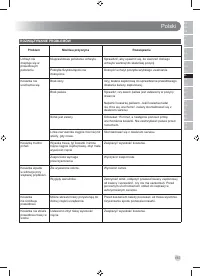
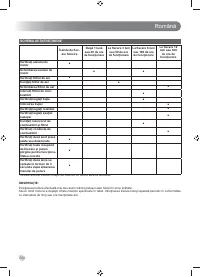
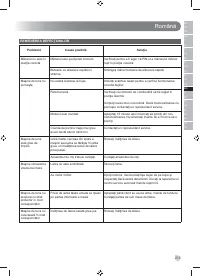
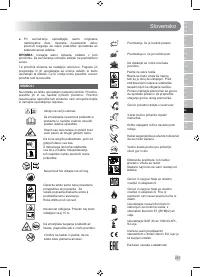
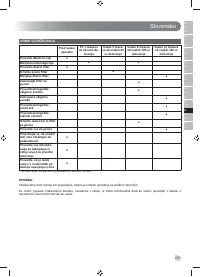
Газонокосилки Ryobi RLM46175Y 5133003671 - инструкция пользователя по применению, эксплуатации и установке на русском языке. Мы надеемся, она поможет вам решить возникшие у вас вопросы при эксплуатации техники.
Если остались вопросы, задайте их в комментариях после инструкции.
"Загружаем инструкцию", означает, что нужно подождать пока файл загрузится и можно будет его читать онлайн. Некоторые инструкции очень большие и время их появления зависит от вашей скорости интернета.


English
6
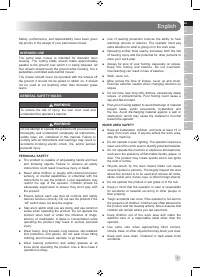
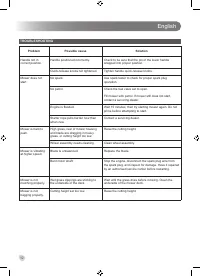
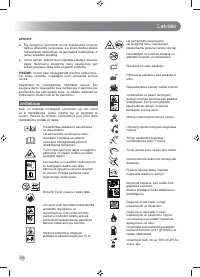
OPERATION
FUEL AND REFUELLING
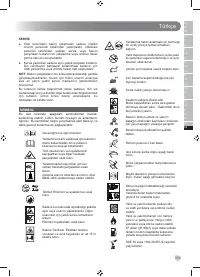
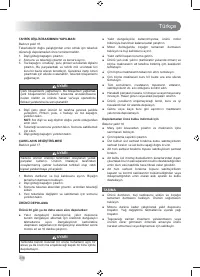
WARNING
Always handle petrol with care; it is highly flammable.
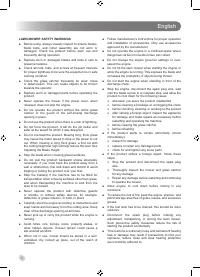
■
Use fresh fuel.
■
Store fuel in containers specifically designed for this
purpose.
■
Always refuel outdoors where there are no sparks and
flames. Do not inhale fuel vapour. Do not smoke. Stay
away from open flames and sparks when filling fuel tank
or when handling fuel.
■
Do not let petrol or oil come in contact with your skin.
■
Keep petrol and oil away from the eyes. If petrol or oil
comes in contact with the eyes, wash them immediately
with clean water. If irritation is still present, see a doctor
immediately.
■
Immediately clean up spilled petrol.
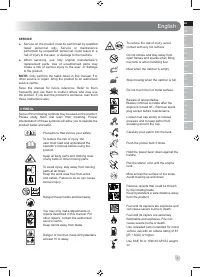
FILLING THE TANK
See figure 5.
WARNING
Always shut off engine and allow it to cool for 5 minutes
before refuelling. Never remove the cap of the fuel tank
or add petrol to a machine with a running or hot engine.
Move at least 9 m (30 ft) from refuelling site before
starting the engine. Do not smoke. Failure to heed this
warning could result in serious personal injury.
WARNING
Do not overfill. Fill the fuel tank to 25 mm below the top
of the fuel neck. After fueling, never tilt the mower more
than 25 degrees for this could result in fuel leakage and
risk of fire, etc.
1. Clean surface around the fuel cap to prevent
contamination.
2. Slowly loosen the fuel cap to release pressure and to
keep fuel from escaping around the cap. Rest the cap
on a clean surface.
3. Carefully pour petrol into the tank. Avoid spillage.
4. Clean and inspect the gasket. Replace and secure all
fuel and container caps.
5. Wipe up any fuel spillage. Move 9 m away from the
refuelling site before starting the engine.
NOTE:
It is normal for smoke to be emitted from a new
engine during and after first use.
ADDING/CHECKING ENGINE OIL
See figure 5.
Engine oil has a major influence on engine performance
and service life. For general, all-temperature use, SAE
10W-30 is recommended. Always use a 4-cycle motor oil
that meets or exceeds the requirements for API service
classification SJ.
NOTE:
Non-detergent or 2-cycle engine oils will damage
the engine and should not be used.
To add engine oil:
1. Be sure the mower is level and the area around the oil
cap/dipstick is clean.
2. Remove the cap and the seal from the oil bottle.
3. Open the oil cap/dipstick by turning it 90°
counterclockwise. Remove the oil cap/dipstick.
4. Slowly add oil. Fill to the “Full” line on the dipstick. Do
not overfill.
NOTE:
When checking the oil level, seat the dipstick in the
oil fill hole but do not screw in.
5. Reinstall and secure the oil cap/dipstick by turning it
90° clockwise.
To check engine oil:
■
Be sure mower is level and area around oil cap/dipstick
is clean.
■
Remove the oil cap/dipstick. Wipe clean and reseat in
the oil fill hole but do not screw in.
■
Remove the oil cap/dipstick again and check the oil
level. Add oil as needed.
STARTING OR STOPPING THE MOWER
See figure 5.
WARNING
Never start or run the engine inside a closed or poorly
ventilated area; breathing exhaust fumes can kill.
NOTE:
The engine is provided with a shut-off valve. Turn
the fuel off at the conclusion of mowing.
Starting the engine
1. Open the fuel valve.
2. Press the primer bulb 3 times.
NOTE:
This step is not usually necessary when starting
an engine that has already run for a few minutes.
3. Hold the power lever bar down against the handle.
4. Pull the starter grip until the engine starts. Slowly
release the starter cord so that the rope does not snap
back.
NOTE:
It may be necessary to repeat the priming steps
in cooler weather. In warmer weather, overpriming may
cause flooding and the engine will not start. If you do
flood the engine, wait a few minutes before attempting
to start and do not repeat priming steps.


