
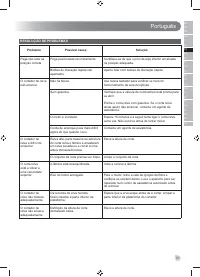
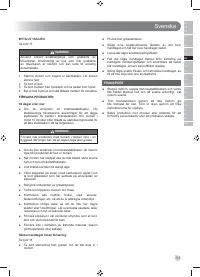
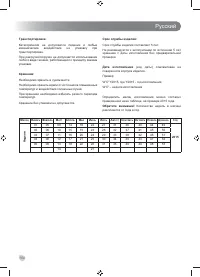
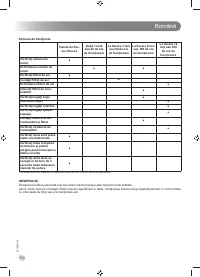
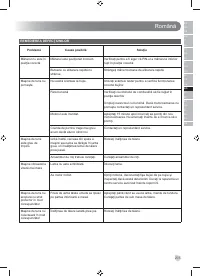
Газонокосилки Ryobi 4-in-1 RLM46175S 5133002553 - инструкция пользователя по применению, эксплуатации и установке на русском языке. Мы надеемся, она поможет вам решить возникшие у вас вопросы при эксплуатации техники.
Если остались вопросы, задайте их в комментариях после инструкции.
"Загружаем инструкцию", означает, что нужно подождать пока файл загрузится и можно будет его читать онлайн. Некоторые инструкции очень большие и время их появления зависит от вашей скорости интернета.


English
7
EN
FR
DE
ES
IT
NL
PT
DA
SV
FI
NO
RU
PL
CS
HU
RO
LV
LT
ET
HR
SL
SK
BG
UK
■
To raise the blade height, grasp the height adjustment
lever and move it toward the back of the mower.
■
To lower the blade height, grasp the height adjustment
lever and move it toward the front of the mower.
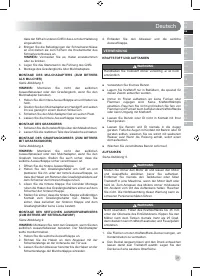
SETTING HANDLE HEIGHT AND ANGLE
See figure 8.
The height of the handle can be easily adjusted for operator
preference.
To adjust the handle height:
■
Remove the quick-release knob.
■
Slide out the quick-release lever and adjust the height
to the other opening.
■
Reinstall the quick-release fastener. Tighten the quick-
release knob.
■
Repeat on the other side of the handle.
To adjust the handle angle:
■
Release the lower quick-release fasteners.
■
Change the handle angle according to preference.
Ensure the locking pin on the lower handle is inserted
in the hole of the bracket.
NOTE:
The product has a 3-point handle angle
adjustment setting.
■
Reinstall the lower quick-release fasteners.
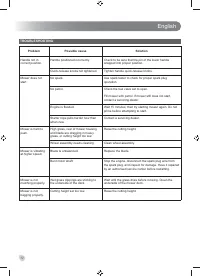
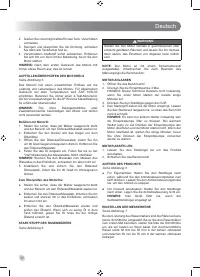
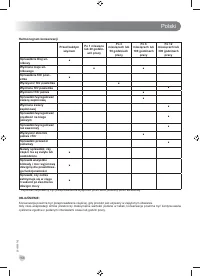
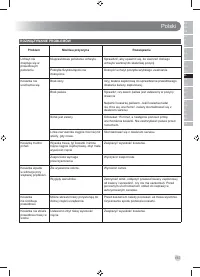
MOWING TIPS
■
Make sure the lawn mower mowing area is clear of
stones, sticks, wires, and other objects that could
damage the lawn mower blades or engine. Such
objects could be accidentally thrown by the mower in
any direction and cause serious personal injury to the
operator and others.
■
For best performance, always cut off one-third or less of
the total height of the grass.
■
When cutting long grass, reduce walking speed to allow
for more effective cutting and a proper discharge of the
clippings.
■
Do not cut wet grass, it will stick to the underside of the
deck and prevent proper bagging or mulching of grass
clippings.
■
New or thick grass may require a higher cutting height
and a narrower cutting path.
■
Clean the underside of the mower deck after each use
to remove grass clippings, leaves, dirt, and any other
accumulated debris. Refer to “Cleaning the underside
of the mower deck” section.
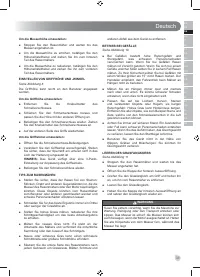
SLOPE OPERATION TIPS
See figure 10.
■
Slopes are a major factor related to slip-and-fall
accidents that can result in severe injury. Operation on
slopes requires extra caution. If you feel uneasy on a
slope, do not mow it. For your safety, do not attempt to
mow slopes greater than 15 degrees. Do not use the
drive wheels when mowing on slopes.
■
Mow across the face of slopes, never up and down.
Exercise extreme caution when changing direction on
slopes.
■
Watch for holes, ruts, rocks, hidden objects, or bumps
which can cause you to slip or trip. Tall grass can hide
obstacles. Remove all objects such as rocks, tree limbs,
etc., which could be tripped over or thrown by the blade.
■
Always be sure of your footing. A slip and a fall can
cause serious personal injury. If you feel you are losing
your balance, immediately release the power lever.
■
Do not mow near drop-offs, ditches, or embankments;
you could lose your footing or balance.
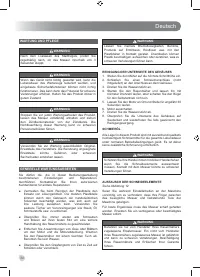
EMPTYING THE GRASS CATCHER
See figure 11.
1. Stop the product and wait for the blade to come to a
complete stop.
2. Lift the rear discharge door.
3. Grasp grass catcher by its handle and lift to remove
from the product.
4. Empty grass clippings.
5. Lift the rear discharge door and reinstall the grass
catcher.
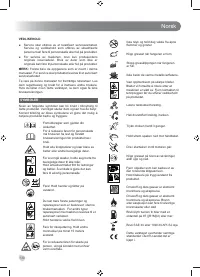
WARNING
Use extreme caution when lifting or tilting the product for
maintenance, cleaning, storage or transportation. The
blade is sharp. Even though the engine is shut off, the
blades can still be moved. Keep all body parts away from
the blade while it is exposed.
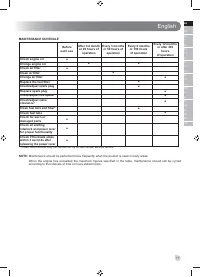
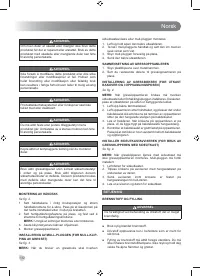
MAINTENANCE
WARNING
After releasing the power lever, regularly check if the
blade stops in 3 seconds.
WARNING
If the product is not maintained correctly, the life span of
the product may be reduced, and built-in safety features
may not function correctly, thus increasing the potential
for serious injury. Keep the product in good working
condition.
WARNING
Before performing any maintenance, stop the product,
allow the blade to come to a complete stop, and
disconnect the spark plug wire from the spark plug.
Failure to heed this warning could result in serious
personal injury.


