
Вытяжки Zigmund & Shtain K 333.41 S - инструкция пользователя по применению, эксплуатации и установке на русском языке. Мы надеемся, она поможет вам решить возникшие у вас вопросы при эксплуатации техники.
Если остались вопросы, задайте их в комментариях после инструкции.
"Загружаем инструкцию", означает, что нужно подождать пока файл загрузится и можно будет его читать онлайн. Некоторые инструкции очень большие и время их появления зависит от вашей скорости интернета.


8
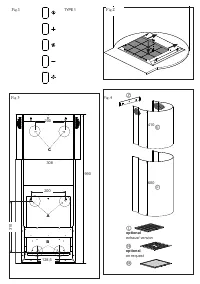
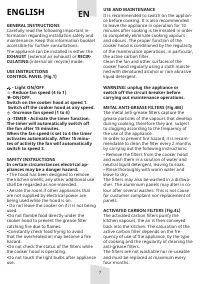
To assemble the carbon filter it is necessary
to:
-remove the metal anti-grease filters
(Fig.4M)
-if present, extract the 'easy-clean' panel
(Fig.4N) by unscrewing the 4 screws.
-remove the carbon filter unscrewing the
screw (Fig.2)
INSTALLING INSTRUCTIONS
The appliance can be installed in 2 ways:
•EXHAUST-AIR MODE:
the kitchen vapours
are purified by the metal anti-grease filters
and carried outside through a ducting
system.
•RECIRCULATING-AIR MODE:
the kitchen
vapours are purified by the metal anti-
grease filters and an activated carbon filter
(sold separately), then conveyed back into
the kitchen.
We suggest to have installation carried
out by qualified personnel, in compliance
with all the current regulations and in
particular with the ones concerning air
exhaust and electrical connection.
The manufacturer cannot be held liable
for damages caused by improper instal
-
lation or if it has not been carried out
according to the state-of-the-art.
IMPORTANT
The appliance must be installed at a mini-
mum height of 650 mm from an electric coo-
ker stove, or 750 mm from gas or combined
cooker stoves (fig.9). If a connection tube
composed of two parts is used, the upper
part must be placed outside the lower part.
Do not connect the cooker hood exhaust
to the same conductor used to circulate
hot air or for evacuating fumes from other
appliances generated by other than an
electrical source.Take care when the cooker
hood is operating simultaneously with an
open fireplace or burner that depend on the
air in the environment and are supplied by
other than electrical energy, as the cooker
hood removes the air from the environment
which a burner or fireplace need for com
-
bustion. The negative pressure in the
environment must not exceed 4 Pa (4x10 –5
bar). Provide adequate ventilation in the en-
vironment for a safe operation of the cooker
hood. Follow the local laws applicable for
external air evacuation.
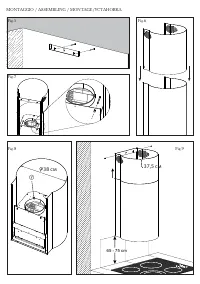
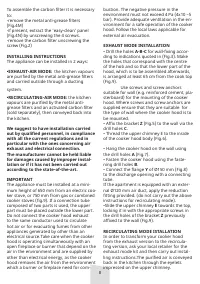
EXHAUST MODE INSTALLATION
• Drill the holes
A-B-C
for wall-fixing accor
-
ding to indications quoted in (Fig.3). Make
the holes that correspond with the centre
of the hob and so that the lower part of the
hood, which is to be assembled afterwards,
is arranged at least 65 cm from the cook top
(Fig.9).
Use screws and screw anchors
suitable for wall (e.g. reinforced cement, pla-
sterboard) for the mounting of the cooker
hood. Where screws and screw anchors are
supplied ensure that they are suitable for
the type of wall where the cooker hood is to
be mounted.
• Affix the bracket
Z
(Fig.5) to the wall via the
drill holes
C
.
• Thread the upper chimney E to the inside
of the cooker hood body (Fig.6).
• Hang the cooker hood on the wall using
the drill holes
A
(Fig.7).
• Fasten the cooker hood using the faste-
ning drill holes
B
.
• Connect the flange
Y
of Ø150 mm (Fig.8)
to the discharge opening with a connecting
tube.
If the apartment is equipped with an exter-
nal Ø120 mm air duct, apply the reduction
fitting provided. (do not carry out the above
instructions for recirculating mode).
•Slide the upper chimney
E
towards the top,
locking it in with the appropriate screws in
the drill holes of the bracket
Z
previously
affixed to the wall (Fig.9).
RECIRCULATING MODE ISTALLATION
In order to transform your cooker hood
from the exhaust version to the recircula-
ting version, ask your local retailer for the
exhaust mode kit and then carry out instal-
ling instructions.The purified air is conveyed
back in the kitchen through the eyelets
impressed on the upper chimney.


