
Вытяжки Kuppersberg 60 X - инструкция пользователя по применению, эксплуатации и установке на русском языке. Мы надеемся, она поможет вам решить возникшие у вас вопросы при эксплуатации техники.
Если остались вопросы, задайте их в комментариях после инструкции.
"Загружаем инструкцию", означает, что нужно подождать пока файл загрузится и можно будет его читать онлайн. Некоторые инструкции очень большие и время их появления зависит от вашей скорости интернета.

24
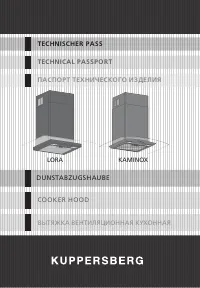
TECHNICAL PASSPORT
ENGLISH
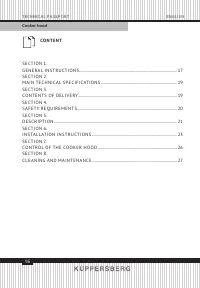
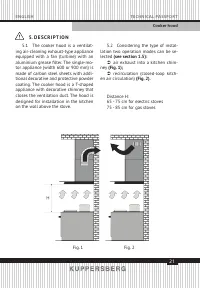
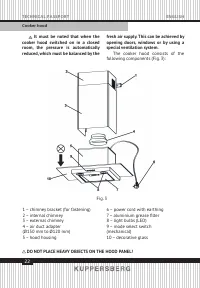
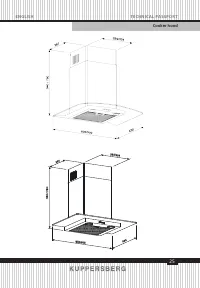
Cooker hood
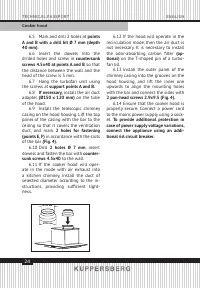
6.5 Mark and drill 2 holes at
points
A and B with a drill bit Ø 7 mm (depth
40 mm).
6.6 Insert the dowels into the
drilled holes and screw in
countersunk
screws 4.5x40 at points A and B, so that
the distance between the wall and the
head of the screw is 5 mm.
6.7 Hang the turbofan unit using
the screws at
support points A and B.
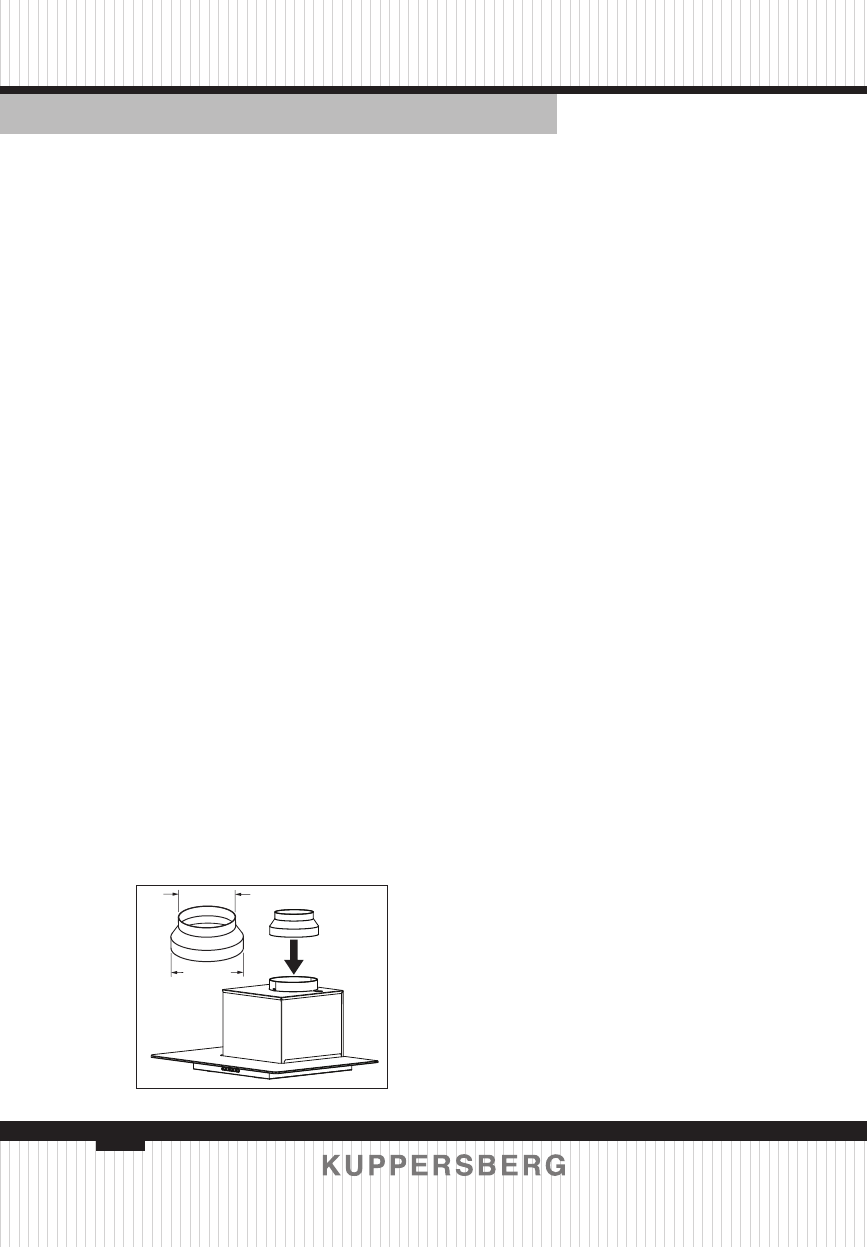
6.8
If necessary, install the air duct
adapter
(Ø150 x 120 mm) on the tube
of the hood.
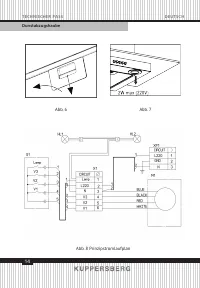
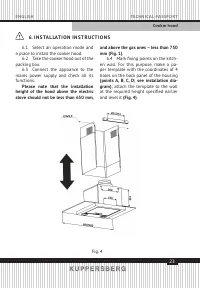
6.9 Install the telescopic chimney
casing on the hood housing. Lift the top
panel of the casing with the bar to the
ceiling so that it covers the ventilation
duct, and mark
2 holes for fastening
(points E, F) in accordance with the slots
of the bar
(Fig. 4).
6.10 Drill
2 holes Ø 7 mm, insert
dowels and fasten the bar with
counter-
sunk screws 4.5x40 to the wall.
6.11 If the cooker hood will oper-
ate in the mode with air exhaust into
a kitchen chimney, install the duct of
selected diameter according to the in-
structions, providing sufficient tight
-
ness.
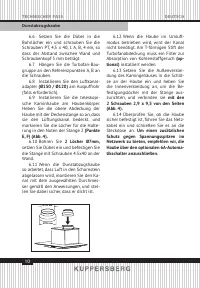
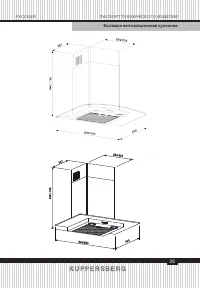
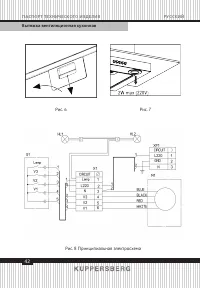
Ø120 мм
Ø150 мм
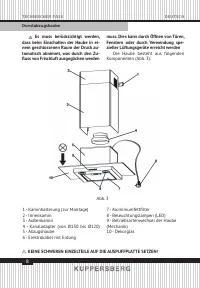
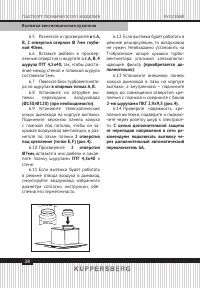
6.12 If the hood will operate in the
recirculation mode, then the air duct is
not necessary. It is necessary to install
the odor-absorbing carbon filter
(op-
tional) on the T-shaped pin of a turbo-
fan lid.
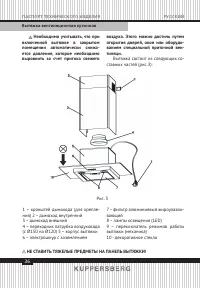
6.13 Install the outer panel of the
chimney casing into the grooves on the
hood housing, and lift the inner one
upwards to align the mounting holes
with the bar and connect the sides with
2 pan-head screws 2.9x9.5 (Fig. 4).
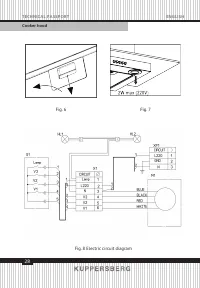
6.14 Ensure that the cooker hood is
properly secure. Connect a power cord
to the mains power supply using a sock-
et.
To provide additional protection in
case of power supply voltage variations,
connect the appliance using an addi-
tional 6А circuit breaker.
Содержание
- 31 К СВЕДЕНИЮ ПОКУПАТЕЛЕЙ!
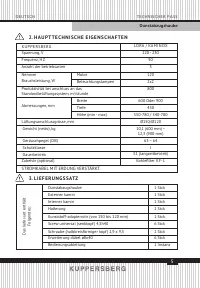
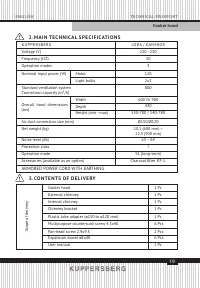
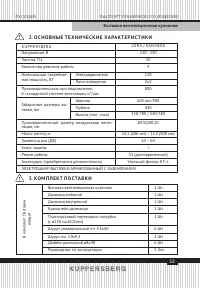
- 33 О С Н О В Н Ы Е Т Е Х Н И Ч Е С К И Е Х А РА КТ Е Р И СТ И К И; K U P P E R S B E RG; КО М П Л Е КТ П О СТА В К И
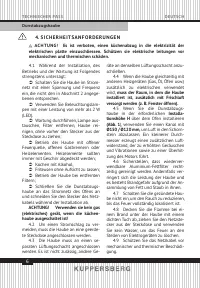
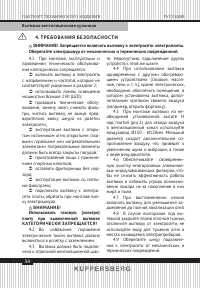
- 34 Т Р Е Б О В А Н И Я Б Е З О П АС Н О СТ И; плиту при выключенной вытяжке
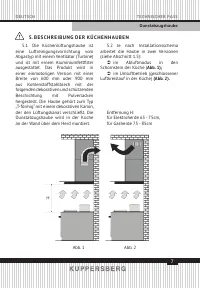
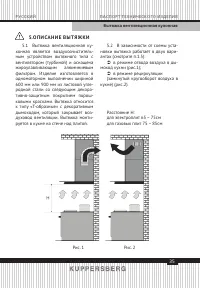
- 35 О П И СА Н И Е В Ы Т Я Ж К И
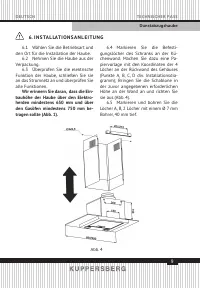
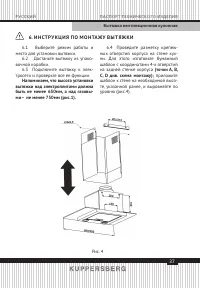
- 37 И Н СТ Р У К Ц И Я П О М О Н ТА ЖУ В Ы Т Я Ж К И; Напоминаем, что высота установки
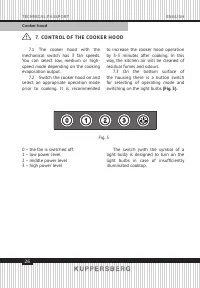
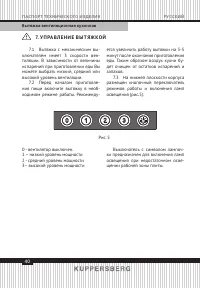
- 40 У П РА В Л Е Н И Е В Ы Т Я Ж КО Й
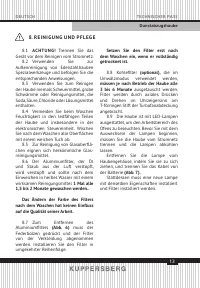
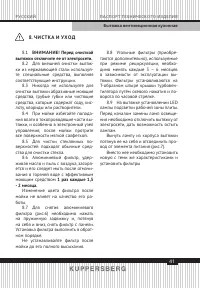
- 41 Ч И СТ К А И У Х О Д; В Н И М А Н И Е! Перед очисткой
- 43 конструкцию, комплектацию и дизайн приборов.
- 46 УСТА Н О В КА, ГА РА Н Т И Й Н О Е И П О СТ ГА РА Н Т И Й Н О Е О Б С Л УЖ И В А Н И Е; Телефон горячей линии Kuppersberg:; Полный список авторизованных сервисных центров Kuppersberg; УСЛОВИЯ ГАРАНТИИ
Характеристики

Остались вопросы?Не нашли свой ответ в руководстве или возникли другие проблемы? Задайте свой вопрос в форме ниже с подробным описанием вашей ситуации, чтобы другие люди и специалисты смогли дать на него ответ. Если вы знаете как решить проблему другого человека, пожалуйста, подскажите ему :)


