
Вытяжки Falmec Lumina 120 - инструкция пользователя по применению, эксплуатации и установке на русском языке. Мы надеемся, она поможет вам решить возникшие у вас вопросы при эксплуатации техники.
Если остались вопросы, задайте их в комментариях после инструкции.
"Загружаем инструкцию", означает, что нужно подождать пока файл загрузится и можно будет его читать онлайн. Некоторые инструкции очень большие и время их появления зависит от вашей скорости интернета.


29
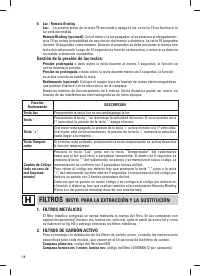
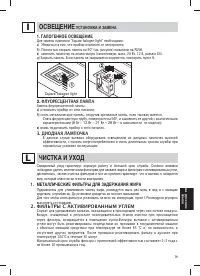
3. CLEANING THE OUTSIDE OF THE APPLIANCE
It is advised to clean the external hood surfaces at least every 15 days in order to avoid
that oily or greasy substances affect the steel surfaces.
The ouside of the range hhod should be cleaned using a damp cloth and neutral liquid
detergent or denatured alcohol.
In case of fingerprint-less finish (fasteel) clean only with water and neutral soap using
clean with a soft cloth, rinse and wipe dry thoroughly. Do not use products that contain
abrasive substances, rough cloths or cloths specifically designed for cleaning steel. Using
abrasive substances or rough cloths will inevitably damage the finish of steel. The steel
surface will be irrevocably damaged if the instructions above are not complied with. Keep
these instructions together with the instructions for use of your hood.
The manufacturer accepts no liability for any damage caused by non-compliance with the
instructions above.
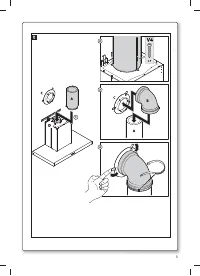
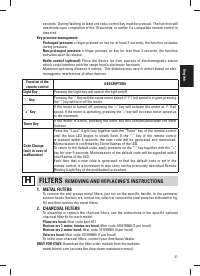
4. CLEANING THE INSIDE OF THE APPLIANCE
The electrical parts or parts of the motor assembly inside the range hood must not be
cleaned using liquids or solvents.
Do not use abrasive products.
All the above operations must be performed after having disconnected the appliance from the
mains power supply.
WARRANTY
M
The new equipment is covered by warranty. The warranty conditions are provided by the
distributor.
The manufacturer is not liable for any inaccuracies in this booklet resulting from printing or
transcription errors. The manufacturer reserves the right to modify its products as it consid-
ers necessary or in the interests of the user, without compromising their essential safety and
operating characteristics.
N
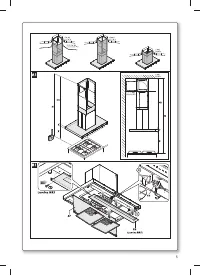
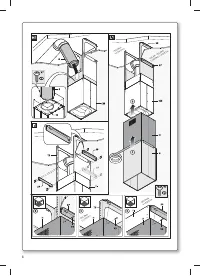
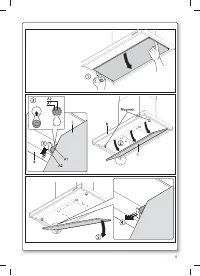
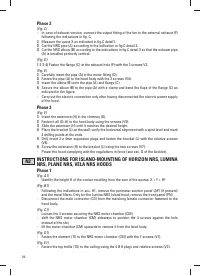
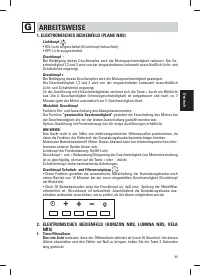
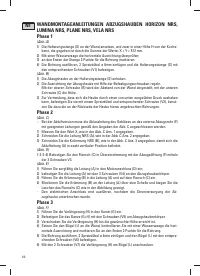
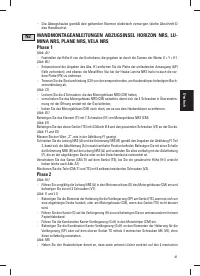
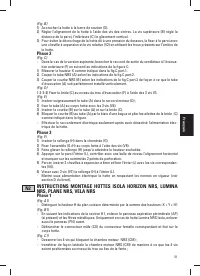
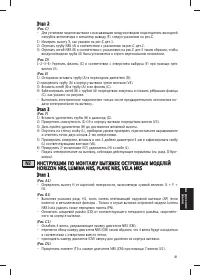
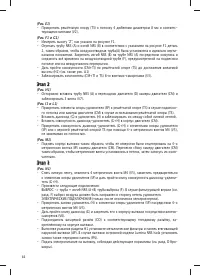
MOUNTING INSTRUCTIONS
WARNING:
Failure to install the screws or fixing device in accordance with these instructions
may result in electrical hazards.
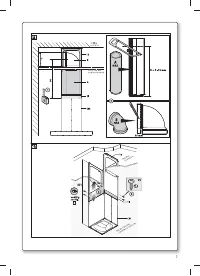
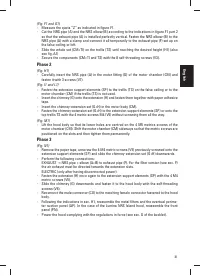
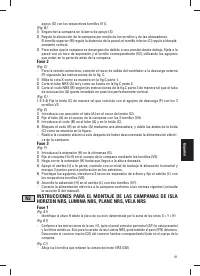
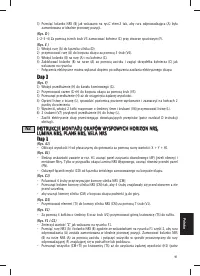
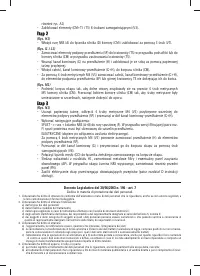
N1 INSTRUCTIONS FOR WALL-MOUNTING OF HORIZON NRS, LUMINA
NRS, PLANE NRS, VELA NRS HOODS
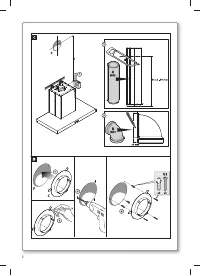
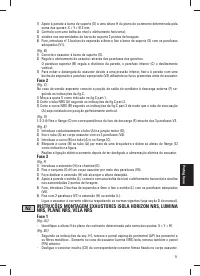
Phase 1
(Fig. A)
1) Place the support bar (S) on the wall at a height H from cooker resulting from the sum of
the quotas: X + Y + 512 mm.
2) With a spirit level, verify the horizontal alignment;
3) mark 2 drilling points at the ends of support bar.
4) Drill, insert 2 ø 8mm expansion plugs and fasten the support bar (S) with the relative screws (V1).
(Fig. B)
1) Hook the hood on the support bar (S).
2) Adjust the alignment of the hood, using the fixing screws. The upper screw (B) adjusts the
distance from the wall, the lower one (C) the vertical scrolling.
3) To prevent the hood from falling due to a pressure below, fasten it to the wall with an ex-
pansion plug and relative screw (V2) using the appropriate holes on the back of the hood.
English
Содержание
- 76 íÖïçàóÖëäàÖ ïÄêÄäíÖêàëíàäà; åéçíÄÜ; éëçéÇçõÖ áÄåÖóÄçàü; èéÑäãûóÖçàÖ ùãÖäíêéùçÖêÉàà
- 78 рис
- 80 îàãúíêõ; àçëíêìäñàà èé àáÇãÖóÖçàû à áÄåÖçÖ; åÖíÄããàóÖëäàÖ îàãúíêõ
- 81 éëÇÖôÖçàÖ; ìëíÄçéÇäÄ à áÄåÖçÄ; ÉÄãéÉÖççéÖ éëÇÖôÖçàÖ; óàëíäÄ à ìïéÑ; åÖíÄããàóÖëäàÖ îàãúíêõ Ñãü áÄÑÖêÜÄçàü ÜàêÄ
- 82 ÉÄêÄçíàà; Этап
Характеристики

Остались вопросы?Не нашли свой ответ в руководстве или возникли другие проблемы? Задайте свой вопрос в форме ниже с подробным описанием вашей ситуации, чтобы другие люди и специалисты смогли дать на него ответ. Если вы знаете как решить проблему другого человека, пожалуйста, подскажите ему :)


