
Вытяжки Elica Getup BL MAT/A/90 - инструкция пользователя по применению, эксплуатации и установке на русском языке. Мы надеемся, она поможет вам решить возникшие у вас вопросы при эксплуатации техники.
Если остались вопросы, задайте их в комментариях после инструкции.
"Загружаем инструкцию", означает, что нужно подождать пока файл загрузится и можно будет его читать онлайн. Некоторые инструкции очень большие и время их появления зависит от вашей скорости интернета.


34
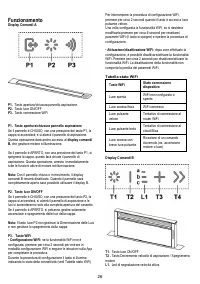
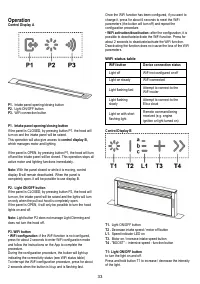
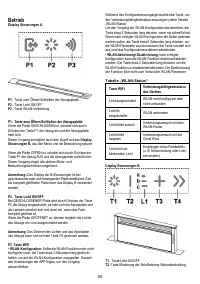
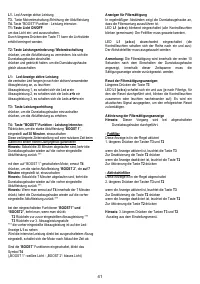
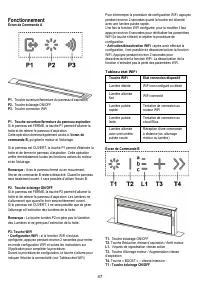
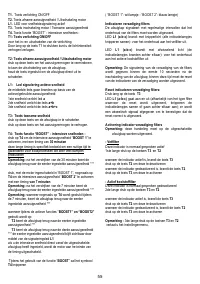
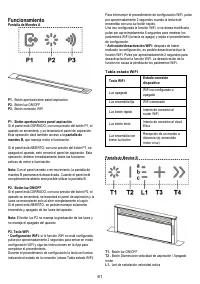
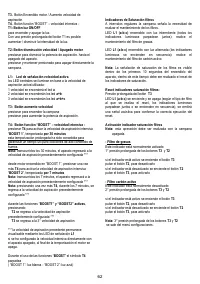
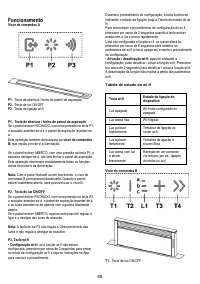
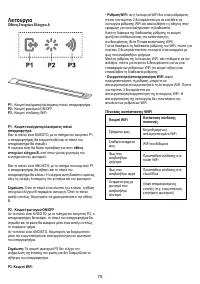
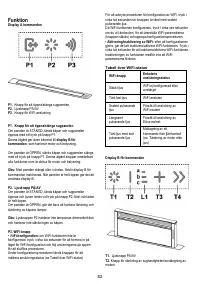
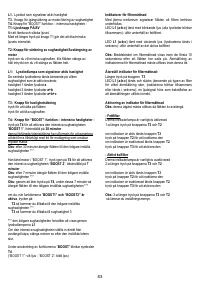
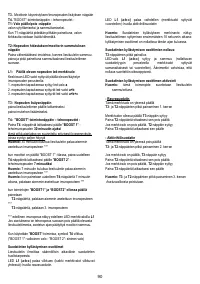
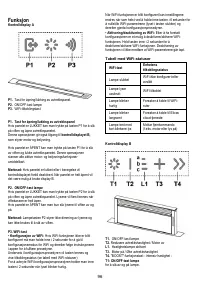
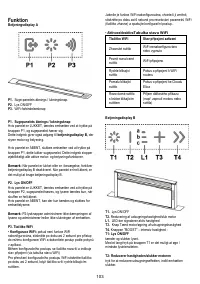
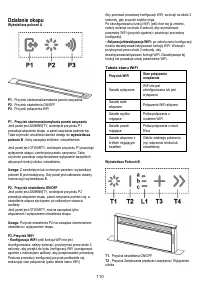
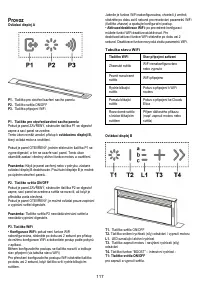
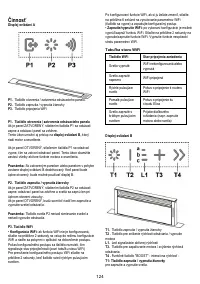
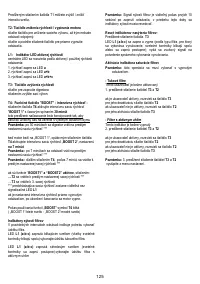
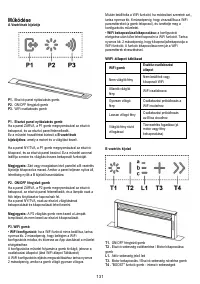
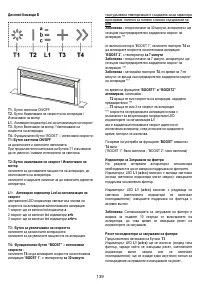
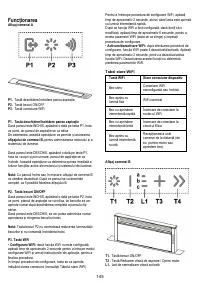
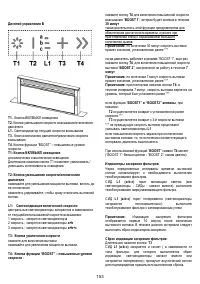
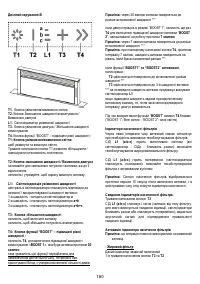
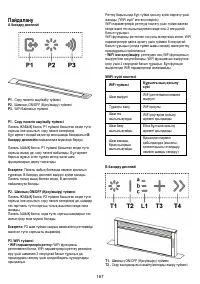
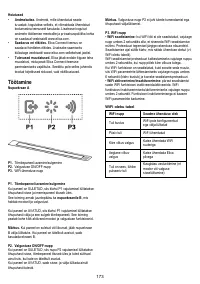
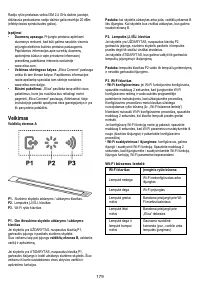
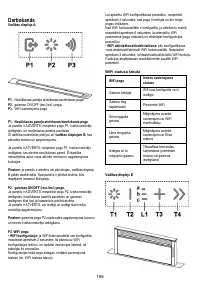
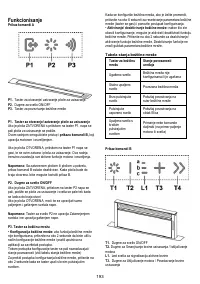
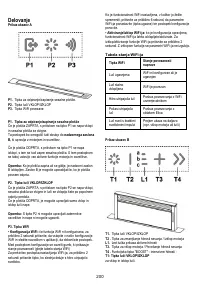
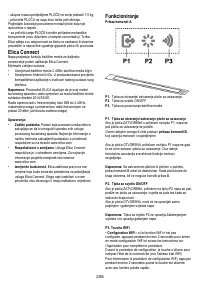
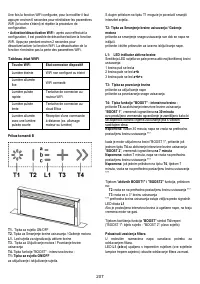
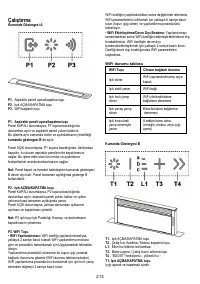
T2:
Decrease speed / motor off button
press the decrease the intake power, until the extractor hood
is turned off.
press and hold to turn the hood off directly.
L1:
Speed indicator LED on
the central LEDs light up according to the intake speed
active/used:
1st speed, LED
a
will light up
2nd speed, LEDs
a+b
will light up
3rd speed, LEDs
a+b+c
will light up
T3: Increase speed button
press to turn the hood on
press to increase the intake power.
T4:
"BOOST” –
intensive speed - function button
press
T4
to activate the intensive intake speed “
BOOST 1
”,
timed
for 30 minutes
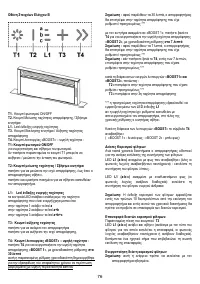
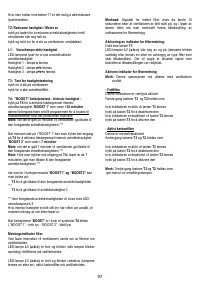
this prolonged timing has been designed to guarantee a
suitable cooking time for preparations that release high
amounts of smoke during cooking
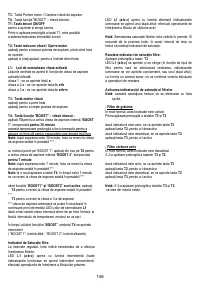
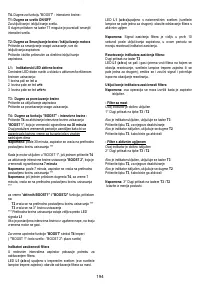
Note:
after the 30 minutes, the hood will go back to the
previously set intake speed ***
with the motor on “BOOST 1”, press
T4
again to activate the
intensive intake speed “
BOOST 2
”, timed
for 7 minutes
Note:
after the 7 minutes, the hood will go back to the
previously set intake speed ***
Note:
press
T4
again, during the 7 minutes, to go back to the
previously set intake speed ***
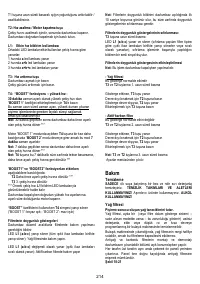
with the “
BOOST1” and “BOOST2” functions active
, press:
T2
to go back to the previously set intake speed ***
T3
to go back to the 3rd intake speed
*** the previous intake speed remains visible via the indicator
LEDs
L1
if you have set the intensive speed directly with the hood off,
the motor will be turned off after the set time.
Whi
le using the “
BOOST
” functions, the
T4
symbol flashes
(“BOOST 1”: white light
-
“BOOST 2”: blue light)
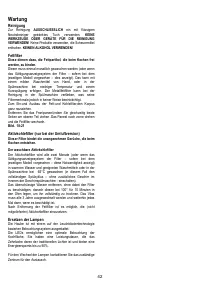
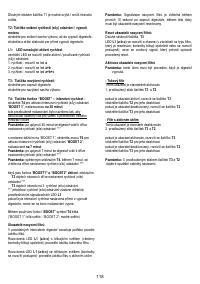
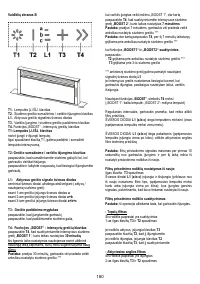
Filter Saturation indicator lights
At regular intervals, the hood signals the need to perform
maintenance on the filters.
LED
L1
(a-b-c)
on and flashing light (all indicator lights
flashing together): perform maintenance on the grease filter.
LED
L1
(a-b-c)
on and alternating light (the indicator lights
turn on in sequence): perform maintenance on the active
carbon filter
Note:
The filter saturation indicator is visible within the first 10
seconds on turning on the hood; the saturation indicators must
be reset within this time.
Reset filter saturation indicator:
Press and hold button
T3
LED
L1
(a-b-c)
turns on and off (depending on the type of
filter being reset, the indicator lights flash together or turn on
in sequence); an acoustic signal will confirm the reset
operation.
Activation of filter saturation indicator
Note:
this operation must be performed with the hood off.
- Grease filter
This indicator is normally activated
1st prolonged press of buttons
T3
and
T2
if the indicator is active, button
T3
turns on
press button
T2
, to deactivate it
if the indicator is not active, button
T2
turns on
press button
T3
, to activate it
- Active carbon filter
This indicator is normally deactivated
2nd prolonged press of buttons
T3
and
T2
if the indicator is active, button
T3
turns on
press button
T2
, to deactivate it
if the indicator is not active, button
T2
turns on
press button
T3
, to activate it
Note:
3rd prolonged press of buttons
T3
and
T2
to exit settings m enu.
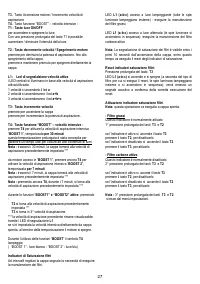
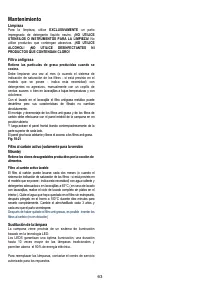
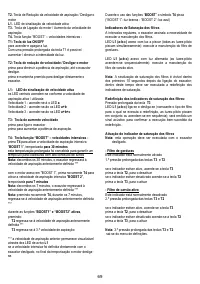
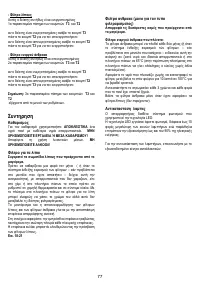
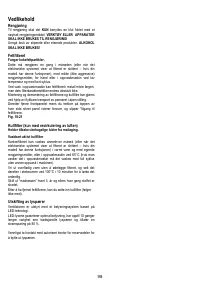
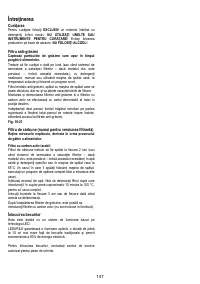
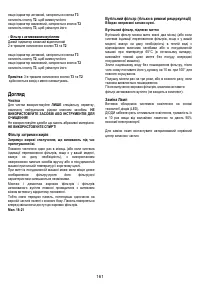
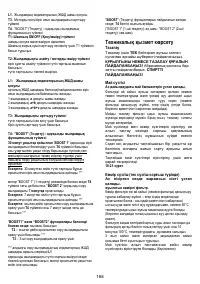
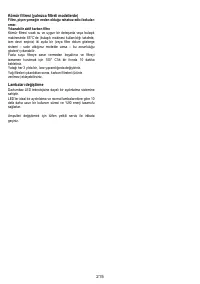
Maintenance
Cleaning
Clean using
ONLY
a cloth dampened with neutral liquid
detergent.
DO NOT CLEAN WITH TOOLS OR
INSTRUMENTS
. Do not use abrasive products.
DO NOT USE
ALCOHOL!
Grease filter
Traps cooking grease particles.
This must be cleaned once a month (or when the filter
saturation indication system
–
if envisaged on the model in
possession
–
indicates this necessity) using non aggressive
detergents, either by hand or in the dishwasher, which must
be set to a low temperature and a short cycle.
When washed in a dishwasher, the grease filter may discolor
slightly, but this does not affect its filtering capacity.
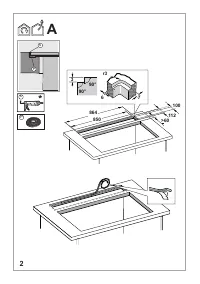
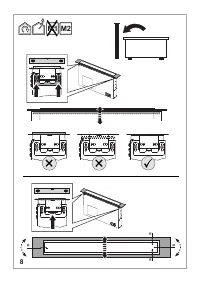
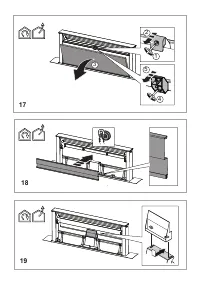
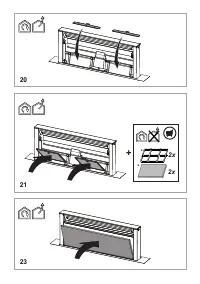
When inserting and removing grease filters and charcoal
filters, please make sure that the extractable unit of the hood
is in open position.
Then remove the front panel ,by pulling on the upper part of
each side at the same time.
The panel turns forward ,so that grease filters can be inserted.
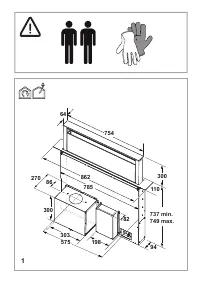
Fig. 18-21


