Видеорегистратор Saturn ST-VDR0001 - инструкция пользователя по применению, эксплуатации и установке на русском языке. Мы надеемся, она поможет вам решить возникшие у вас вопросы при эксплуатации техники.
Если остались вопросы, задайте их в комментариях после инструкции.
"Загружаем инструкцию", означает, что нужно подождать пока файл загрузится и можно будет его читать онлайн. Некоторые инструкции очень большие и время их появления зависит от вашей скорости интернета.


6
ting interface, then se-
lect
specific parameters
by
Up/Down
button
【
10.11
】
. Press OK but-
ton again to exit after
finished.
1
)
DPI: HD VGA QVGA
D1
2
)
Exposure Value:+1/3
+0.0 -1/3 -2/3 -1.0 -
4/3
-5/3
-2.0 +2.0
+5/3 +4/3 +1.0 +2/3
3
)
White Balance: Auto/
Daylight/ Cloudy/ Tung-
sten Filament lamp/ Flu-
orescent lamp
4
)
Time
Display:
Close/Date/Date
and
Time (Under “Close
“ mode, the time don’t
be shown)
5
)
Motion
Detection:
Off/On
6
)
Continuous loop Vid-
eo Recording: 3 minutes
/ 5 minutes / 10 minutes
/ 15 minutes
7
)
Flip Screen: OFF/ON
8
)
Night Vision: OFF/ON
Under setting interface
of Recording mode or
Camera mode, press
MENU
button
【
12
】
again, DVR will enter the
following settings, Press
Up/Down
button
【
10.11
】
to select the
specific
parameters,
press OK button
【
17
】
to
confirm
exit.
1)
Format:
Can-
cel/Execute
2)
Language:
Eng-
lish/Simplified Chinese/
Traditional Chinese/ Jap-
anese/
Rus-
sian/French/German/Itali
an/ Spanish/Portuguese
and
so
on.
3) Auto power off: 1
minute, 3 minutes, 5
minutes,
off
4) Restore default pa-
rameters: cancel/ exe-
cute (After select Exe-
cute, DVR will restore
the default settings)
5)
Frequency:
50Hz/60Hz
6) Format: PAL, NTSC
7) Time setting: off/set
(Press the OK button
【
17
】
to enter setting,
press the MENU button
【
12
】
again to enter the
time and date settings,
press Up/Down buttons
【
10.11
】
to adjust time,
date, press the OK but-
ton
【
17
】
to enter the
next setting, when all is
set up, press the MENU
【
12
】
button to confirm
and exit.)
Note:
Before
set time, you can press
Up/Down
buttons
【
10.11
】
to
select:
[year/month/day],
[day/month/ year] and
[month/day/year]
8) USB functions: PC
camera/Disk drive
7
Download files
1) Connect the product
with computer by USB
cable
2) [My computer] will
occur removable disk,
3) The file is stored at
Removable
Disk/DCIM/100 DSCIM.
At the moment, the file
of the product can be
downloaded to the com-
puter.
Note
1) Please insert the TF
card before recording.
2) The product can select
the recording mode, re-
cycling recording, when
the memory card is full,
the camera will continue
recording.
Remark: At this point the
old file is overwritten one
by one, in order to avoid
all the old files are re-
moved, the camera pro-
vides 3 minutes/ 5
minutes/ 10 minutes/ 15
minutes as storage time.
3) When the polymer
battery is in low power
level, DVR screen will
display "low battery"
message, the DVR will
automatically save the
file and shut down after
20 seconds.
4) When you need reset
the DVR, press and hold
RESET hole for 3 seconds
then release, DVR will
automatically
reset.
5) When recording, do
not pull out the TF card,
to prevent crashes.
6) With QGA resolution
in recording, reaction in
the preview will slowly
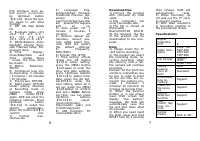
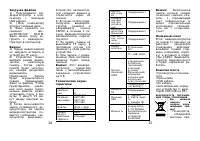
Specifications
Digital
magnifica-
tion
8
Video reso-
lution
1280*720
640*480
320*240
720*480
File Format
Image
:
JPEG
Video
:
AVI
White
balance
color ef-
fects
Auto
Standard
Continuous
loop re-
cording
Support
Power off
file recov-
ery
Support
Motion
detection
function
Support
Year,
month, day
hour, mi-
nute
Support
Carrier
media
built-in SPI

