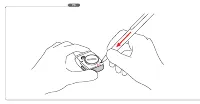
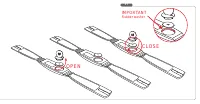
Велокомпьютеры VDO HC12 6 - инструкция пользователя по применению, эксплуатации и установке на русском языке. Мы надеемся, она поможет вам решить возникшие у вас вопросы при эксплуатации техники.
Если остались вопросы, задайте их в комментариях после инструкции.
"Загружаем инструкцию", означает, что нужно подождать пока файл загрузится и можно будет его читать онлайн. Некоторые инструкции очень большие и время их появления зависит от вашей скорости интернета.

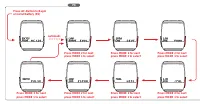

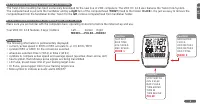
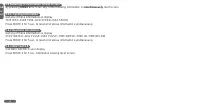

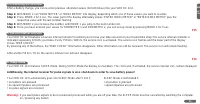
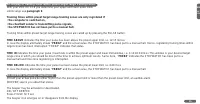

4.2.3 Entering the precise wheelsize
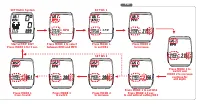
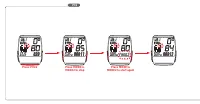
Step 1: By pressing MODE 1 call TRIP DIST in your display.
Step 2: Press MODE 1 for 3 sec. In the upper part of the display you see "WS1" and "KMH" or "MPH" flashing. The lower part of the display alternately shows
"ENTER MTRIC SYSTM" and "KMH"/"MPH"
Step 3: With MODE 2 you choose whether you want kilometers=KMH oder miles=MPH as a measuring unit.
Step 4: Once the conversion of KMH or MPH has been chosen, you proceed by briefly pressing (0.1 sec) MODE 1. The lower part of the display now alternates
"ENTER WHEELSIZE1" and 2155. The last number "5" flashing. or 84.8. (if MPH selected)The last number "8"flashing.
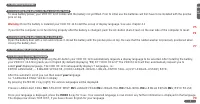
Step 5: With MODE 1 and MODE 2 you enter your measured wheelsize 1 (bike1). MODE 2 increases the flashing number MODE 1 jumps to the next number,
see set-up mode.
Step 6: Once you have entered the last number of wheelsize 1 and press the MODE 1 button, the computer automatically jumps to the setup mode for
wheelsize 2. The lower part of the display alternately shows "ENTER WHEELSIZE2" and 2000 with the last number "0" flashing. Enter your
wheelsize 2 as described in Step 5.The lower part of the display alternately shows "ENTER WHEELSIZE2" and 2000 or 78.7
(if MPH selected) with the last number "0" or "7" flashing.
Step 7: Once you have entered wheelsize 2, press MODE 1 for 3 sec to exit set-up mode. The computer will return to displaying TRIP DIST.
P11
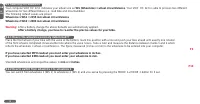
Warning:
Exiting setup procedure before having completely entered the precise wheelsize may lead to faulty readouts.
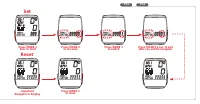
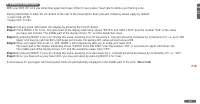
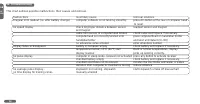
4.3 setting the clock CLK
Your VDO HC 12.6 features a clock with hour and minute display in12 or 24 h mode.
To access the clock setup mode proceed as follows:
Step 1: MODE 2 calls the CLK information into your display
Step 2: Press the MODE 1 for 3 sec. The set-up mode for the clock starts. The lower part of the display alternately shows "ENTER CLOCK" and "24h"/12h
Step 3: With MODE 2 you choose whether you want your time in a 24 or 12 hour mode.
Step 4: With MODE 1 you start the hour setup. The hour display will be flashing and can be changed with MODE 2.
Step 5: With MODE 1 you start the minute setup. The minute display will be flashing and can be changed with MODE 2.
Step 6: Once hours and minutes are correctly entered, you exit CLK set-up mode by pressing MODE 1 for 3 sec.
P12
GB
HC
12.6
9

