
Варочная панель Teka EH 60 4G AI AL TR CI NAT ANTHR. OS - инструкция пользователя по применению, эксплуатации и установке на русском языке. Мы надеемся, она поможет вам решить возникшие у вас вопросы при эксплуатации техники.
Если остались вопросы, задайте их в комментариях после инструкции.
"Загружаем инструкцию", означает, что нужно подождать пока файл загрузится и можно будет его читать онлайн. Некоторые инструкции очень большие и время их появления зависит от вашей скорости интернета.
7
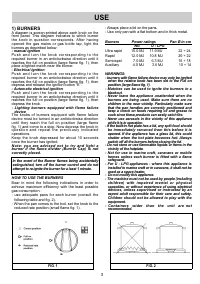
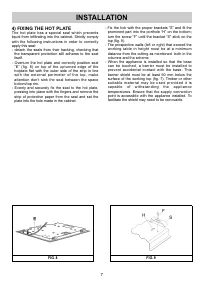
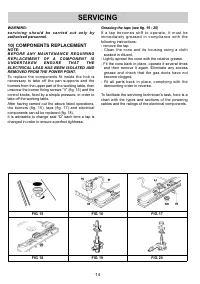
4) FIXING THE HOT PLATE
The hot plate has a special seal which prevents
liquid from infiltrating into the cabinet. Strictly comply
with the following instructions in order to correctly
apply this seal:
- detach the seals from their backing, checking that
the transparent protection still adheres to the seal
itself.
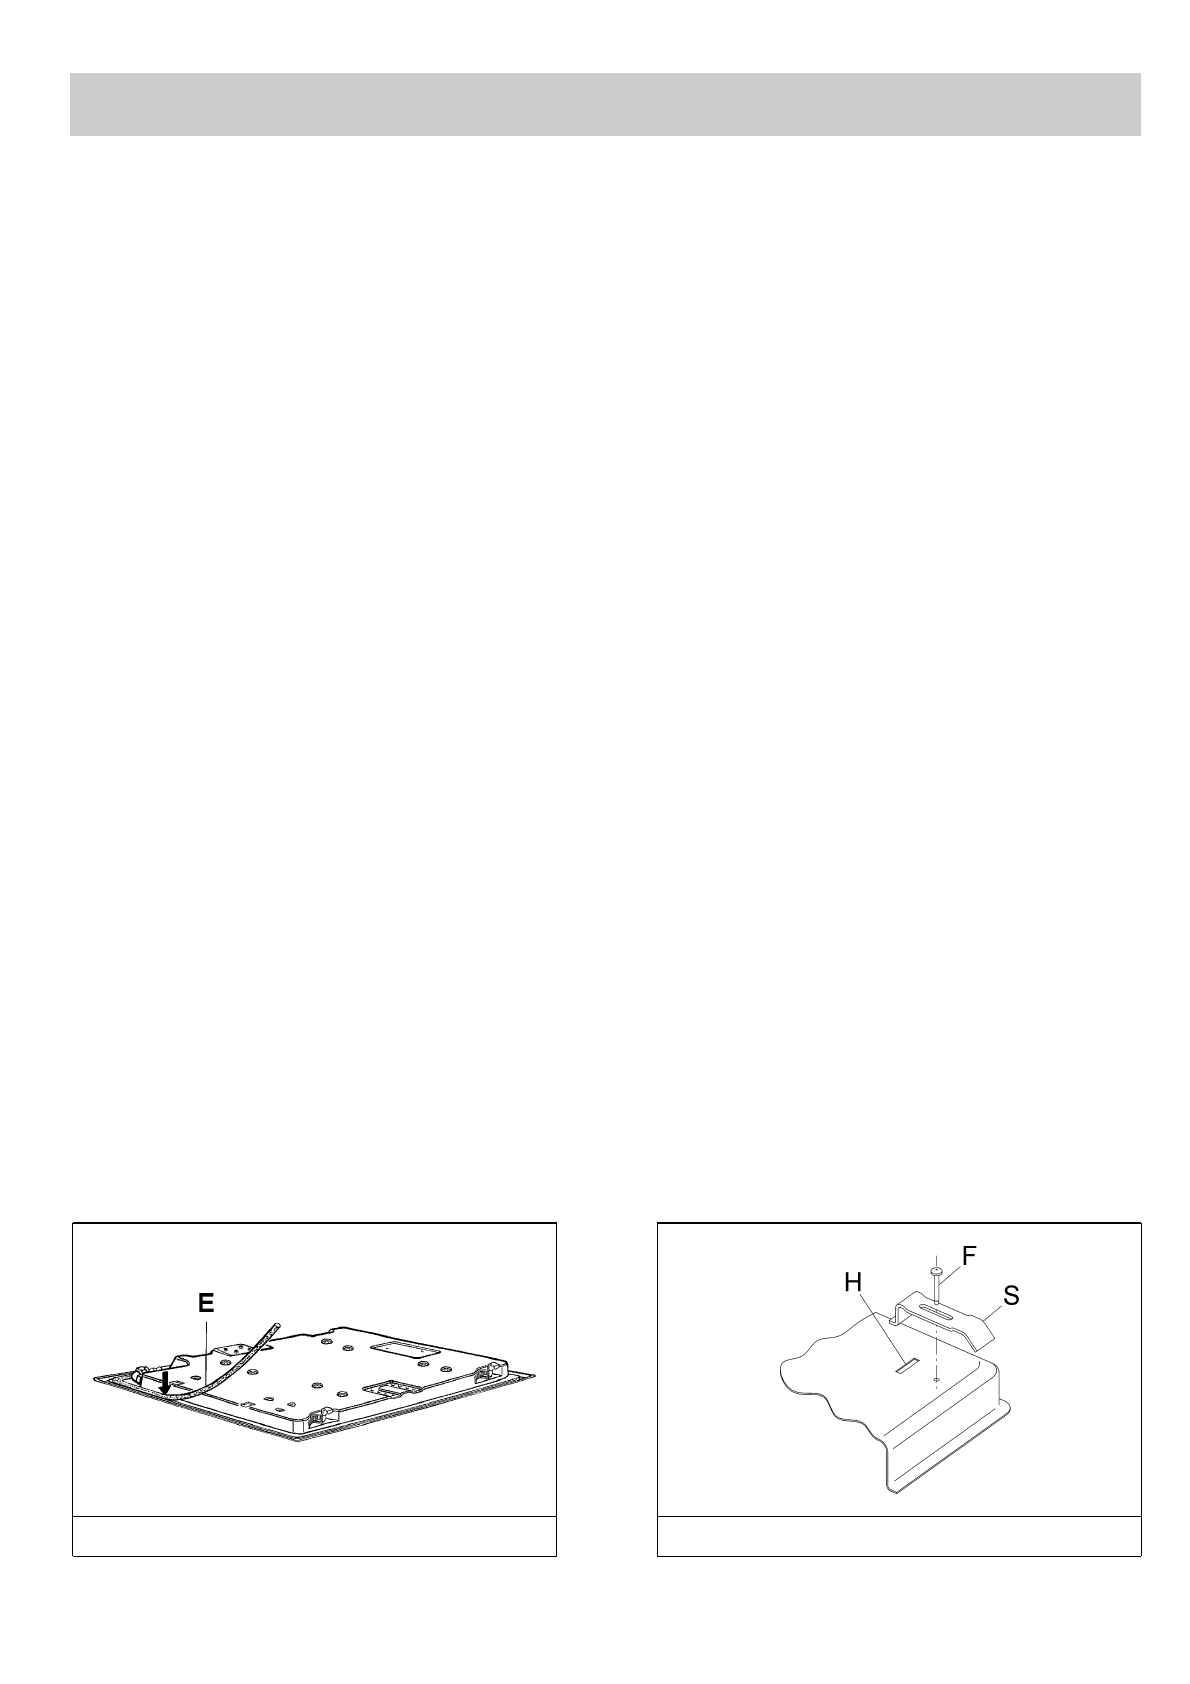
- Overturn the hot plate and correctly position seal
“E” (fig. 8) on top of the upturned edge of the
hotplate flat with the outer side of the strip in line
with the external perimeter of the top, make
attention don’t sink the seal between the space
bottom/top rim.
- Evenly and securely fix the seal to the hot plate,
pressing into place with the fingers and remove the
strip of protective paper from the seal and set the
plate into the hole made in the cabinet.
- Fix the hob with the proper brackets “S” and fit the
prominent part into the porthole “H” on the bottom;
turn the screw “F” until the bracket “S” stick on the
top (fig. 9).
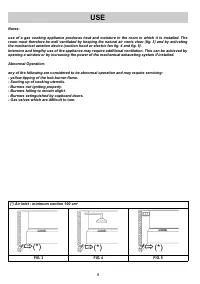
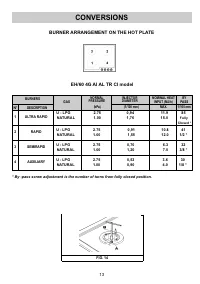
- The prospective walls (left or right) that exceed the
working table in height must be at a minimum
distance from the cutting as mentioned both in the
columns and the scheme.
- When the appliance is installed so that the base
can be touched, a barrier must be installed to
prevent accidental contact with the base. This
barrier shield must be at least 60 mm below the
surface of the working top (fig. 7). Timber or other
suitable material may be used provided it is
capable of withstanding the appliance
temperatures. Ensure that the supply connection
point is accessible with the appliance installed. To
facilitate the shield may need to be removable.
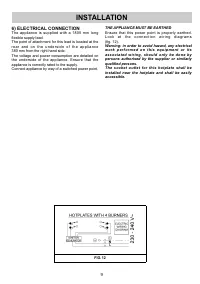
INSTALLATION
FIG. 8
FIG. 9
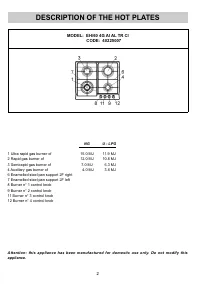
Характеристики

Остались вопросы?Не нашли свой ответ в руководстве или возникли другие проблемы? Задайте свой вопрос в форме ниже с подробным описанием вашей ситуации, чтобы другие люди и специалисты смогли дать на него ответ. Если вы знаете как решить проблему другого человека, пожалуйста, подскажите ему :)


