
Варочная панель Smeg P652 - инструкция пользователя по применению, эксплуатации и установке на русском языке. Мы надеемся, она поможет вам решить возникшие у вас вопросы при эксплуатации техники.
Если остались вопросы, задайте их в комментариях после инструкции.
"Загружаем инструкцию", означает, что нужно подождать пока файл загрузится и можно будет его читать онлайн. Некоторые инструкции очень большие и время их появления зависит от вашей скорости интернета.

Instructions for the installer
31
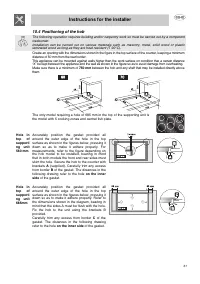
10.4
Positioning of the hob
The following operation requires building and/or carpentry work so must be carried out by a competent
tradesman.
Installation can be carried out on various materials such as masonry, metal, solid wood or plastic
laminated wood as long as they are heat resistant (T 90°C).
Create an opening with the dimensions shown in the figure in the top surface of the counter, keeping a minimum
distance of 50 mm from the rear border.
This appliance can be mounted against walls higher than the work surface on condition that a certain distance
“X” be kept between the appliance and the wall as shown in the figure so as to avoid damage from overheating.
Make sure there is a minimum of
750 mm
between the hob and any shelf that may be installed directly above
them.
The only model requiring a hole of 685 mm in the top of the supporting unit is
the model with 5 cooking zones and central fish plate.
Hole in
top of
supporti
ng unit
560 mm
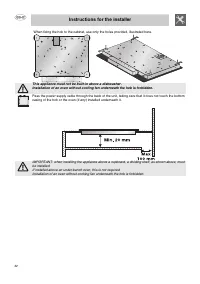
Accurately position the gasket provided all
around the outer edge of the hole in the top
surface as shown in the figures below, pressing it
down so as to make it adhere properly. For
measurements, refer to the figure depending on
the hob model to be installed, bearing in mind
that in both models the front and rear sides must
skim the hole. Secure the hob to the counter with
brackets
A
(supplied). Carefully trim any excess
from border
B
of the gasket. The distances in the
following drawing refer to the hole
on the inner
side
of the gasket.
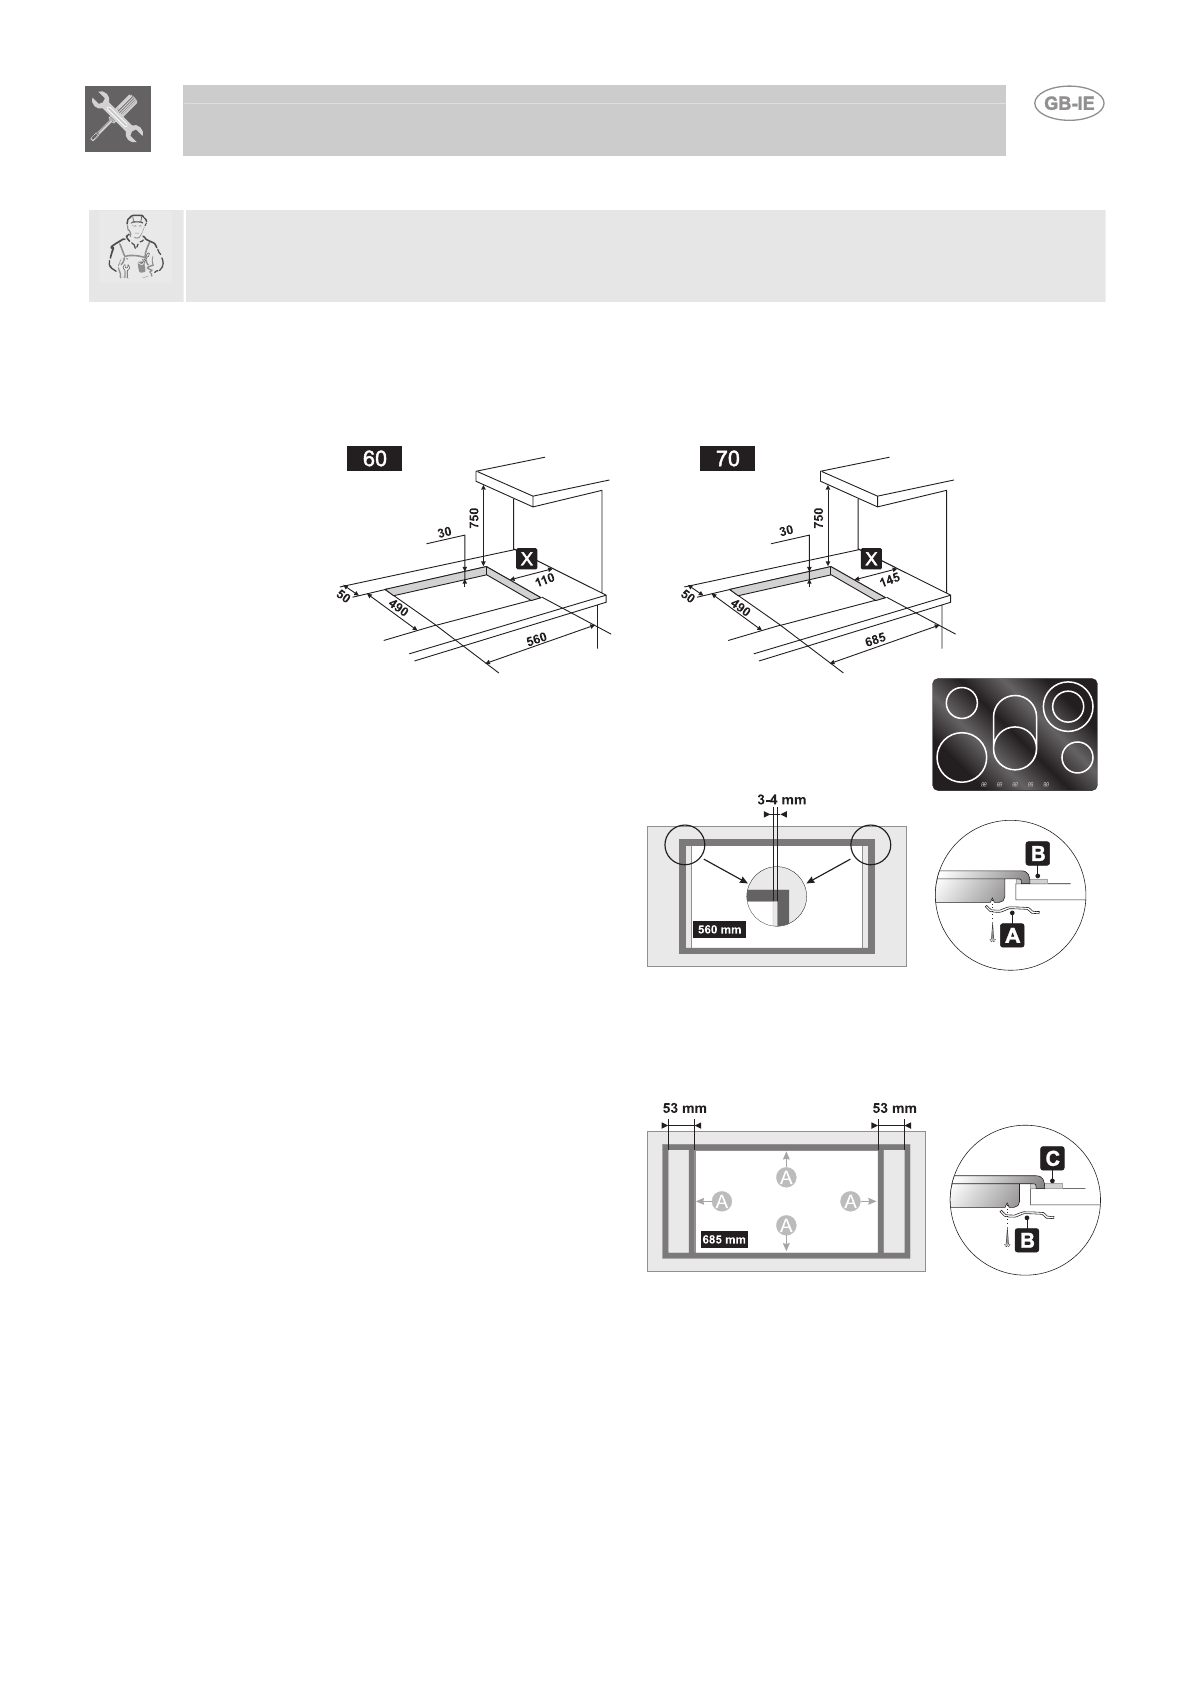
Hole in
top of
supporti
ng unit
685mm
Accurately position the gasket provided all
around the outer edge of the hole in the top
surface as shown in the figures below, pressing it
down so as to make it adhere properly. Refer to
the dimensions shown in the diagram, bearing in
mind that the sides A must be flush with the hole.
Fix the hob to the unit using the brackets B
provided.
Carefully trim any excess from border
C
of the
gasket. The distances in the following drawing
refer to the hole
on the inner side
of the gasket.
Характеристики

Остались вопросы?Не нашли свой ответ в руководстве или возникли другие проблемы? Задайте свой вопрос в форме ниже с подробным описанием вашей ситуации, чтобы другие люди и специалисты смогли дать на него ответ. Если вы знаете как решить проблему другого человека, пожалуйста, подскажите ему :)


