
Варочная панель Maunfeld MVI59.2FL-BK - инструкция пользователя по применению, эксплуатации и установке на русском языке. Мы надеемся, она поможет вам решить возникшие у вас вопросы при эксплуатации техники.
Если остались вопросы, задайте их в комментариях после инструкции.
"Загружаем инструкцию", означает, что нужно подождать пока файл загрузится и можно будет его читать онлайн. Некоторые инструкции очень большие и время их появления зависит от вашей скорости интернета.


36
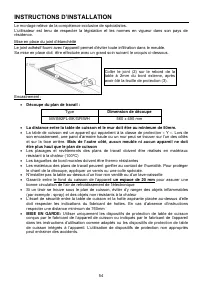
INSTALLATION INSTRUCTIONS
The installation comes under the exclusive responsibility of specialists.
The installer is held to respect the legislation and the standards enforce in his home country.
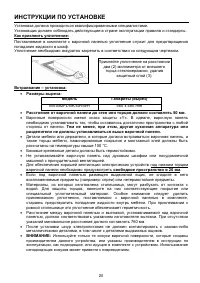
How to stick the gasket:
The gasket supplied with the hob avoids all infiltration of liquids in the cabinet.
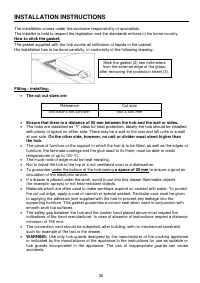
His installation has to be done carefully, in conformity of the following drawing.
Fitting - installing:
•
The cut out sizes are:
Reference
Cut-size
MVI592FL-BK/GR/WH
560 x 490 mm
•
Ensure that there is a distance of 50 mm between the hob and the wall or sides.
•
The hobs are classif
ied as “Y” class for heat protection. Ideally the hob should be installed
with plenty of space on either side. There may be a wall at the rear and tall units or a wall
at one side.
On the other side, however, no unit or divider must stand higher than
the hob.
•
The piece of furniture or the support in which the hob is to be fitted, as well as the edges of
furniture, the laminate coatings and the glue used to fix them, must be able to resist
temperatures of up to 100 °C.
•
The mural rods of edge must be heat-resisting.
•
Not to install the hob to the top of a not ventilated oven or a dishwasher.
•
To guarantee under the bottom of the hob casing
a space of 20 mm
to ensure a good air
circulation of the electronic device.
•
If a drawer is placed under the work, avoid to put into this drawer flammable objects
(for example: sprays) or not heat-resistant objects.
•
Materials which are often used to make worktops expand on contact with water. To protect
the cut out edge, apply a coat of varnish or special sealant. Particular care must be given
to applying the adhesive joint supplied with the hob to prevent any leakage into the
supporting furniture. This gasket guaranties a correct seal when used in conjunction with
smooth work top surfaces.
•
The safety gap between the hob and the cooker hood placed above must respect the
indications of the hood manufacturer. In case of absence of instructions respect a distance
minimum of 760 mm.
•
The connection cord should be subjected, after building, with no mechanical constraint,
such for example of the fact of the drawer.
•
WARNING:
Use only hob guards designed by the manufacturer of the cooking appliance
or indicated by the manufacturer of the appliance in the instructions for use as suitable or
hob guards incorporated in the appliance. The use of inappropriate guards can cause
accidents.
Stick the gasket (2) two millimeters
from the external edge of the glass,
after removing the protection sheet (3).
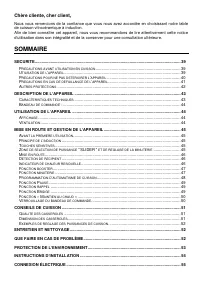
Содержание
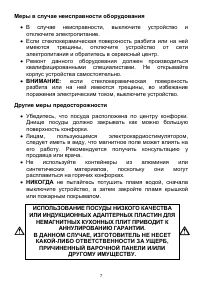
- 4 БЕЗОПАСНОСТЬ; Предварительные меры предосторожности
- 5 Эксплуатация оборудования
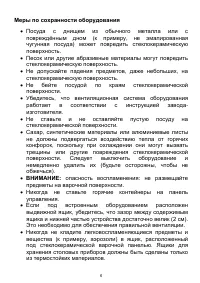
- 6 Меры по сохранности оборудования
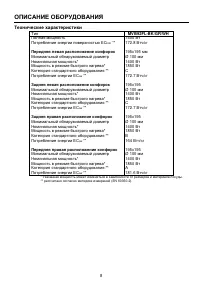
- 8 ОПИСАНИЕ ОБОРУДОВАНИЯ; Технические характеристики; Передняя левая pасположение конфорок; Задняя левая pасположение конфорок; Задняя правая pасположение конфорок; Передняя правая pасположение конфорок
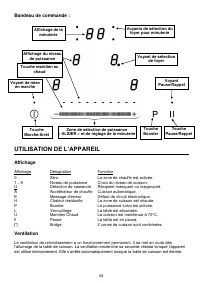
- 9 Панель управления; ЭКСПЛУАТАЦИЯ ОБОРУДОВАНИЯ; Дисплей
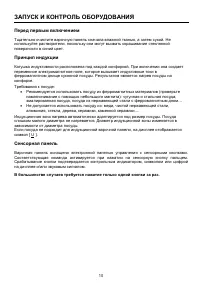
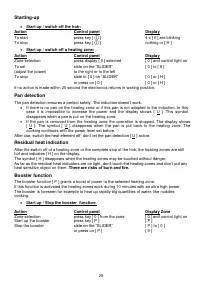
- 10 ЗАПУСК И КОНТРОЛЬ ОБОРУДОВАНИЯ; Перед первым включением
- 11 Запуск
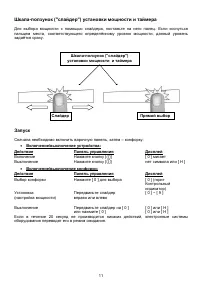
- 12 Опасность возгорания и пожара.; Управление мощностью:
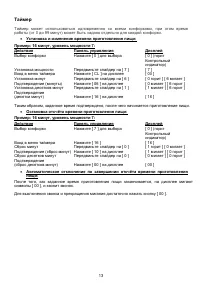
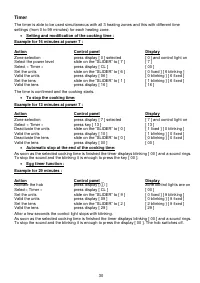
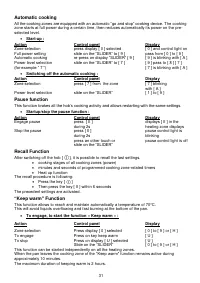
- 13 Таймер
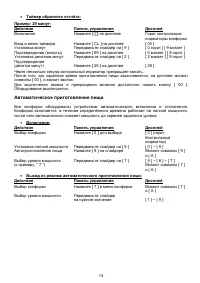
- 14 Автоматическое приготовление пищи
- 15 II
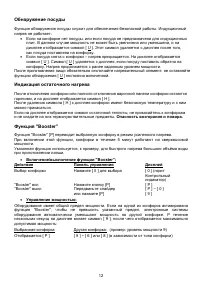
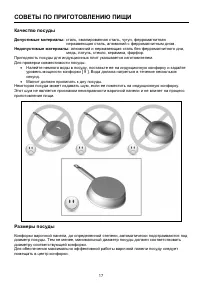
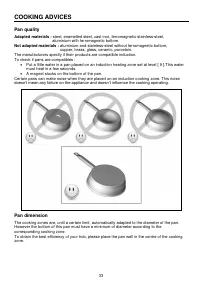
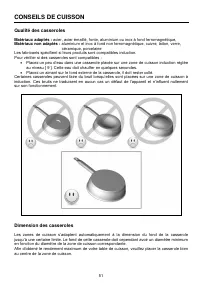
- 17 СОВЕТЫ ПО ПРИГОТОВЛЕНИЮ ПИЩИ; Качество посуды; Допустимые материалы:; Недопустимые материалы:; Размеры посуды
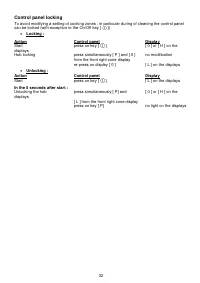
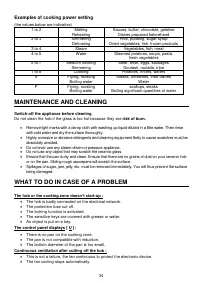
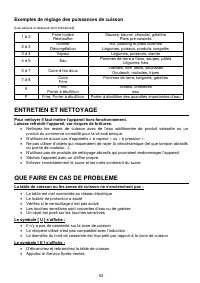
- 18 Примеры настройки мощности конфорок; УХОД И ОЧИСТКА; Отключение оборудования перед очисткой; УСТРАНЕНИЕ НЕИСПРАВНОСТЕЙ; Варочная панель или конфорка не включается:
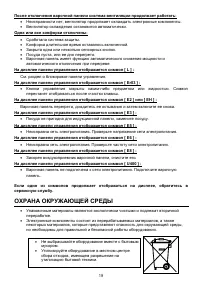
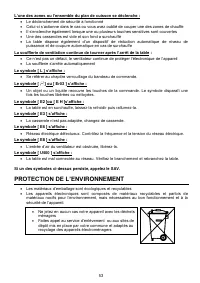
- 19 Одна или все конфорки отключены:; ОХРАНА ОКРУЖАЮЩЕЙ СРЕДЫ
- 20 ИНСТРУКЦИИ ПО УСТАНОВКЕ
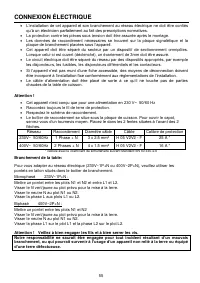
- 21 ЭЛЕКТРИЧЕСКОЕ ПОДКЛЮЧЕНИЕ; Подключение варочной панели
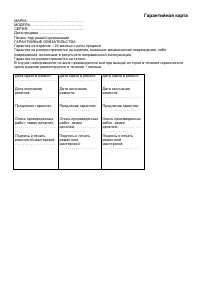
- 59 Гарантийная карта


