
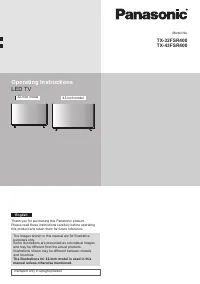
Телевизоры Panasonic TX-43FSR400 - инструкция пользователя по применению, эксплуатации и установке на русском языке. Мы надеемся, она поможет вам решить возникшие у вас вопросы при эксплуатации техники.
Если остались вопросы, задайте их в комментариях после инструкции.
"Загружаем инструкцию", означает, что нужно подождать пока файл загрузится и можно будет его читать онлайн. Некоторые инструкции очень большие и время их появления зависит от вашей скорости интернета.


13
►
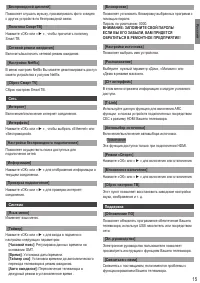
Film mode:Enhance the picture quality to smooth out
frame transitions while watching a video.
Picture freeze: Freeze the picture.
Note:The options offered depend on the program
you are watching.
Select to reset the picture settings to the factory default.
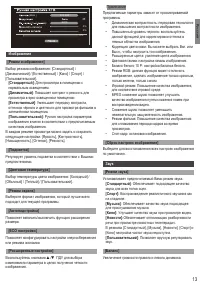
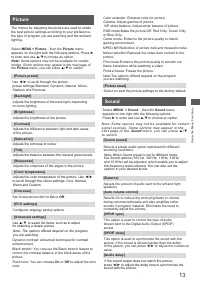
Picture
Select
MENU > Picture
, then the
Picture
menu
appears on the right with the following options. Press
to enter and use
▲/▼
to choose an option.
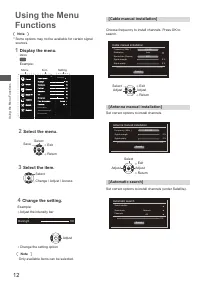
Note:
Some options may not be available for certain
modes. Some options may appear in the next page of
the
Picture
menu, you can press
▲/▼
to switch.
Adjusts the brightness of the back light, depending
on room lighting.
Adjusts the brightness of the picture.
Adjusts the difference between light and dark areas
of the picture.
Adjusts the richness of colour.
Adjusts the balance between the red and green levels.
Adjusts the crispness of the edges in the picture.
Adjusts the color temperatur
e of the picture. Use ◄/►
to scroll through the colour settings: Cool, Normal,
Warm and Custom.
Set Overscan function to
On
or
Off
.
Use
◄/►
to scroll through the picture.
preset settings:Standard, Dynamic, Natural, Movie,
Stadium and Personal.
Use to select the items, such as to adjust
for obtaining a clearer picture.
▲/▼
Note: The options offered depend on the program
you are watching.
Dynamic contrast: Advanced technique for contrast
enhancement.
Black stretch: You can use the Black stretch feature to
Flesh tone: You can choose
On
or
Off
to adjust the skin
color
correct the contrast balance in the black areas of the
picture.
RGB mode:Make the picture Off, Red Only, Green Only
or Blue Only.
Game mode: Enhance the picture quality to match
gaming environment.
MPEG NR:Reduction of picture bulk and mosquito noise.
Noise reduction:Reduces the noise level content in the
picture.
Color extender: Enhance color for picture.
Gamma: Adjust gamma of picture.
10P white balance: Adjust white balance of picture.
The menus for adjusting the picture are used to obtain
the best picture settings according to your preference,
the type of program you are watching and the ambient
lighting.
[Picture preset]
[Backlight]
[
Picture reset
]
[Brightness]
[Contrast]
[Saturation]
[Tint]
[Sharpness]
[Color temperature]
[Overscan]
[ECO settings]
[Advanced settings]
Configures engergy saving options.
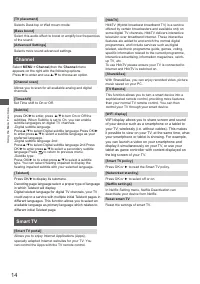
Sound
Select
MENU > Sound
, then the
Sound
menu
appears on the right with the following options.
Press
►
to enter and use
▲/▼
to choose an option.
N o t e : S o m e o p t i o n s m a y n o t b e a v a i l a b l e f o r c e r t a i n
s i g n a l s o u r c e s . S o m e o p t i o n s m a y a p p e a r i n t h e
n e x t p a g e o f t h e
Sound
m e n u , y o u c a n p r e s s
▲
/
▼
t o s w i t c h .
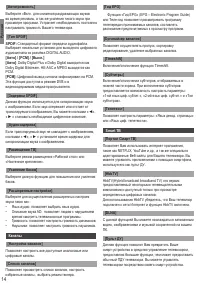
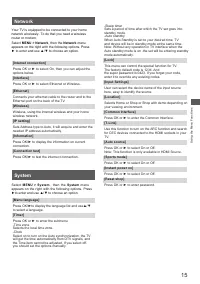
[Sound preset]
Selects a preset audio option optimized for different
sounding conditions.
[Balance]
Adjusts the amount of audio sent to the left and right
speakers.
[Auto volume control]
Selects On to reduce the annoying blasts in volume
during commercial breaks and also amplifies softer
sounds in program material. Eliminates the need to
constantly adjust the volume.
Note: When Sound preset is set to different mode,
five Sound options (100 Hz, 300 Hz, 1 KHz, 3 KHz,
and 10 KHz) will be adjusted, which enable you to adjust
the frequency levels desired. You can also set the
options to your desired levels.
[SPDIF type]
This option is used to control the type of audio
stream sent to the Digital Audio Output (SPDIF)
socket.
[SPDIF delay]
This option is used to synchronize the sound with the
picture. If the sound is slower/quicker than the action
of the picture, you can press ◄/► to adjust the numerical
value.
[Audio delay]
if the sound output does not match the picture,
press ◄/► to adjust the delay time to synchronize the
sound with the picture.
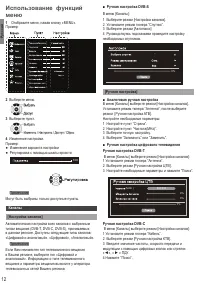
Using the Menu Functions


