
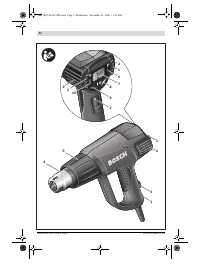
Технические фены Bosch 0.601.944.302 - инструкция пользователя по применению, эксплуатации и установке на русском языке. Мы надеемся, она поможет вам решить возникшие у вас вопросы при эксплуатации техники.
Если остались вопросы, задайте их в комментариях после инструкции.
"Загружаем инструкцию", означает, что нужно подождать пока файл загрузится и можно будет его читать онлайн. Некоторые инструкции очень большие и время их появления зависит от вашей скорости интернета.


English |
19
Bosch Power Tools
1 609 929 S53 | (26.11.08)
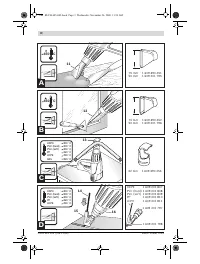
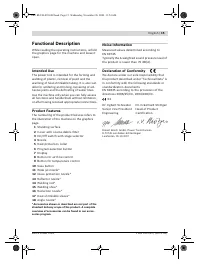
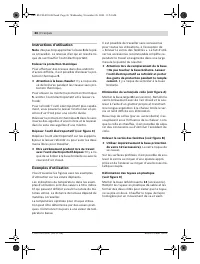
Work Examples
The illustrations of the work examples can be
found on the fold-out pages.
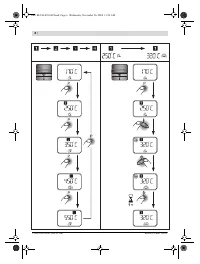
The temperature settings in the work examples
are reference values that can vary, depending
on the material characteristics. The distance
between the nozzle and the workpiece depends
on the material to be worked.
The optimal temperature for the respective ap-
plication can be determined by practical testing.
Always start with a low temperature setting.
All application examples can be performed with-
out accessories except for “Removing Varnish/
Paint from Windows”. However, the use of rec-
ommended accessories simplifies the work and
significantly improves the quality of the result.
f
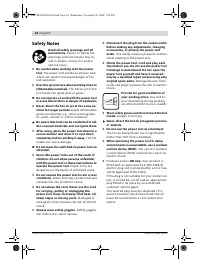
Be careful when changing the nozzle! Do
not touch the hot nozzle. Allow the power
tool to cool down and wear protective
gloves while changing the nozzle.
Danger
of burning oneself on the hot nozzle.
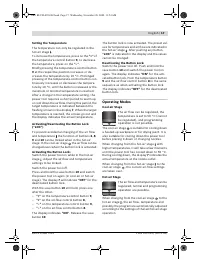
Removing Varnish/Softening Adhesives
(see figure A)
Mount the wide jet nozzle
11
(accessory). Brief-
ly soften the varnish applying hot air and remove
it using a sharp, clean scraper or putty knife.
Applying heat too long will burn the varnish,
making it more difficult to remove.
Many adhesives (e. g. of stickers) become soft
when heated. Heated adhesives allow for bonds
to be separated or excessive adhesive to be
removed.
Removing Varnish/ Paint from Windows
(see figure B)
f
Use of the glass protection nozzle 12 (acces-
sory) is essential.
Danger of glass breaking.
On profiled surfaces, varnish can be removed
using an appropriately fitting spatula and
brushed off with a soft wire brush.
Shaping Plastic Tubing (see figure C)
Mount the reflector nozzle
13
(accessory). To
avoid kinking of the tubing, fill the tubing with
sand and plug both ends. Heat the tubing evenly
by by applying the heat from side to side.
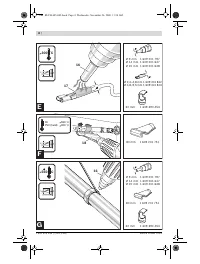
Welding Plastics (see figure D)
Mount the reduction nozzle
16
and the welding
shoe
15
(both accessories). The workpieces to
be welded and the welding rod
14
(accessory)
must be of the same material (e. g. both of PVC).
The seam must be clean and grease-free.
Carefully heat up the seam location until it be-
comes doughy. Please note that the tempera-
ture difference between the doughy and liquid
state of plastic is low.
Feed in the welding rod
14
and allow it to run
into the gap so that a uniform bead is produced.
Shrinking (see figure E)
Mount the reduction nozzle
16
(accessory).
Select the diameter of the heat-shrinkable
sleeve
17
(accessory) according to the work-
piece (e. g. a cable lug). Heat the heat-shrinkable
sleeve evenly.
Defrosting Water Pipes (see figure F)
f
Before heating pipes, check to make sure
that it is actually a water pipe.
Water lines
often do not differ in appearance from gas
lines. Gas lines are not to be heated under
any circumstances.
Place on the angle nozzle
18
(accessory). Heat
the frozen zone always from the outside to the
middle.
Heat up plastic pipes as well as connections
between pipe pieces especially careful to pre-
vent damage.
Soft Soldering (see figure G)
For point soldering, place on the reduction
nozzle
16
, for the soldering of pipes/tubing,
place on the reflector nozzle
13
(both acces-
sories).
If solder without flux is used, apply soldering
grease or paste to the location to be soldered.
Warm the location to be soldered for
50 – 120 seconds depending on the material.
Apply the solder. The solder must melt from the
workpiece temperature. After the soldered
location has cooled, remove the flux.
OBJ_BUCH-485-002.book Page 19 Wednesday, November 26, 2008 11:54 AM
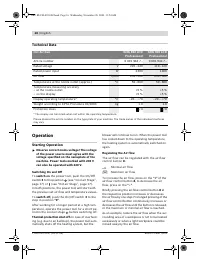
Содержание
- 129 Описание функции; Применение по назначению
- 130 Технические данные; Работа с инструментом; Включение электроинструмента; включения
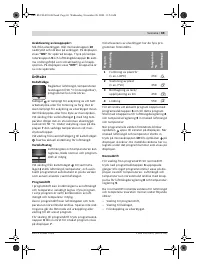
- 132 Режимы работы; Ступень потока холодного воздуха
- 133 Указания по применению; Съемная термозащита; Примеры возможных видов работы
- 134 Техобслуживание и сервис; Техобслуживание и очистка; Очистка грубого фильтра
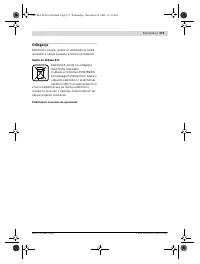
- 135 Россия; Утилизация
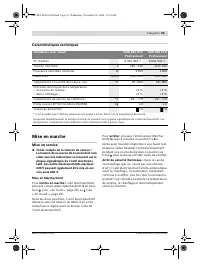
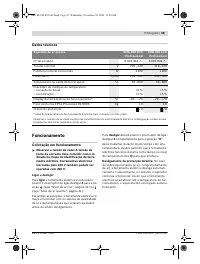
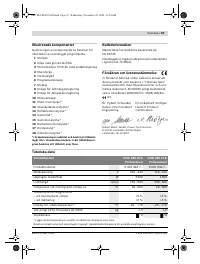
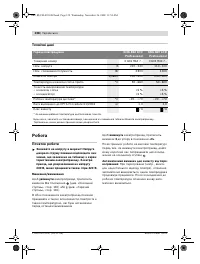
Характеристики

Остались вопросы?Не нашли свой ответ в руководстве или возникли другие проблемы? Задайте свой вопрос в форме ниже с подробным описанием вашей ситуации, чтобы другие люди и специалисты смогли дать на него ответ. Если вы знаете как решить проблему другого человека, пожалуйста, подскажите ему :)


