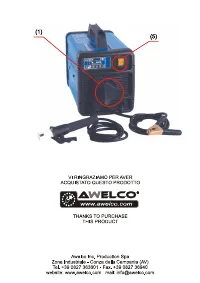
Сварочное оборудование Awelco HOBBY 150US - инструкция пользователя по применению, эксплуатации и установке на русском языке. Мы надеемся, она поможет вам решить возникшие у вас вопросы при эксплуатации техники.
Если остались вопросы, задайте их в комментариях после инструкции.
"Загружаем инструкцию", означает, что нужно подождать пока файл загрузится и можно будет его читать онлайн. Некоторые инструкции очень большие и время их появления зависит от вашей скорости интернета.


ENGLISH
GENERAL DESCRIPTION
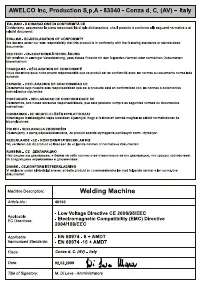
The models are portables single-phase AC arc welder 230V-50/60
Hz or 230/400V- 50/60 Hz.
Their compact and robust formats make them versatiles and
efficients for a variety of uses. Its compliance to current regulations
and the optimum quality of materials used, will ensure a long working
life in complete safety.
DESCRIPTION OF SIGNS AND SYMBOLS
Single-phase transformer
Falling characteristic
EN 60974-1
EN 60974-6
Norms of reference
1 ~
Single phase alternating voltage
3 ~
Three phase alternating voltage
U
0
… (V)
Nominal open circuit voltage
U
1
… (V/Hz)
Nominal values of mains voltage and
frequency
I
2
… (A)
Welding current
Ø (mm)
The diameter of the electrodes which can
be welded
t
w
Time between the reset and the set of
the thermal cut-out device
t
r
Time between the set and the reset of
the thermal cut-out device
I
1 max
(A)
The welding unit's maximum absorbed
current
IP21
The welding unit's protection class
H
The transformer's insulation class.
Welding machine suitable for use in
environments with heightened risk of
electric shock.
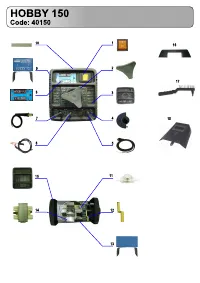
INSTALLATION
Unpack the welding machine, assemble the separate parts contained
in the package.
For welders with double voltage supply, it is necessary to set the
blocking screw of the voltage-reverse switch in the position
corresponding to the voltage really available. To use a thorn chosen
on the base of the value of the fuse indicated on the plate.
TECHNICAL INFORMATION
The welder is fitted with a thermal overload cut-out which operates
automatically to stop the transformer overheating.
The machine will become operational again automatically once the
temperature has reduced itself to an acceptable working level.
To switch on the welding machine operate the main switch. The
intensity of the supplied welding current can be adjusted by means of
a manually operated switch or using the hand wheel.
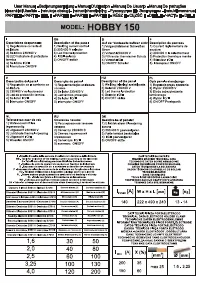
The welding current must be regulated according to the diameter of
the electrode in use and the type of the joint to be carried out: see
below the currents corresponding to various electrode diameters.
WELDING HINTS
The welding surface should be free of rust or paint. Choose the
electrode in accordance with the material being welded. It is
adviseable to initially test electrode and amperage on some scrap
material.
Place the electrode at a distance of 2 cm. from the workpiece and
place the face shield in position to protect the eyes. Strike the arc by
bringing the electrode into contact with the workpiece with a light
tapping and scrapping action.
Through the face shield you will see the arc which should be in
length one to one and a half the diameter of the electrode.
It is important to maintain a constant length of the arc. As the
electrode melts and its length decreases, a gradual downward
movement is needed to maintain the correct distance and the arc
itself.
To stop welding simply withdraw the electrode away from the
workpiece. It is adviseable to lift into the weld seam to avoid a porous
crater.
Be careful - the metal and electrode tip will be hot. Remove the
surface slag when cooled by lightly tapping with a pointed tool.
Welding may be resumed from the same spot having first ensured
the removal of the slag.
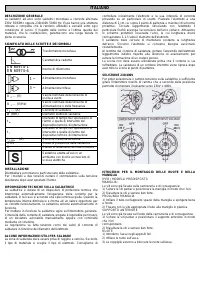
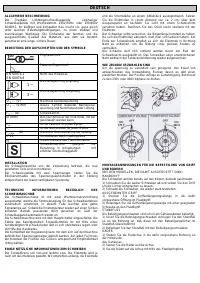
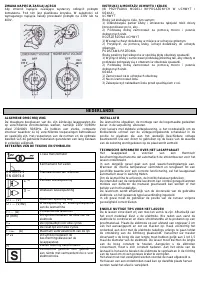
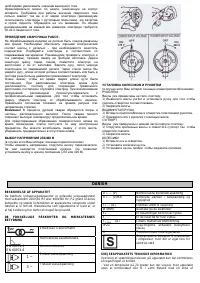
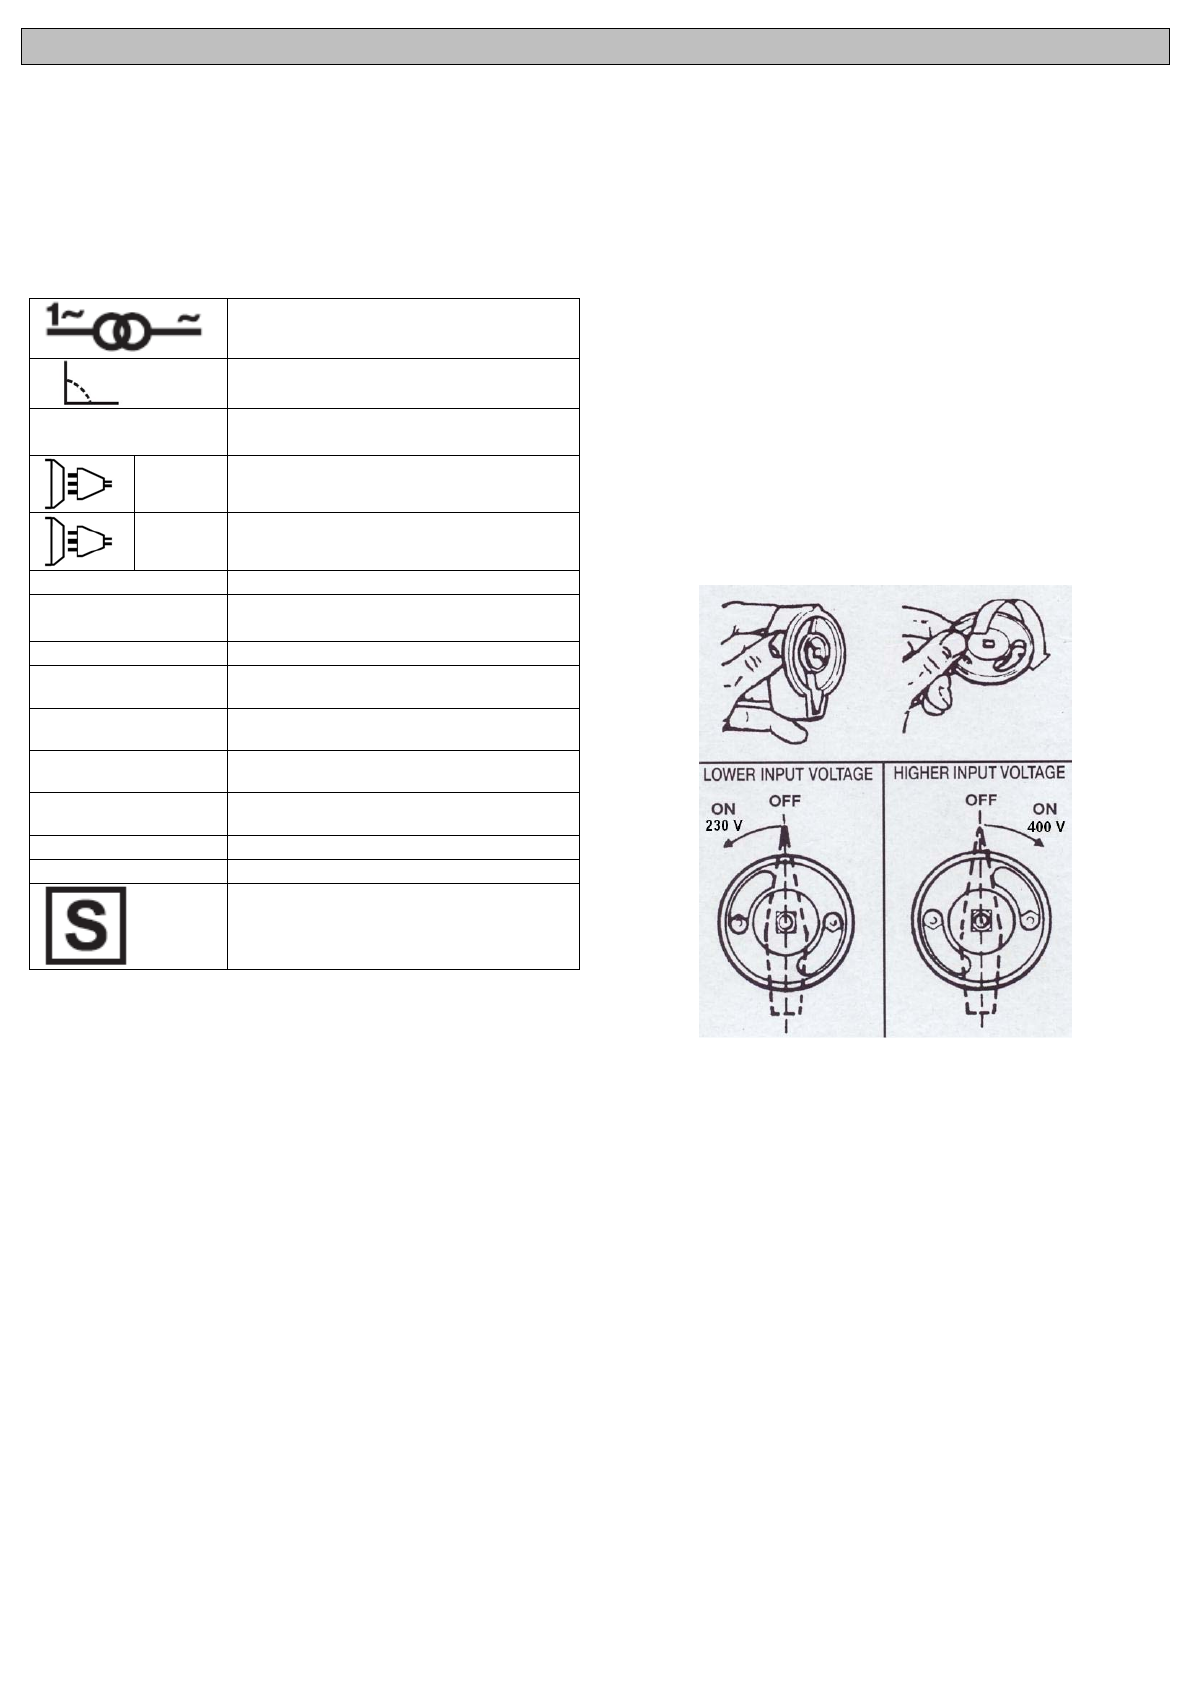
HOW TO SELECT 230/400V
To change the voltage its sufficient to unscrew the knob of the
commutator. Back of it there is a plastic cam. According to the
position it permit to turn the knob toward the 230V or 400V.
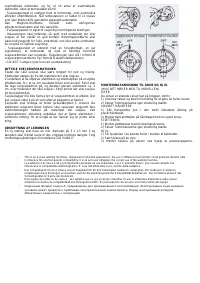
INSTRUCTIONS FOR HANDLES AND WHEELS ASSEMBLING
(JUST FOR THE MODELS EQUIPED WITH )
HANDLE
The screws are already screwed on the body, therefore:
1) Unscrew the parker screws and place the handle in order to make
the holes correspond.
2) Screws the screws again tightening strongly.
EXTENDED HANDLE
1) Insert the handle in the proper space of the handle pushing to the
bottom.
2) Screws with the proper screw the tube to the plastic handle.
FRONT SUPPORT
The screws are already screwed on the bottom of the body,
therefore:
1) Unscrew the parker screws and place the plate front support in
order to make the holes correspond.
2) Screws the screws again tightening strongly.
WHEELS
1) The axe is to be introduced in the proer space.
2) Insert the wheels on the axe.
3) The plugs are used in order to block the wheels on the axe.

