Сушилки для овощей и фруктов Gorenje FDK 24 DW ( KYS-336B) - инструкция пользователя по применению, эксплуатации и установке на русском языке. Мы надеемся, она поможет вам решить возникшие у вас вопросы при эксплуатации техники.
Если остались вопросы, задайте их в комментариях после инструкции.
"Загружаем инструкцию", означает, что нужно подождать пока файл загрузится и можно будет его читать онлайн. Некоторые инструкции очень большие и время их появления зависит от вашей скорости интернета.
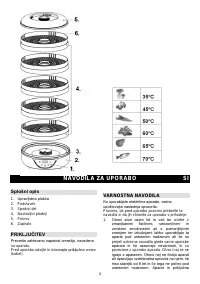


24
with the drying time settings, the system will
automatically switch to standby mode in the
current time setup.
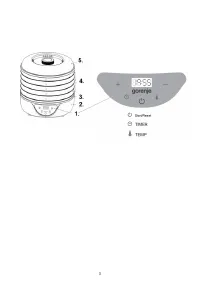
4. When the appliance is in the standby mode,
press the “TEMP” button and LED screen will
display the temperature. Use the "+" or "-" button
to change the drying temperature as needed
between "35
°C” and “70°C ". Each time you press
"+" or "-", temperature will change by 5
°C. If you
press and hold the "+" or "-" button, temperature
setting will be increased or decreased
continuously. 3 seconds after the drying
temperature is set, the system automatically
confirms operation with the current temperature
setup. LED screen will display the time in standby
mode.
Note: Set low temperature for thin/small pieces of
food or for a small load of food. Set high
temperature for drying thick/big pieces of food and
large loads. The thermostat can also be used to
decrease the temperature as the food is near the
end of its drying cycle, which makes it easier to
control the final moisture level in the food.
5. After setting time and temperature, press the
“Start/Reset” button, Motor and fan will start first;
the heating element will start to operate 5 seconds
later. Set time begins to count down;
the signal “:”
on the LED screen flashes.
6. During the drying process, you can change or
check the drying time. Press the “TIMER” button
first, then press the "+" or "-" button. If you press
the
“TIMER” button twice, you can check the set
time.
7. During the drying process, you can change or
check the drying temperature
. Press the “TEMP”
button first, then press the "+" or "-" button. After 5
seconds, LED screen will switch back to time
display mode.
8. During drying process,
press the “Start/Reset”
button twice; all functions will be paused. Press
“Start/Reset” button one more time to resume
operation in the mode that was active before the
pause.
9. In any function mode, press the “Start/Reset”
button for more than 3 seconds. Current work
status stops and all setups are cleared. The
dehydrator will go back to standby mode.
10. In standby mode, you can press the
“Start/Reset” button directly to start the default
drying cycle (TIME: 10 hours, TEMPERATURE:
70
°C)
.
You also can
change the drying time and
temperature if needed.
11. Function buttons as below: see Picture 3
12. When the set time counts down to "0:00”, the
heating element stops working first. The fan will
continue running for 10 seconds and the buzzer
will beep 20 times (once per second). The LED
screen switches to standby mode at default time
and temperature settings.
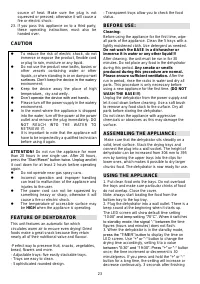
Note: Make sure that the fan base is always in
place when operating the dryer. If you do not have
time to dry all the food in one day, you can dry it
the next day. In this case, you should store the
food in a container/polyethylene bag and put it in
the freezer.
13. Unplug the unit from the power mains.
Note: It is recommended to stack at least 3 trays,
whether there is food on them or not.
HINTS
:
·This dehydrator includes 5 stackable transparent
trays and it features overheat protection. The base
contains th heating elements, motor, fan and
thermostat.
·The air vents on the tray allow air to circulate.
·Using temperature-controlled heating, air is
circulated from the base of the dehydrator to each
of the five trays and the cover to eliminate
moisture from food.
·Depending on the moisture in the food and the
humidity in the air, drying time can change. Use
the dryer in a dust free, well ventilated, warm and
dry room. Good ventilation is also important.
· Fruit and vegetables dried in your food
dehydrator will be different in appearance from
those sold in health food stores and
supermarkets. This is because your food
dehydrator uses no preservatives, no artificial
colouring and only natural additives.
Recording humidity and weight of the food before
and after particular drying times will be helpful for
improving your drying techniques in the future.
DRYING TIPS:
Drying time for pre-treated fruit will vary according
to the following factors:
1)
thickness of pieces or slices
2)
number of trays used in the drying process
3)
volume of food being dried
4)
moisture or humidity in your environment
5)
your preferences of drying for each type of
dried food
It is recommended to:
Check your food every hour.
Rotate and/or re-stack your trays if you notice
uneven drying.
Label food with contents, date and weight
before drying. It will also be helpful to note the
drying time for future reference.
Pre-treated food will give the best effect in
drying.
Correct food storage after drying also will
help to keep food in good condition and
preserve the nutrients.
Характеристики

Остались вопросы?Не нашли свой ответ в руководстве или возникли другие проблемы? Задайте свой вопрос в форме ниже с подробным описанием вашей ситуации, чтобы другие люди и специалисты смогли дать на него ответ. Если вы знаете как решить проблему другого человека, пожалуйста, подскажите ему :)


