
Швейная машина Janome HD1019 - инструкция пользователя по применению, эксплуатации и установке на русском языке. Мы надеемся, она поможет вам решить возникшие у вас вопросы при эксплуатации техники.
Если остались вопросы, задайте их в комментариях после инструкции.
"Загружаем инструкцию", означает, что нужно подождать пока файл загрузится и можно будет его читать онлайн. Некоторые инструкции очень большие и время их появления зависит от вашей скорости интернета.


17
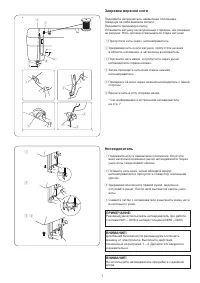
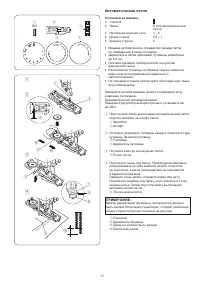
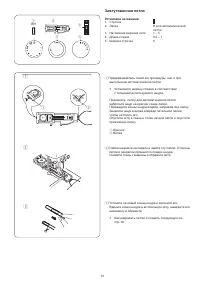
Автоматическая петля
Установки на машине:
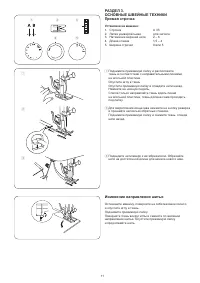
1. Строчка
2. Лапка
R для автоматической
петли
3. Натяжение верхней нити
1 – 5
4. Длина стежка
0,5 – 1
5. Ширина строчки
5
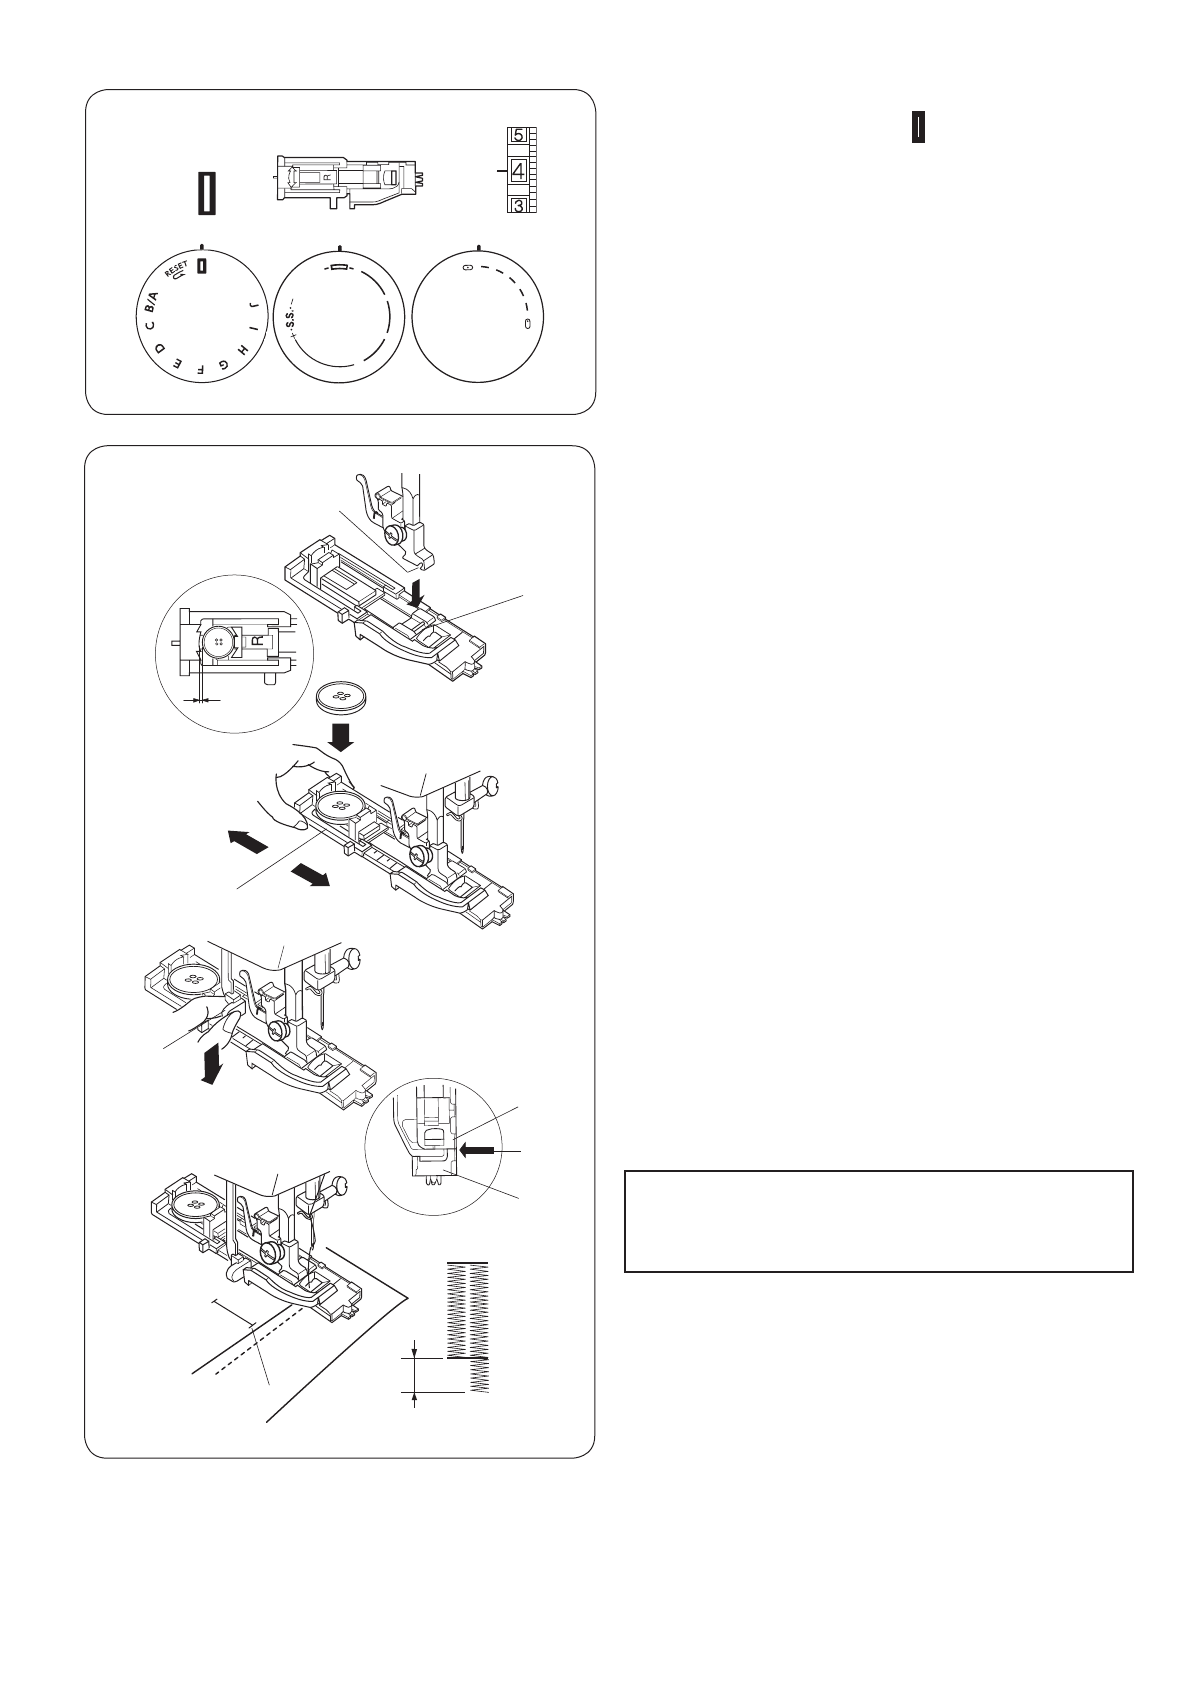
• Машина автоматически определяет размер петли
по помещённой в лапку пуговице.
• Держатель в лапке принимает пуговицы диаметром
до 2,5 см.
• Сначала сделайте пробную петлю на кусочке
идентичной ткани.
• Расположите пуговицу на образце ткани и отметьте
верх и низ для определения правильного
местоположения.
• На тянущихся тканях используйте прокладочную ткань
или стабилизатор.
Поверните на себя маховое колесо и поднимите иглу
в верхнее положение.
Поднимите рычаг прижимной лапки.
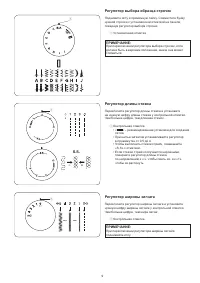
Поверните регулятор выбора строчек и установите её
на «BH».
z
Пристегните лапку выполнения автоматической петли,
опустив желобок на штифт лапки.
q
Желобок
w
Штифт
x
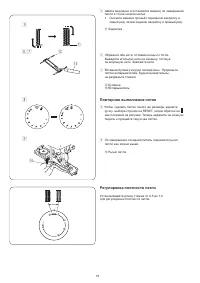
Оттяните держатель пуговицы назад и поместите туда
пуговицу. Зажмите пуговицу.
e
Пуговица
r
Держатель пуговицы
c
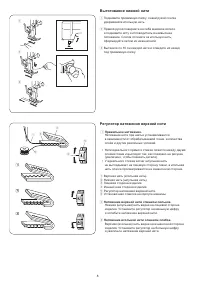
Потяните вниз до конца рычаг петли.
t
Рычаг петли
v
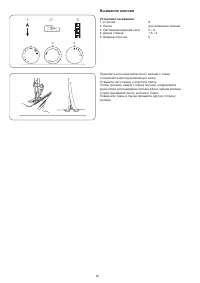
Подложите ткань под лапку. Правой рукой медленно
поворачивайте на себя маховое колесо, пока игла
не опустится, а рычаг нитеводителя не поднимется
в верхнее положение.
Сдвиньте ткань влево, отведите влево обе нити.
Подложите изделие под лапку, опустите иглу в точку
начала шитья. Затем опустите лапку выполнения
автоматической петли.
y
Точка начала петли
u
Ползунок
i
Держатель пружины
o
Здесь не должно быть зазора
!0
Различная длина
Между держателем пружины и ползунком не должно
быть зазора. Если зазор существует, то будет различная
длина сторон петли как показано на рисунке.
ПРИМЕЧАНИЕ:
20
z
x
c
v
r
y
!0
u
o
i
A
B
e
q
w
q
w
e
r
t
Automatic Buttonhole
q
Stitch pattern:
w
Presser foot:
R: Automatic buttonhole
foot
e
Thread tension dial: 1–5
r
Stitch length:
0.5–1
t
Stitch width:
5
* The size of buttonhole is automatically set by
placing the button in the rear of the automatic
buttonhole foot R.
* The button holder of the foot takes a button
size up to 1˝ (2.5 cm) in diameter.
* Make a test buttonhole on an extra piece of
the fabric, interfacing and seams of the actual
garment.
* Use interfacing on stretch fabrics.
z
Raise the needle by turning the handwheel
toward you.
Raise the presser foot lifter.
Attach the automatic buttonhole foot R.
q
Groove
w
Pin
x
Pull the button holder to the back A, and
place the button in it.
Push back the button holder toward you B as
far as it will go.
e
Button holder
* If the button is extremely thick, make a test
buttonhole. If it is difficult to fit the button
through the test buttonhole, lengthen the
buttonhole by pulling the button holder back
to create a gap.
r
Gap
c
Pull the buttonhole lever downward as far as
it will go.
t
Buttonhole lever
v
Insert the fabric under the foot. Turn the
handwheel toward you one rotation and
remove the fabric to the left to draw both
threads to the left. Insert the garment under
the foot, and lower the needle at the starting
point. Then lower the automatic buttonhole
foot R.
y
Starting point
NOTE:
Make sure there is no gap between the slider
and spring holder, otherwise the left and right
length will be different.
u
Slider
i
Spring holder
o
There should be no gap.
!0
Sewing gap
BH
C
D
E
F
G
H
I
J
K
L
A
1
2
3
4
0
1
2
4 3
5
0
t
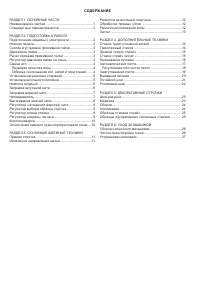
Содержание
- 4 СОДЕРЖАНИЕ
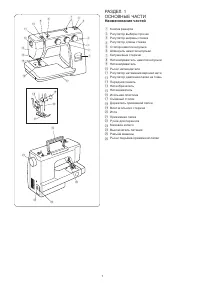
- 5 ОСНОВНЫЕ ЧАСТИ; Наименование частей; SECTION 1. ESSENTIAL PARTS; Names of Parts; Stitch selector dial
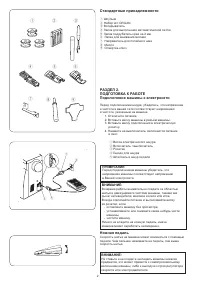
- 6 SECTION 2. GETTING READY TO; SECTION 2. GETTING READY TO
- 7 Рычаг подъёма прижимной лапки; Reduce the pressure to 2 for applique, cutwork,
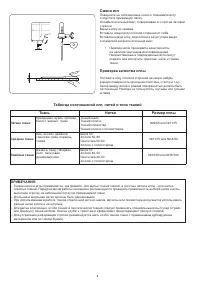
- 8 Changing Needle; the flat side away from you.; To check the needle; Fabric, Thread and Needle Chart; Fabric
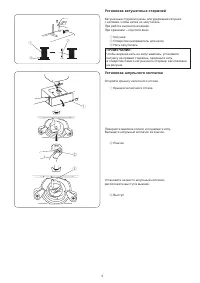
- 9 Removing or Inserting the Bobbin Case; Spool
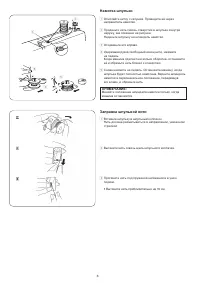
- 10 Winding the Bobbin; Guide the thread around the bobbin winder; Threading Bobbin Case
- 11 Needle Threader; Needle Threader
- 12 Thread Tension Dial
- 13 CAUTION; Setting mark
- 15 Изменение направления шитья; SECTION 3. BASIC SEWING
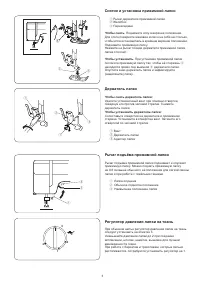
- 17 Зигзаг; Zigzag foot; Zigzag foot
- 18 ДОПОЛНИТЕЛЬНЫЕ ТЕХНИКИ; Трикотажный стежок; SECTION 4. UTILITY STITCHING; SECTION 4. UTILITY STITCHING; This stitch is used to finish the raw edge on; SECTION 4. UTILITY STITCHING; This stitch is used to finish the raw edge on; SECTION 4. UTILITY STITCHING
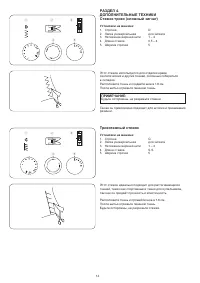
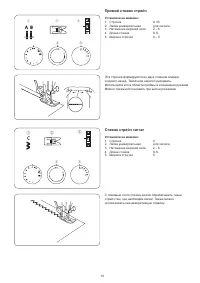
- 19 Прямой стежок стрейч; Стежок стрейч зигзаг; Straight Stretch
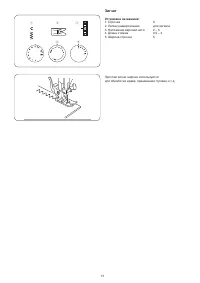
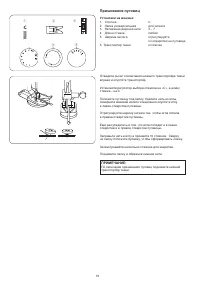
- 20 Пришивание пуговиц; Sewing Buttons
- 21 Автоматическая петля
- 22 n m
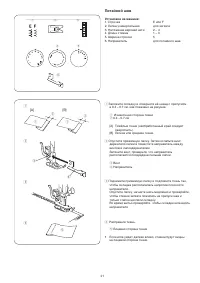
- 23 Зажгутованная петля; Corded Buttonhole
- 24 Вшивание молнии; Smooth the threads toward the back and lower; Smooth the threads toward the back and lower
- 25 Blind Hem Stitch; Screw
- 26 Роликовый шов
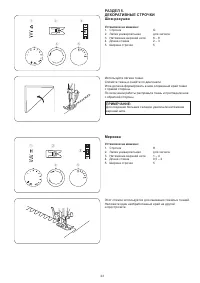
- 27 ДЕКОРАТИВНЫЕ СТРОЧКИ; Мережка; SECTION 5. DECORATIVE STITCHING
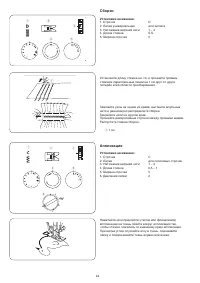
- 28 Сборки; Аппликация
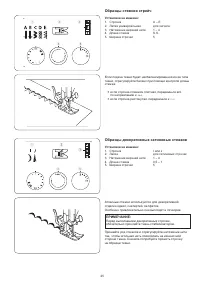
- 29 Образцы стежков стрейч; Образцы декоративных сатиновых стежков
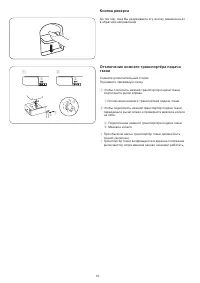
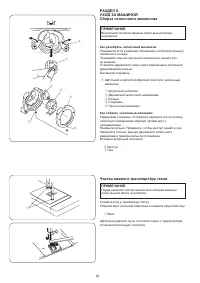
- 30 Чистка нижнего транспортёра ткани
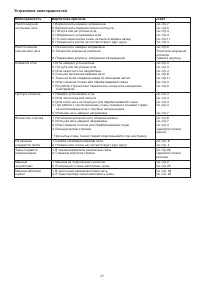
- 31 Устранение неисправностей; Неисправность
Характеристики

Остались вопросы?Не нашли свой ответ в руководстве или возникли другие проблемы? Задайте свой вопрос в форме ниже с подробным описанием вашей ситуации, чтобы другие люди и специалисты смогли дать на него ответ. Если вы знаете как решить проблему другого человека, пожалуйста, подскажите ему :)


