
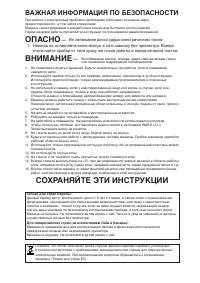
Швейная машина Janome HD1019 - инструкция пользователя по применению, эксплуатации и установке на русском языке. Мы надеемся, она поможет вам решить возникшие у вас вопросы при эксплуатации техники.
Если остались вопросы, задайте их в комментариях после инструкции.
"Загружаем инструкцию", означает, что нужно подождать пока файл загрузится и можно будет его читать онлайн. Некоторые инструкции очень большие и время их появления зависит от вашей скорости интернета.


7
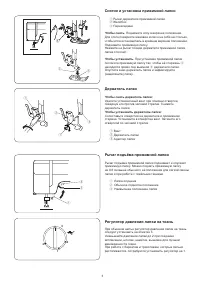
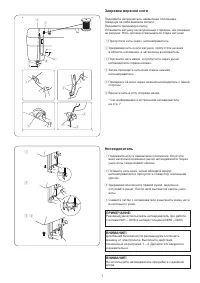
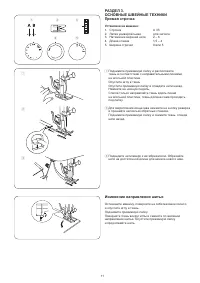
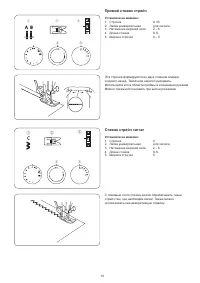
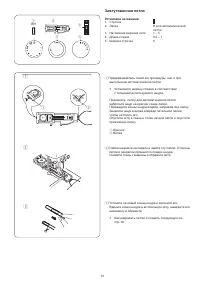
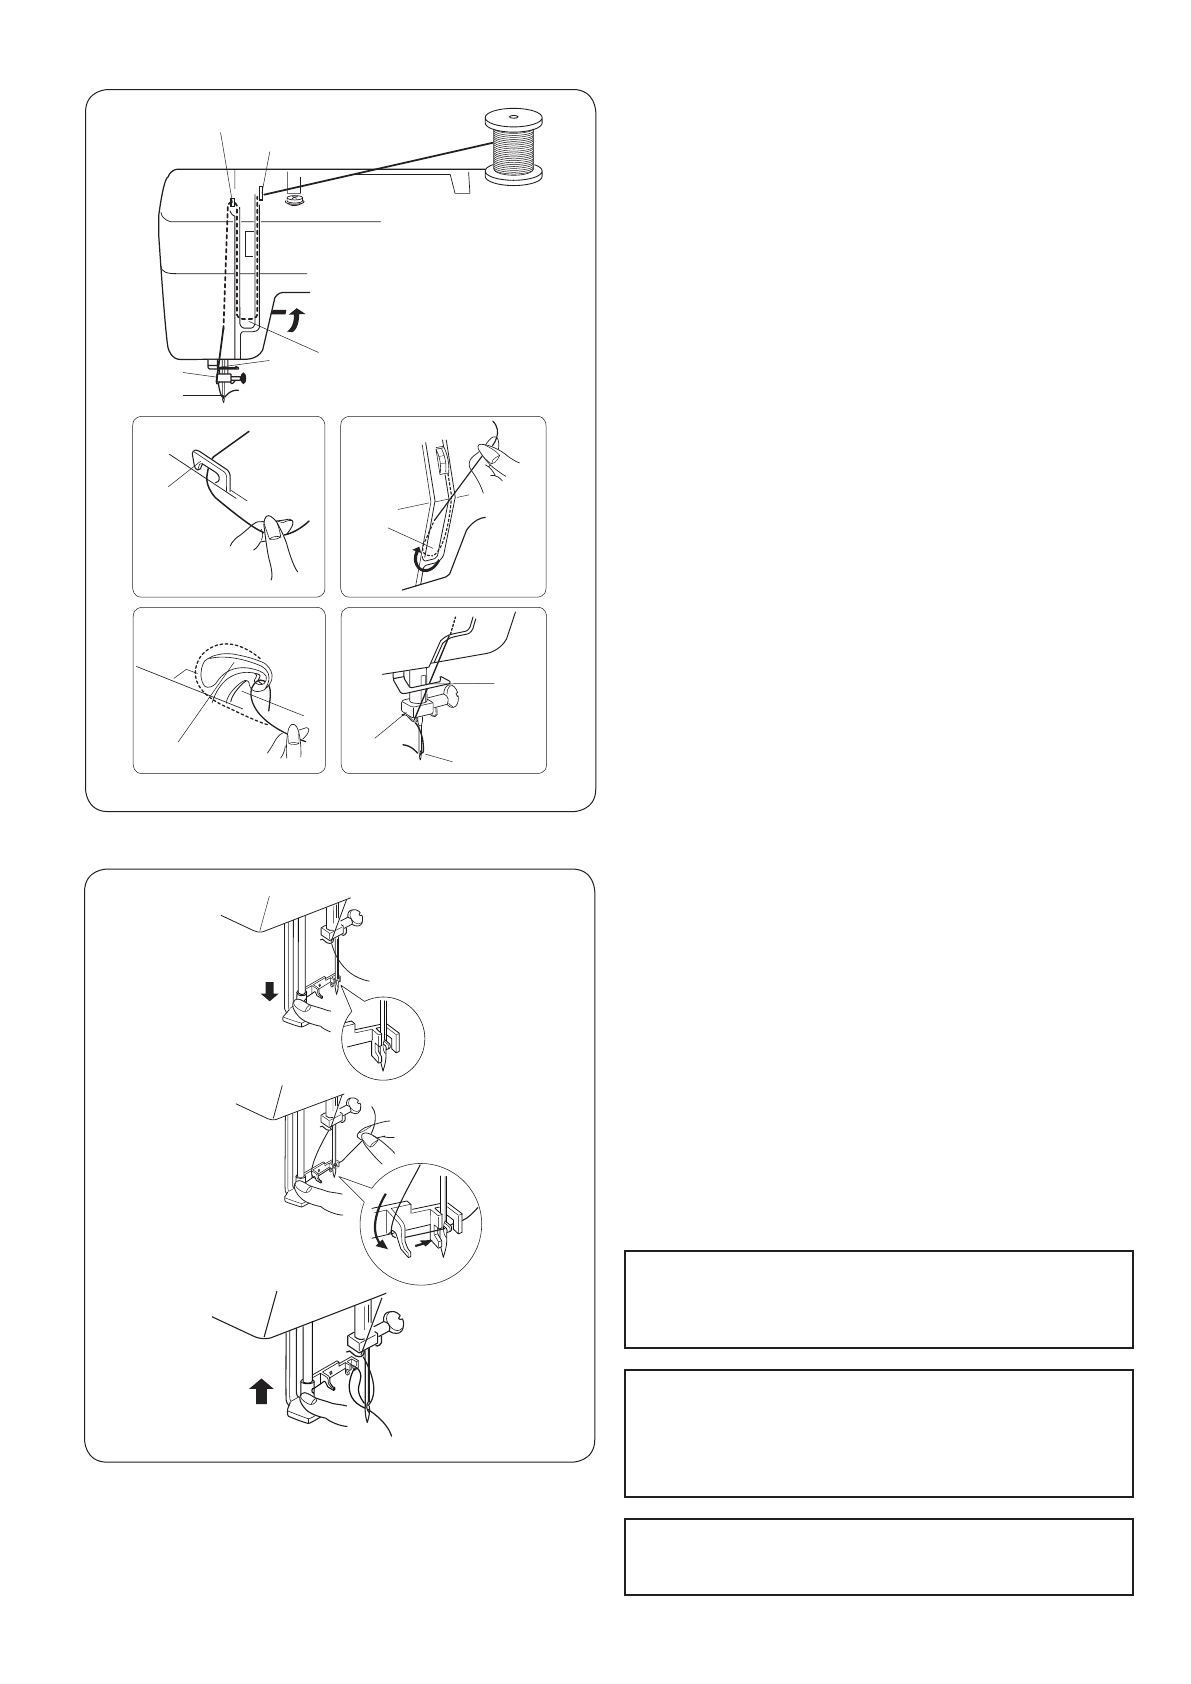
Заправка верхней нити
Поднимите нитеводитель наивысшее положение,
повернув на себя маховое колесо.
Поднимите прижимную лапку.
Установите катушку на катушечный стержень, как показано
на рисунке. Нить должна отматываться сзади катушки.
z
Пропустите нить через нитенаправитель.
x
Удерживая нить около катушки, пропустите её вниз
в область натяжения, а затем вниз в натяжитель.
c
Подтяните нить вверх и пропустите через рычаг
нитеводителя справа налево.
v
Затем проведите нить вниз сквозь нижний
нитенаправитель.
b
Проведите её вниз через нижний нитеводитель с левой
стороны.
n
Вденьте нить в иглу спереди назад.
* См. информацию о встроенном нитевдевателе
на стр. 7
Нитевдеватель
z
Поднимите иглу в наивысшее положение. Опустите
вниз насколько возможно рычаг нитевдевателя. Через
ушко иглы сзади войдёт крючок.
x
Потяните нить вниз, затем обведите вокруг
нитенаправителя и пропустите слева под маленький
крючок.
c
Удерживая кончик нити правой рукой, медленно
отпускайте рычаг. Петля нити вытянется сквозь ушко
иглы.
v
Снимите петлю с нитевдевателя и вытяните конец нити
из игольного ушка.
Для Вашей безопасности рекомендуем отключить
машину от электросети. Выполните действия,
показанные на рисунках 1 – 4. Делайте это аккуратно
и внимательно.
Не используйте нитевдеватель при работе с двойной
иглой.
Рекомендуем использовать нитевдеватель при работе
с иглами №11 – №16 и нитями толщиной №50 – №80.
ВНИМАНИЕ!
ВНИМАНИЕ!
ПРИМЕЧАНИЕ:
10
z
c
x
z
x
c
b
n
b
n
Threading the Machine
Raise the take-up lever to its highest position by
turning the handwheel toward you.
Raise the presser foot.
Place a spool on the spool pin as shown, with
thread coming from back of the spool.
z
Draw the thread into thread guide using both
hands.
x
While holding the thread near spool, draw
thread down into the tension area and then
around the check spring holder.
c
Firmly draw the thread up and through the
take–up lever from right to left.
v
Then draw the thread down along the left
channel.
b
Slide the thread into needle bar thread guide
on the left.
n
Thread the needle eye from front to back.
NOTE:
You may want to cut the thread end with
sharp scissors for easier needle threading.
v
v
z
x
c v
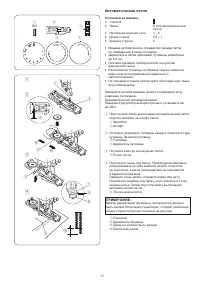
Needle Threader
z
Raise the needle to its highest position.
Press down the needle threader knob as far
as it will go.
The hook comes out through the needle eye
from behind.
x
Pull the thread down around the thread guide
then pass it from the left and under the hook.
c
Release the knob slowly while holding the
thread end with your hand.
A loop of the thread is pulled up through the
needle eye.
v
Remove the loop from the threader and pull
out the thread end from the needle eye.
NOTE:
The needle threader can be used
with a #11/75 to #16/100 needle or Janome
Blue Tipped needle.
Thread size 50 to 100 would work well.
10
z
c
x
z
x
c
b
n
b
n
Threading the Machine
Raise the take-up lever to its highest position by
turning the handwheel toward you.
Raise the presser foot.
Place a spool on the spool pin as shown, with
thread coming from back of the spool.
z
Draw the thread into thread guide using both
hands.
x
While holding the thread near spool, draw
thread down into the tension area and then
around the check spring holder.
c
Firmly draw the thread up and through the
take–up lever from right to left.
v
Then draw the thread down along the left
channel.
b
Slide the thread into needle bar thread guide
on the left.
n
Thread the needle eye from front to back.
NOTE:
You may want to cut the thread end with
sharp scissors for easier needle threading.
v
v
z
x
c v
Needle Threader
z
Raise the needle to its highest position.
Press down the needle threader knob as far
as it will go.
The hook comes out through the needle eye
from behind.
x
Pull the thread down around the thread guide
then pass it from the left and under the hook.
c
Release the knob slowly while holding the
thread end with your hand.
A loop of the thread is pulled up through the
needle eye.
v
Remove the loop from the threader and pull
out the thread end from the needle eye.
NOTE:
The needle threader can be used
with a #11/75 to #16/100 needle or Janome
Blue Tipped needle.
Thread size 50 to 100 would work well.
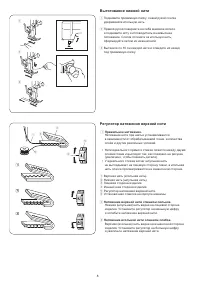
Содержание
- 4 СОДЕРЖАНИЕ
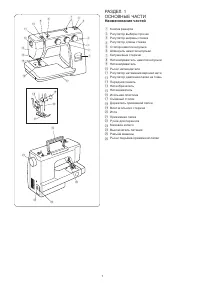
- 5 ОСНОВНЫЕ ЧАСТИ; Наименование частей; SECTION 1. ESSENTIAL PARTS; Names of Parts; Stitch selector dial
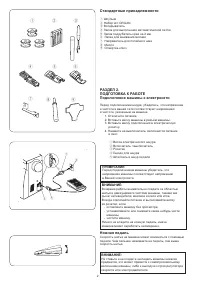
- 6 SECTION 2. GETTING READY TO; SECTION 2. GETTING READY TO
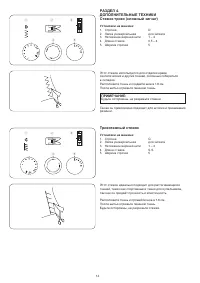
- 7 Рычаг подъёма прижимной лапки; Reduce the pressure to 2 for applique, cutwork,
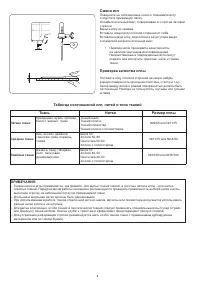
- 8 Changing Needle; the flat side away from you.; To check the needle; Fabric, Thread and Needle Chart; Fabric
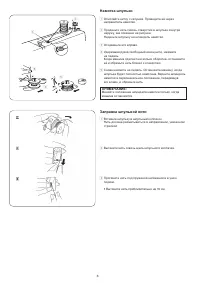
- 9 Removing or Inserting the Bobbin Case; Spool
- 10 Winding the Bobbin; Guide the thread around the bobbin winder; Threading Bobbin Case
- 11 Needle Threader; Needle Threader
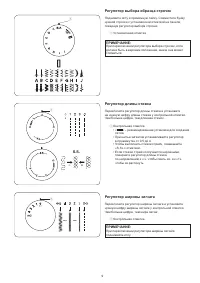
- 12 Thread Tension Dial
- 13 CAUTION; Setting mark
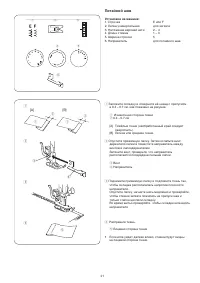
- 15 Изменение направления шитья; SECTION 3. BASIC SEWING
- 17 Зигзаг; Zigzag foot; Zigzag foot
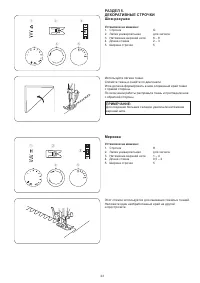
- 18 ДОПОЛНИТЕЛЬНЫЕ ТЕХНИКИ; Трикотажный стежок; SECTION 4. UTILITY STITCHING; SECTION 4. UTILITY STITCHING; This stitch is used to finish the raw edge on; SECTION 4. UTILITY STITCHING; This stitch is used to finish the raw edge on; SECTION 4. UTILITY STITCHING
- 19 Прямой стежок стрейч; Стежок стрейч зигзаг; Straight Stretch
- 20 Пришивание пуговиц; Sewing Buttons
- 21 Автоматическая петля
- 22 n m
- 23 Зажгутованная петля; Corded Buttonhole
- 24 Вшивание молнии; Smooth the threads toward the back and lower; Smooth the threads toward the back and lower
- 25 Blind Hem Stitch; Screw
- 26 Роликовый шов
- 27 ДЕКОРАТИВНЫЕ СТРОЧКИ; Мережка; SECTION 5. DECORATIVE STITCHING
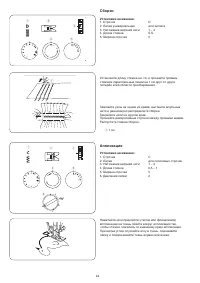
- 28 Сборки; Аппликация
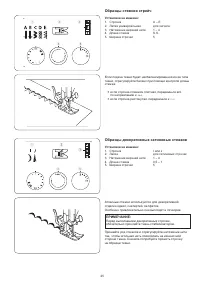
- 29 Образцы стежков стрейч; Образцы декоративных сатиновых стежков
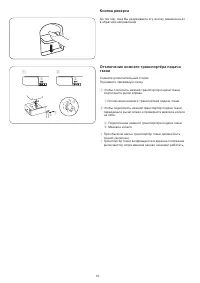
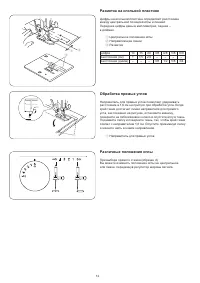
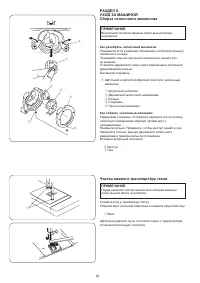
- 30 Чистка нижнего транспортёра ткани
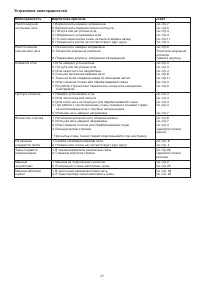
- 31 Устранение неисправностей; Неисправность
Характеристики

Остались вопросы?Не нашли свой ответ в руководстве или возникли другие проблемы? Задайте свой вопрос в форме ниже с подробным описанием вашей ситуации, чтобы другие люди и специалисты смогли дать на него ответ. Если вы знаете как решить проблему другого человека, пожалуйста, подскажите ему :)


