
Шуруповерты Hitachi DV 18 DMR - инструкция пользователя по применению, эксплуатации и установке на русском языке. Мы надеемся, она поможет вам решить возникшие у вас вопросы при эксплуатации техники.
Если остались вопросы, задайте их в комментариях после инструкции.
"Загружаем инструкцию", означает, что нужно подождать пока файл загрузится и можно будет его читать онлайн. Некоторые инструкции очень большие и время их появления зависит от вашей скорости интернета.


English
9
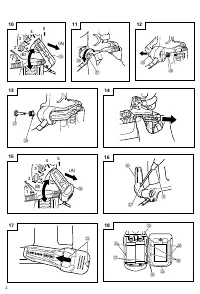
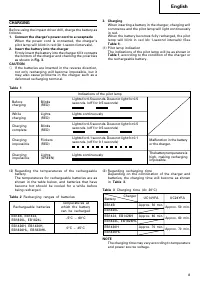
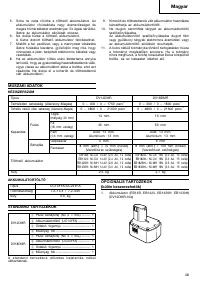
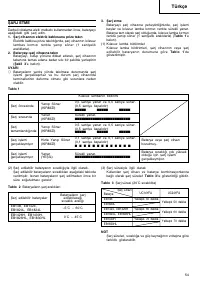
4. Disconnect the charger
’
s power cord from the
receptacle
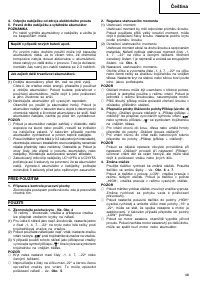
5. Hold the charger firmly and pull out the battery
NOTE
After charging, pull out batteries from the charger
first, and then keep the batteries properly.
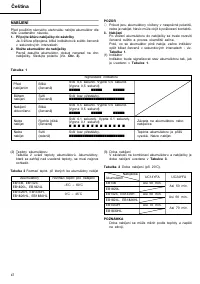
R e g a r d i n g e l e c t r i c d i s c h a r g e i n c a s e o f n e w
batteries, etc.
As the internal chemical substance of new batteries
and batteries that have not been used for an extended
period is not activated, the electric discharge might
be low when using them the first and second time.
This is a temporary phenomenon, and normal time
required for recharging will be restored by recharging
the batteries 2
–
3 times.
How to make the batteries perform longer.
(1) Recharge the batteries before they become completely
exhausted.
When you feel that the power of the tool becomes
weaker, stop using the tool and recharge its battery.
If you continue to use the tool and exhaust the electric
current, the battery may be damaged and its life will
become shorter.
(2) Avoid recharging at high temperatures.
A rechargeable battery will be hot immediately after
use. If such a battery is recharged immediately after
use, its internal chemical substance will deteriorate,
and the battery life will be shortened. Leave the battery
and recharge it after it has cooled for a while.
CAUTION
䡬
If the battery is charged while it is heated because it
has been left for a long time in a location subject to
direct sunlight or because the batetery has just been
used, the pilot lamp of the charger lights up green. In
such a case, first let the battery cool, then start
charging.
䡬
When the pilot lamp flickers in red (at 0.2-second
intervals), check for and take out any foreign objects
in the charger
’
s battery installation hole. If there are
no foreign objects, it is probable that the battery or
charger is malfunctioning. Take it to your authorized
Service Center.
䡬
Since the built-in micro computer takes about 3
seconds to confirm that the battery being charged
with UC14YFA/UC24YFA is taken out, wait for a
minimum of 3 seconds before reinserting it to
continue charging. If the battery is reinserted within
3 seconds, the battery may not be properly charged.
PRIOR TO OPERATION
1. Setting up and checking the work environment
Check if the work environment is suitable by following
the precautions.
HOW TO USE
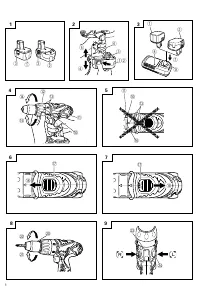
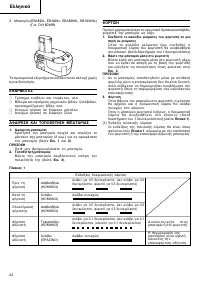
1. Confirm the cap position (see Fig. 4)
The three modes of screwdriver, drill and impact drill
can be switched by the position of the cap in this unit.
(1) When using this unit as a screwdriver, line up the one
of the numbers
“
1, 4, 7 ... 22
”
on the cap, or the black
dots, with the triangle mark on the outer body.
(2) When using this unit as a drill, align the cap drill mark
“
”
with the triangle mark on the outer body.
(3) When using this unit as an impact drill, align the cap
hammer mark
“
”
with the triangle mark on the
outer body.
CAUTION
䡬
The cap cannot be set between the numerals
“
1, 4, 7
... 22
”
or the black dots.
䡬
Do not use with the cap numeral between
“
22
”
and
the black line at the middle of the drill mark. Doing so
may cause damage (See
Fig. 5
).
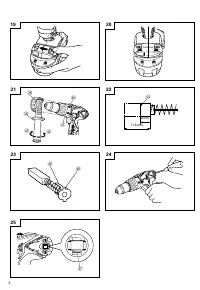
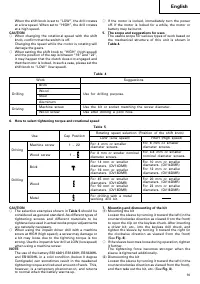
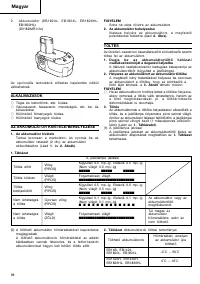
2. Tightening torque adjustment
(1) Tightening torque
Tightening torque should correspond in its intensity
to the screw diameter. When too strong torque is
used, the screw head may be broken or be injured.
Be sure to adjust the cap position according to the
screw diameter.
(2) Tightening torque indication
The tightening torque differs depending on the type
of screw and the material being tightened.
The unit indicates the tightening torque with the
numbers
“
1, 4, 7 ... 22
”
on the cap, and the black
dots. The tightening toque at position
“
1
”
is the
weakest and the torque is strongest at the highest
number (See
Fig. 4
).
(3) Adjusting the tightening torque
Rotate the cap and line up the numbers
“
1, 4, 7 ... 22
”
on the cap, or the black dots, with the triangle mark
on the outer body. Adjust the cap in the weak or the
strong torque direction according to the torque you
need.
CAUTION
䡬
The motor rotation may be locked to cease while the
unit is used as drill. While operating the impact driver
drill, take care not to lock the motor.
䡬
Too long hammering may cause the screw broken
due to excessive tightening.
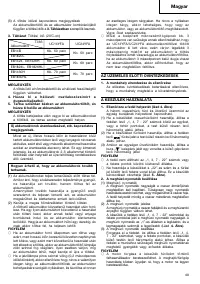
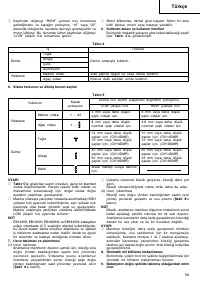
3. Rotation to Impact changeover (See Fig. 4)
The
“
Rotation (Rotation only)
”
and
“
Impact (Impact
+ Rotation)
”
can be switched by aligning the drill
mark
“
”
or the hammer mark
“
”
with the triangle
mark on the outer body.
䡬
To make holes in the metal, wood or plastic, switch
to
“
Rotation (Rotation only)
”
.
䡬
To make holes in bricks or concrete blocks, switch to
“
Impact (Impact + Rotation)
”
.
CAUTION
If an operation which is normally performed at the
“
Rotation
”
setting is performed at
“
Impact
“
setting,
the effect of making holes does not only increase but
it may also damage the bit or other parts.
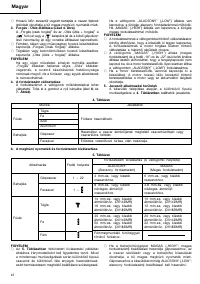
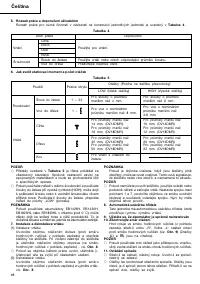
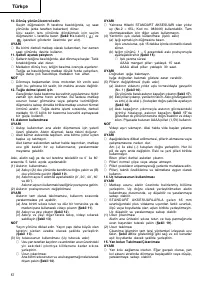
4. Change rotation speed
Operate the shift knob to change the rotational speed.
Move the shift knob in the direction of the arrow (see
Figs. 6
and
7
).


