
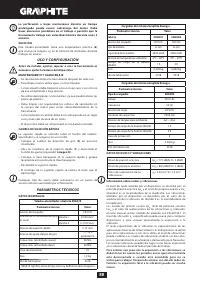
Шуруповерты GRAPHITE Energy+ 58G019 - инструкция пользователя по применению, эксплуатации и установке на русском языке. Мы надеемся, она поможет вам решить возникшие у вас вопросы при эксплуатации техники.
Если остались вопросы, задайте их в комментариях после инструкции.
"Загружаем инструкцию", означает, что нужно подождать пока файл загрузится и можно будет его читать онлайн. Некоторые инструкции очень большие и время их появления зависит от вашей скорости интернета.


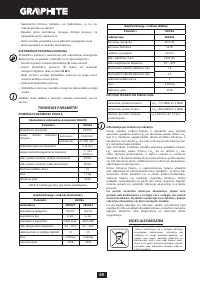


13
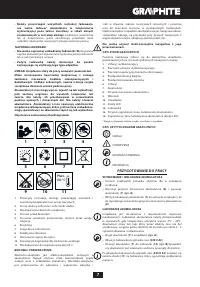
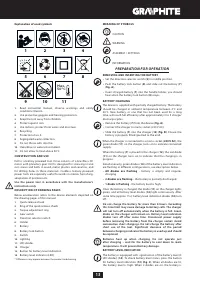
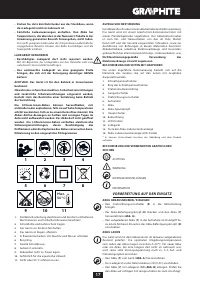
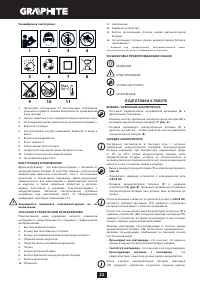
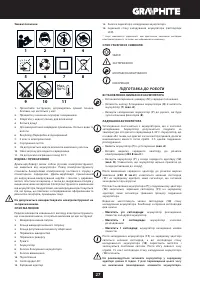
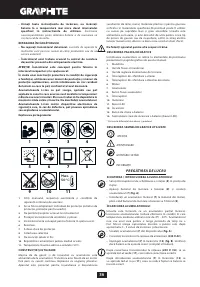
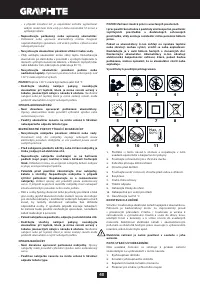
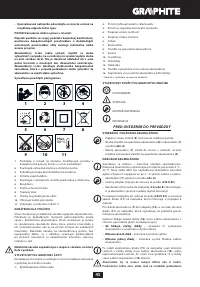
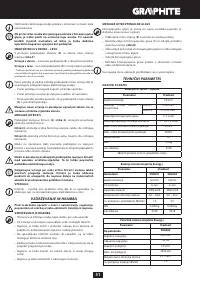
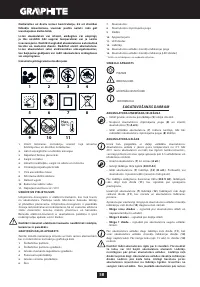
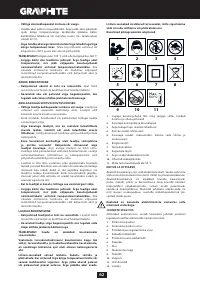
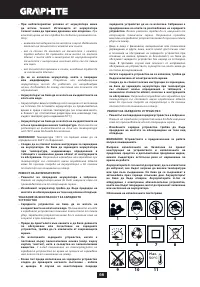
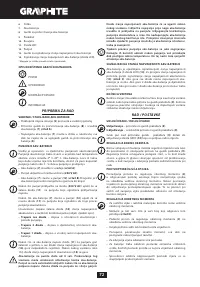
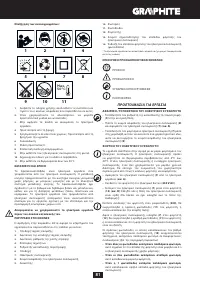
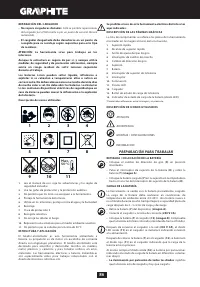
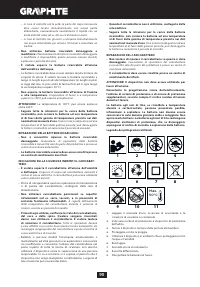
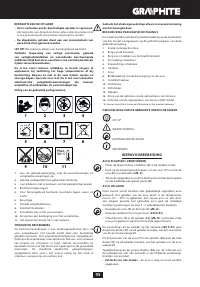
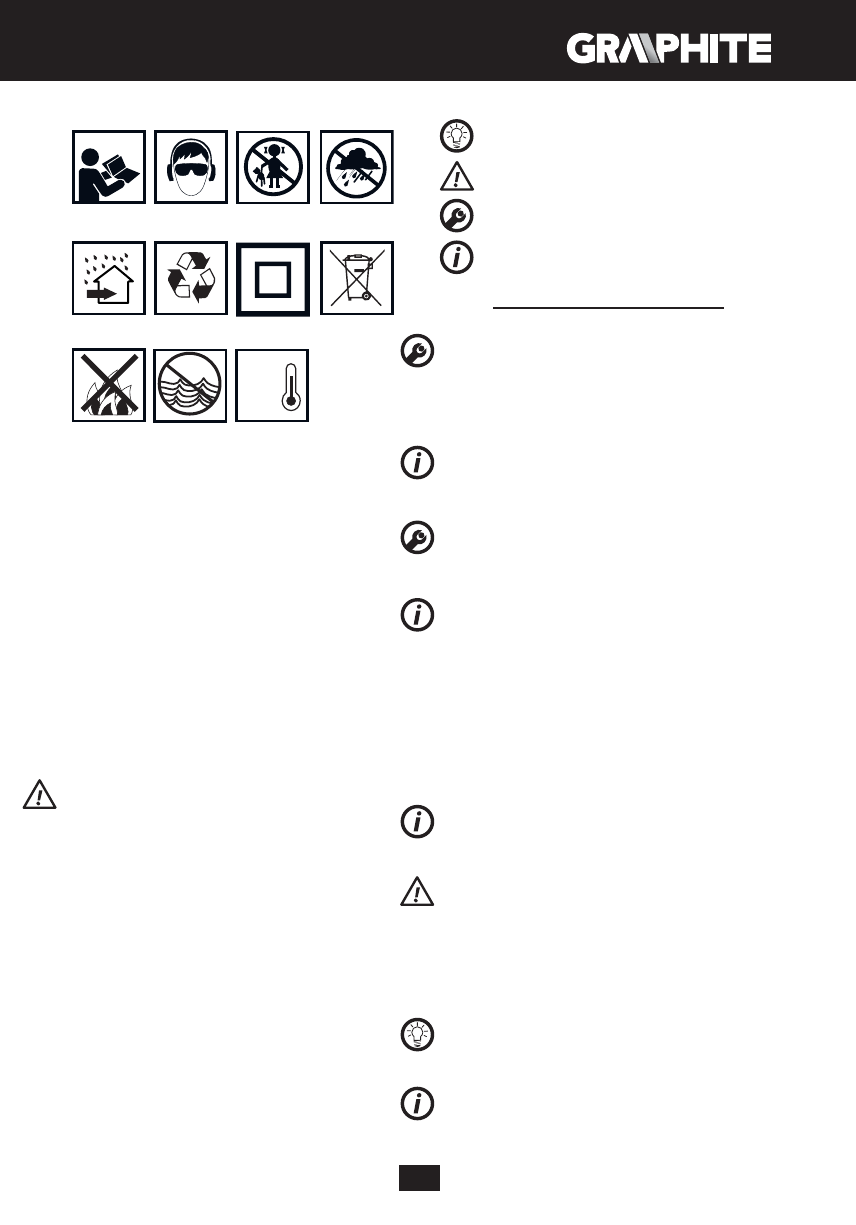
Explanation of used symbols
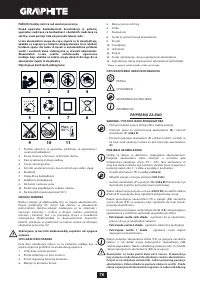
1
2
3
4
7
5
Max.
50°C
6
8
9
10
11
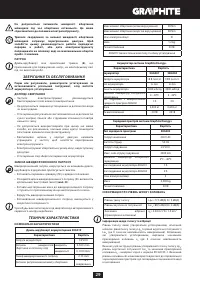
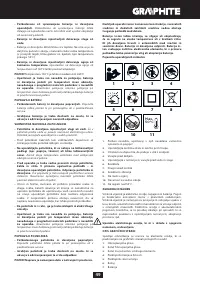
1.
Read instruction manual, obser ve warnings and safety
conditions therein.
2.
Use protective goggles and hearing protectors.
3.
Keep the tool away from children.
4.
Protect against rain.
5.
Use indoors, protect from water and moisture.
6.
Recycling.
7.
Protection class 2.
8.
Segregated waste collection.
9.
Do not throw cells into fire.
10.
Hazardous to water environment.
11.
Do not allow to heat above 50°C.
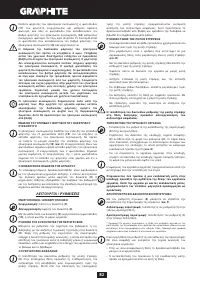
CONSTRUC TION AND USE
Drill is a batter y powered tool. Drive consists of a brushless DC
motor with planetar y gear. Drill is designed for screwing in and
out screws and bolts in wood, metal, plastics and ceramics, and
for drilling holes in these materials. Cordless, batter y-powered
power tools are especially useful for works in interior furnishing,
adaptation of premises etc.
Use the power tool in accordance with the manufacturer ’s
instructions only.
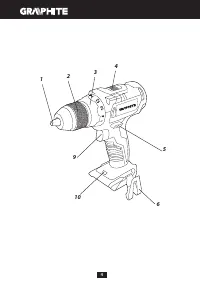
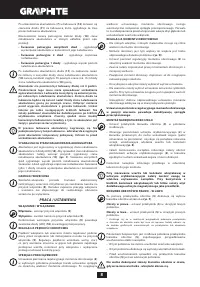
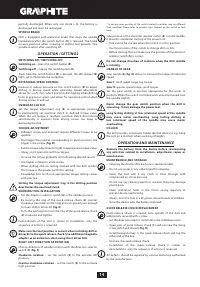
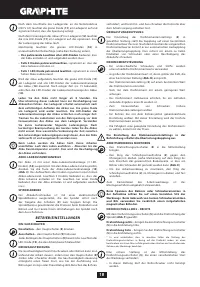
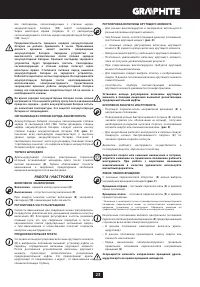
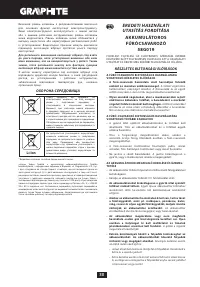
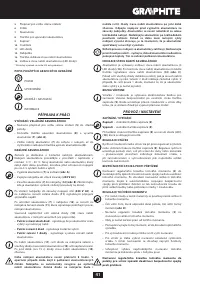
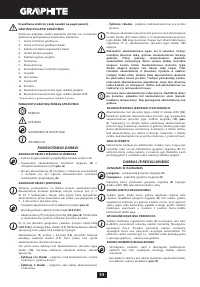
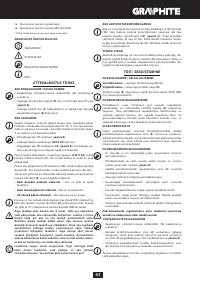
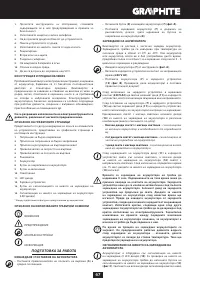
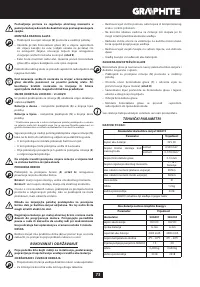
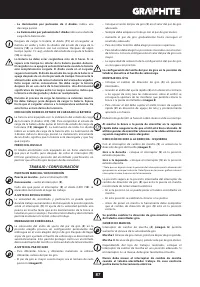
D E S C R I P T I O N O F D R AW I N G PAG E S
Below enumeration refers to the device elements depicted on
the drawing pages of this manual.
1.
Quick-release chuck
2.
Ring of the quick release chuck
3.
Torque adjustment ring
4.
Gear switch
5.
Direction selector switch
6.
Holder
7.
Batter y
8.
Batter y lock button
9.
Switch
10.
Lighting
11.
LED diodes
12.
Charger
13.
Button for batter y level indication
14.
Batter y level indicator (LED)
* Differences may appear between the product and drawing.
M E A N I N G O F S YM B O L S
CAUTION
WARNING
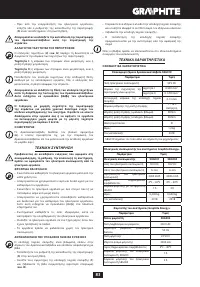
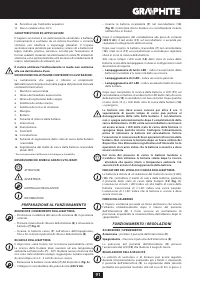
ASSEMBLY / SET TINGS
INFORMATION
PREPARATION FOR OPERATION
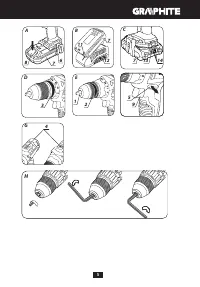
REMOVING AND INSERTING THE BAT TERY
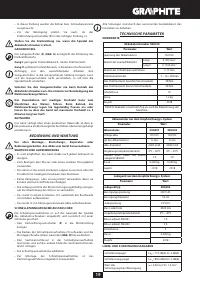
•
Set the direction selector switch (
5
) in middle position.
•
Push the batter y lock button (
8
) and slide out the batter y (
7
)
(
fig. A
).
•
Inser t charged batter y (
7
) into the handle holder, you should
hear when the batter y lock button (
8
) snaps.
BAT TERY CHARGING
The device is supplied with par tially charged batter y. The batter y
should be charged in ambient temperature between 4°C and
40°C. New batter y, or one that has not been used for a long
time, will reach full efficiency after approximately 3 to 5 charge/
discharge cycles.
•
Remove the batter y (
7
) from the device (
fig. A
).
•
Connect the charger to mains socket (230 V AC).
•
Slide the batter y (
7
) into the charger (
12
) (
fig. B
). Ensure the
batter y is properly fitted (pushed to the end).
When the charger is connected to a mains socket (
230 V AC
), the
green diode (
11
) on the charger turns on to indicate connected
supply.
When the batter y (
7
) is placed in the charger (
12
), the red diode
(
11
) on the charger turns on to indicate that the charging is in
progress.
Simultaneously, green diodes (
14
) of the batter y level indication
are flashing in different configurations, see description below.
• All diodes are flashing
- batter y is empty and requires
charging.
• 2 diodes are flashing
- the batter y is par tially discharged.
• 1 diode is flashing
- the batter y level is high.
Once the batter y is charged, the diode (
11
) on the charger lights
green, and all batter y level diodes (
14
) light continuously. After
some time (approx. 15 s) batter y level indication diodes (
14
) turn
off.
Do not charge the batter y for more than 8 hours. Exceeding
this time limit may cause damage to batter y cells. The charger
will not turn off automatically when the batter y is full. Green
diode on the charger will remain on. Batter y level indication
diodes turn off after some time. Disconnect power supply
before removing the batter y from the charger socket. Avoid
consecutive shor t chargings. Do not charge the batter y after
shor t use of the tool. Significant decrease of the period
between chargings indicates the batter y is used up and should
be replaced.
Batteries heat up when charging. Do not operate just
after charging – wait for the batter y to cool down to room
temperature. It will prevent batter y damage.
BAT TERY LE VEL INDIC ATION
The batter y is equipped with signalisation of the batter y level (3
LED diodes) (
14
). To check batter y level status, press the button
for batter y level indication (
13
) (
fig. C
). When all diodes are lit,
the batter y level is high. When 2 diodes are on, the batter y is


