
Шуруповерты DeWalt DCD701D2 (MULTI) - инструкция пользователя по применению, эксплуатации и установке на русском языке. Мы надеемся, она поможет вам решить возникшие у вас вопросы при эксплуатации техники.
Если остались вопросы, задайте их в комментариях после инструкции.
"Загружаем инструкцию", означает, что нужно подождать пока файл загрузится и можно будет его читать онлайн. Некоторые инструкции очень большие и время их появления зависит от вашей скорости интернета.


11
English
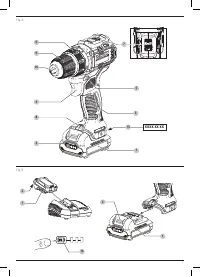
Proper hand position requires one hand on the main handle
3
and one hand on the battery pack.
Worklight (Fig. F)
There is a worklight
8
located on the foot of the tool. The
worklight is activated when the trigger switch is depressed.
When the trigger is released, the worklight will stay illuminated
for up to 20 seconds.
nOTE:
The worklight is for lighting the immediate work surface
and is not intended to be used as a flashlight.
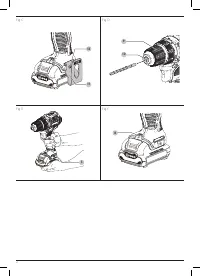
Performing an Application (Fig. A)
WARNING: To reduce the risk of personal injury,
ALWAYS
ensure workpiece is anchored or clamped firmly.
WARNING:
Always wait until the motor has come to
a complete standstill before changing the direction
of rotation.
Prior to performing work:
• Set the speed selector
7
. Refer to
Speed Selection
.
• Install the appropriate bit or accessory into the chuck. Refer
to
Installing a Bit or Accessory into a Keyless Chuck
.
WARNING:
• Do not use this tool to mix or pump easily combustible
or explosive fluids (benzine, alcohol, etc.).
• Do not mix or stir flammable liquids
labeled accordingly.
Screwdriving
Your tool has a clutch with adjustable torque for driving
and removing a wide array of fastener shapes and sizes. The
numbers on the mode selection collar
6
are used to set a
torque range for screwdriving. The higher the number on the
collar, the higher the torque and the larger the fastener which
can be driven.
1. Turn the mode selection collar
6
to the desired position.
Refer to
Mode Selection
.
Proper Hand Position (Fig. E)
WARNING:
To reduce the risk of serious personal injury,
ALWAYS
use proper hand position as shown.
WARNING:
To reduce the risk of serious personal
injury,
ALWAYS
hold securely in anticipation of a
sudden reaction.
OPERATION
Instructions for Use
WARNING:
Always observe the safety instructions and
applicable regulations.
WARNING:
To reduce the risk of serious personal
injury, turn tool off and disconnect battery pack
before making any adjustments or removing/
installing attachments or accessories.
An accidental
start-up can cause injury.
nOTE:
The first time the tool is run after changing the direction
of rotation, you may hear a click on start up. This is normal and
does not indicate a problem.
2. Pull the trigger switch applying pressure in a straight line
with the bit until the fastener is seated at the desired depth
in the workpiece.
Recommendations for screwdriving
• Start with lower torque settings, then advance to higher
torque settings to avoid damage to the workpiece
or fastener.
• Make some practice runs in scrap or on unseen areas of the
workpiece to determine the proper position of the mode
selection collar.
Drilling
1. Turn the mode selection collar
6
to the drill symbol. Refer
to
Mode Selection
.
2. Place drill bit in contact with the workpiece.
nOTE:
Use sharp drill bit only.
3. Pull the trigger applying pressure in a straight line with the
bit until it reaches the desired depth.
WARNING:
Drill may stall if overloaded causing a sudden
twist. Always expect the stall. Grip the drill firmly to control
the twisting action and avoid injury.
4. Keep the motor running when pulling the bit back out of a
drilled hole to prevent jamming.
Recommendations for Drilling
• When drilling, always apply pressure in a straight line with
the bit, but do not push hard enough to stall the motor or
deflect the bit.
•
iF ThE DRill sTAlls:
-
RElEAsE TRiggER sWiTCh
iMMEDiATElY
, remove
drill bit from work, and determine cause of stalling.
-
DO nOT DEPREss TRiggER sWiTCh On AnD OFF
in An ATTEMPT TO sTART A sTAllED DRill—This
CAn DAMAgE ThE DRill.
-
To minimize stalling or breaking through the material,
reduce pressure on drill and ease the bit through the last
fractional part of the hole.
• Large holes (7.9 mm to 12.7 mm) in steel can be made
easier if a pilot hole (4 mm to 4.8 mm) is drilled first.
• If drilling thin material or material that is prone to splinter,
use a wood “back-up” block to prevent damage to
the work piece.
Hammerdrilling
DCD706 Only
WARNING:
Wear proper respiratory protection. Collect
residual dust with a vacuum or dust collection system
designed for the application.
iMPORTAnT:
Use carbide-tipped or masonry bits rated for
percussion drilling only.
1. Select the desired speed/torque range using the speed
selector
7
to match the speed and torque to the planned
operation. Turn the mode selection collar
6
to the
hammerdrill symbol.
2. Pull the trigger, applying just enough pressure on the
hammer to keep it from bouncing excessively or "rising" off
the bit.
Содержание
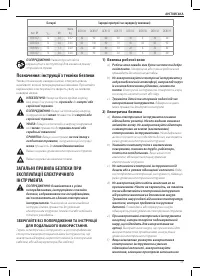
- 16 ОБЩИЕ ПРАВИЛА ТЕХНИКИ; СОХРАНИТЕ ВСЕ ИНСТРУКЦИИ ДЛЯ; Батареи
- 17 ) Эксплуатация электроинструмента и уход
- 18 ) Использование аккумуляторных
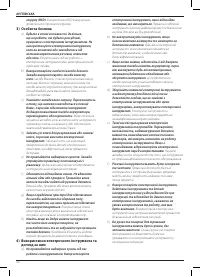
- 19 Зарядные устройства; Электробезопасность; Использование удлинительного кабеля; Остаточные риски; СОХРАНИТЕ НАСТОЯЩЕЕ РУКОВОДСТВО
- 20 Работа с зарядным устройством; Температурная задержка
- 21 Аккумуляторные батареи; ВНИМАТЕЛЬНО ПРОЧТИТЕ ВСЕ ИНСТРУКЦИИ; Транспортировка
- 22 Комплектация поставки; Тип батареи; Рекомендации по хранению
- 23 Установка и извлечение аккумуляторной; Маркировка на инструменте; Сфера применения; НЕ
- 24 Дополнительные принадлежности; Установка батареи в рукоятку инструмента; Установка насадки или принадлежности в
- 25 Заворачивание; Правильное положение рук во время; символ; Пусковой выключатель-регулятор
- 26 Чистка; Смазка; Ударное сверление
- 27 Защита окружающей среды
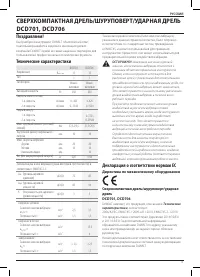
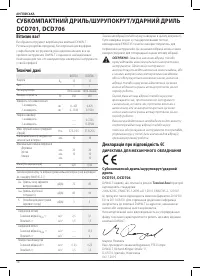
Характеристики

Остались вопросы?Не нашли свой ответ в руководстве или возникли другие проблемы? Задайте свой вопрос в форме ниже с подробным описанием вашей ситуации, чтобы другие люди и специалисты смогли дать на него ответ. Если вы знаете как решить проблему другого человека, пожалуйста, подскажите ему :)


