
Шуруповерты Crown CT10120 - инструкция пользователя по применению, эксплуатации и установке на русском языке. Мы надеемся, она поможет вам решить возникшие у вас вопросы при эксплуатации техники.
Если остались вопросы, задайте их в комментариях после инструкции.
"Загружаем инструкцию", означает, что нужно подождать пока файл загрузится и можно будет его читать онлайн. Некоторые инструкции очень большие и время их появления зависит от вашей скорости интернета.


21
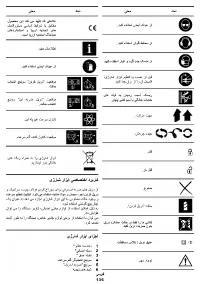
English
7
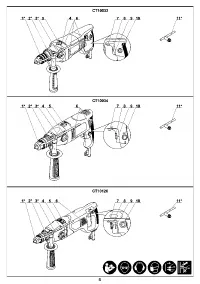
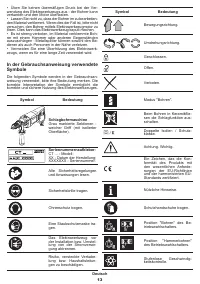
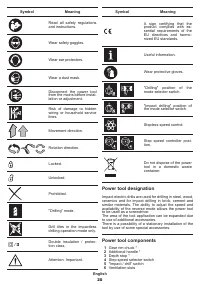
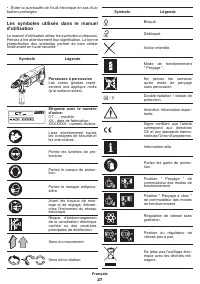
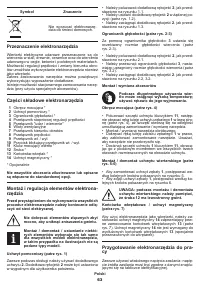
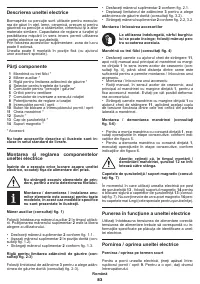
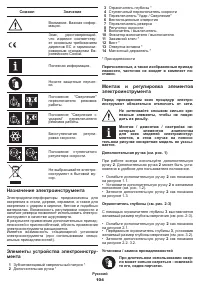
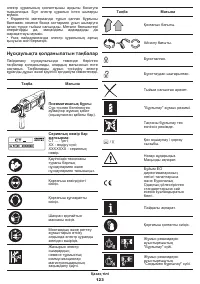
Rotational direction switch
8
Speed selector thumbwheel
9
On / off switch
10
Lock-on button
11
Drill chuck key *
12
Screw *
13
Screwdriver bit *
14
Magnetic holder *
* Optional extra
Not all of the accessories illustrated or described
are included as standard delivery.
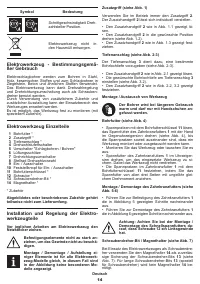
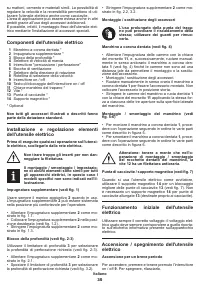
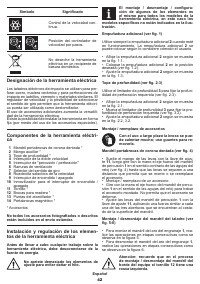
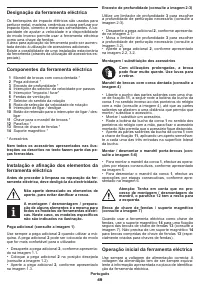
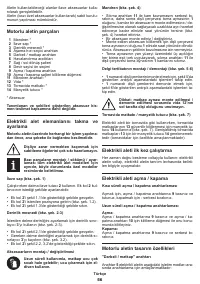
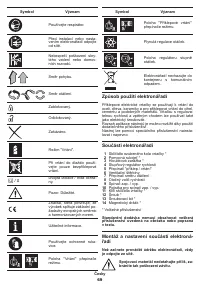
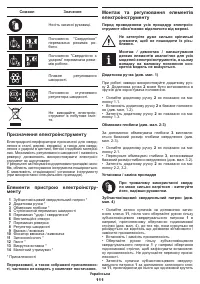
Installation and regulation of power tool
elements
Before carrying out any works on the power tool it
must be disconnected from the mains
�
Do not draw up the fastening elements
too tight to avoid damaging the thread
�
Mounting / dismounting / setting-up of
some elements is the same for all power
tool models, in this case specific models
are not indicated in the illustration.
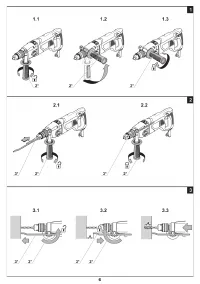
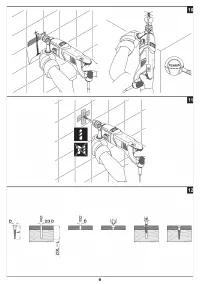
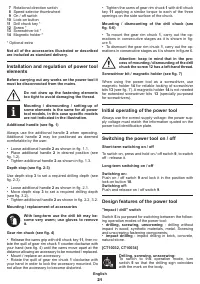
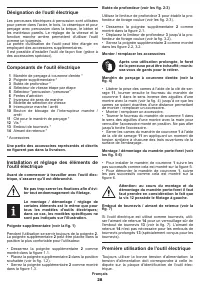
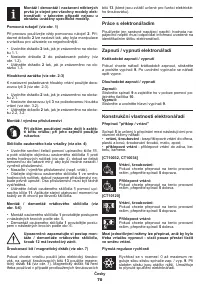
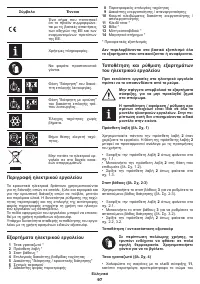
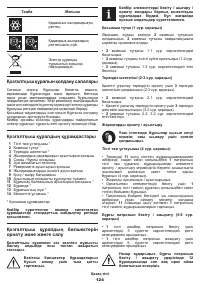
Additional handle (see fig. 1)
Always use the additional handle
2
when operating�
Additional handle
2
may be positioned as deemed
comfortable by the user�
•
Loose additional handle
2
as shown in fig. 1.1.
•
Place additional handle
2
in desired position (see
fig. 1.2).
•
Tighten additional handle
2
as shown in fig. 1.3.
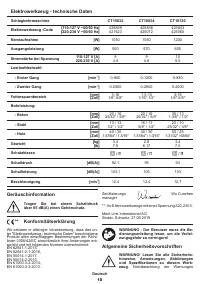
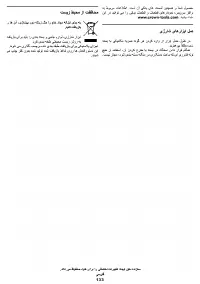
Depth stop (see fig. 2-3)
Use depth stop
3
to set a required drilling depth (see
fig. 2-3).
•
Loose additional handle
2
as shown in fig. 2.1.
•
Move depth stop
3
to set a required drilling depth
(see fig. 3.2).
•
Tighten additional handle
2
as shown in fig. 2.2, 3.2.
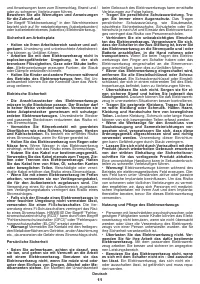
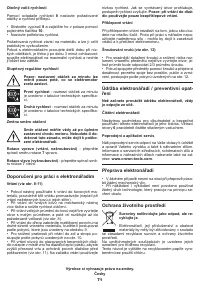
Mounting / replacement of accessories
With long-term use the drill bit may be
-
come very warm; use gloves to remove
it.
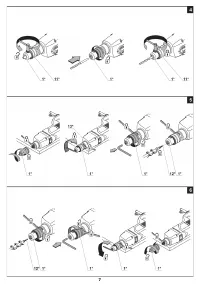
Gear rim chuck (see fig. 4)
•
Release the cams grip with drill chuck key
11
, then ro-
tate the quill of gear rim chuck
1
counter-clockwise with
your hand (see fig. 4) until the cams move apart at the
distance allowing an accessory to be mounted / replaced�
•
Mount / replace an accessory�
•
Rotate the quill of gear rim chuck
1
clockwise with
your hand in order to lock the accessory mounted� Do
not allow the accessory to become distorted�
•
Tighten the cams of gear rim chuck
1
with drill chuck
key
11
applying a similar torque to each of the three
openings on the side surface of the chuck�
Mounting / dismounting of the drill chuck (see
fig. 5-6)
•
To mount the gear rim chuck
1
, carry out the op-
erations in consecutive stages as it is shown in fig
-
ure 5�
•
To dismount the gear rim chuck
1
, carry out the op-
erations in consecutive stages as it is shown in figure 6.
Attention: keep in mind that in the pro
-
cess of mounting / dismounting of the drill
chuck the screw 12 has a left-hand thread.
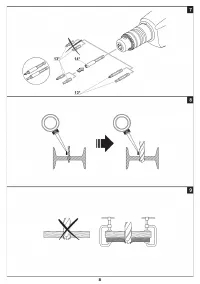
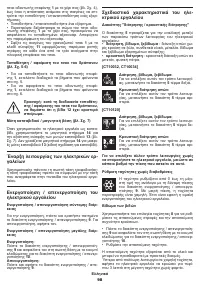
Screwdriver bit / magnetic holder (see fig. 7)
When using the power tool as a screwdriver, use
magnetic holder
14
for reliable locking of screwdriver
bits
13
(see fig. 7). A magnetic holder
14
is not needed
for extended screwdriver bits
13
(specially purposed
for screwdrivers)�
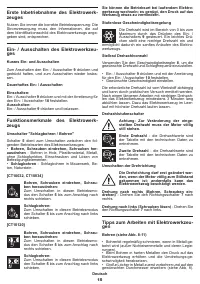
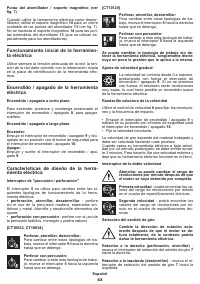
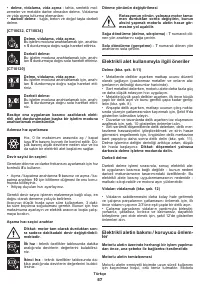
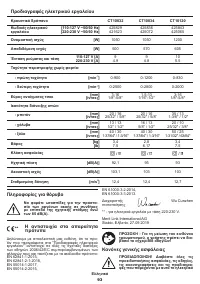
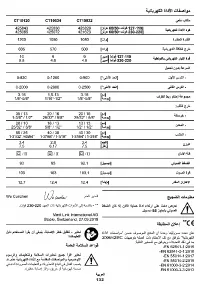
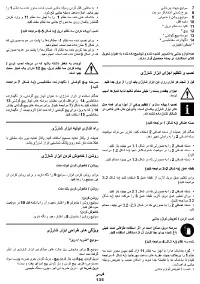
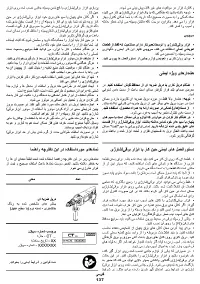
Initial operating of the power tool
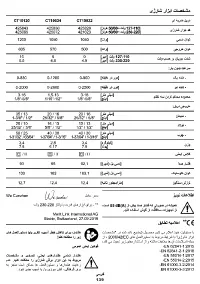
Always use the correct supply voltage: the power sup-
ply voltage must match the information quoted on the
power tool identification plate.
Switching the power tool on / off
Short-term switching on / off
To switch on, press and hold on / off switch
9
, to switch
off - release it�
Long-term switching on / off
Switching on:
Push on / off switch
9
and lock it in the position with
lock-on button
10
�
Switching off:
Push and release on / off switch
9
�
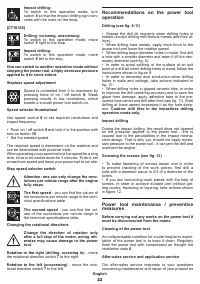
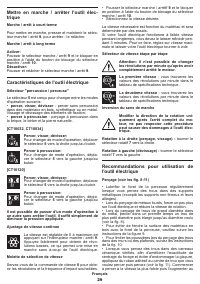
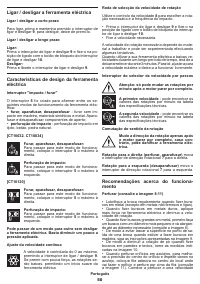
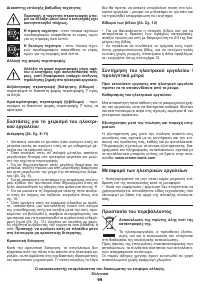
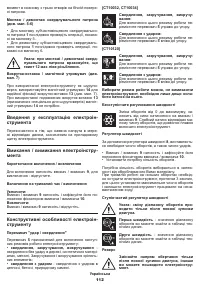
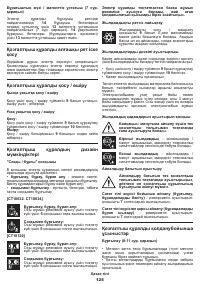
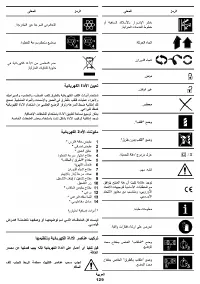
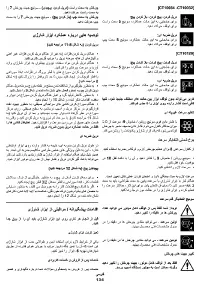
Design features of the power tool
"Impact / drill" switch
Switch
5
is purposed for switching between the follow-
ing operation modes of the power tool:
•
drilling, screwing, unscrewing
- drilling without
impact in wood, synthetic materials, metal� Screwing
and unscrewing fastening components;
•
impact drilling
- impact drilling in brick, concrete,
natural stone�
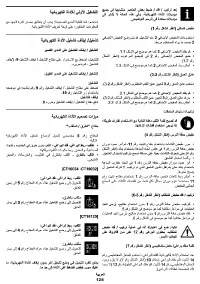
[CT10032, CT10034]
Drilling, screwing, unscrewing:
To switch to this operation mode, turn
switch
5
so that the drilling sign coincides
with the mark on the body�


