
Шуруповерты Bosch GSB 19-2 RE (БЗП) 060117B500 - инструкция пользователя по применению, эксплуатации и установке на русском языке. Мы надеемся, она поможет вам решить возникшие у вас вопросы при эксплуатации техники.
Если остались вопросы, задайте их в комментариях после инструкции.
"Загружаем инструкцию", означает, что нужно подождать пока файл загрузится и можно будет его читать онлайн. Некоторые инструкции очень большие и время их появления зависит от вашей скорости интернета.


English |
15
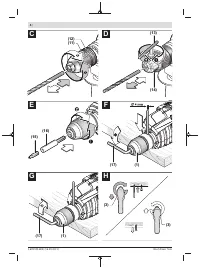
Insert a steel pin with a diameter of 4 mm and a length of ap-
prox. 50 mm into the hole on the spindle collar to lock the
drill spindle in place.
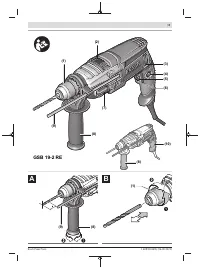
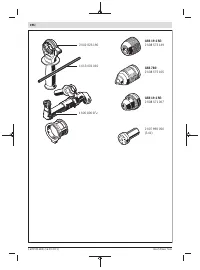
Clamp a hex key
(17)
in the keyless chuck
(1)
, leading with
the short shaft.
Place the power tool on a firm surface, e.g. a work bench.
Hold the power tool in place and loosen the keyless chuck
(1)
by turning the hex key
(17)
in the rotational direction
➊
.
A tightly seated keyless chuck is loosened with a light blow
on the long shaft of the hex key
(17)
. Remove the hex key
from the keyless chuck and completely unscrew the keyless
chuck from the machine.
For power tools with a keyed chuck, removal is carried out as
described above.
For power tools with a keyless chuck, an open-ended span-
ner (width across flats 19 mm) can be mounted on the drill
chuck instead of the hex key
(17)
.
Fitting the Drill Chuck (see figure G)
To assemble the keyless chuck, perform the same steps in
reverse order.
The drill chuck must be tightened using a tight-
ening torque of approx. 50–55 Nm.
u
After successfully fitting the drill chuck, remove the
steel pin from the hole again.
Dust/Chip Extraction
Dust from materials such as lead-containing coatings, some
wood types, minerals and metal can be harmful to one’s
health. Touching or breathing-in the dust can cause allergic
reactions and/or lead to respiratory infections of the user or
bystanders.
Certain dust, such as oak or beech dust, is considered carci-
nogenic, especially in connection with wood-treatment ad-
ditives (chromate, wood preservative). Materials containing
asbestos may only be worked by specialists.
– Provide for good ventilation of the working place.
– It is recommended to wear a P2 filter-class respirator.
Observe the relevant regulations in your country for the ma-
terials to be worked.
u
Avoid dust accumulation at the workplace.
Dust can
easily ignite.
Operation
Starting Operation
u
Pay attention to the mains voltage. The voltage of the
power source must match the voltage specified on the
rating plate of the power tool. Power tools marked
with 230 V can also be operated with 220 V.
u
Products that are only sold in AUS and NZ:
Use a resid-
ual current device (RCD) with a nominal residual current
of 30 mA or less.
Setting the Rotational Direction (see figure H)
u
Only push the rotational direction switch
(3)
when the
power tool is not in use.
The rotational direction switch
(3)
is used to change the ro-
tational direction of the power tool. However, this is not pos-
sible while the on/off switch
(6)
is being pressed.
Clockwise rotation:
To drill and drive in screws, slide the
rotational direction switch
(3)
downwards on the left-hand
side and upwards on the right-hand side at the same time.
Anti-clockwise rotation:
To loosen and unscrew screws and
nuts, slide the rotational direction switch
(3)
upwards on the
left-hand side and downwards on the right-hand side at the
same time.
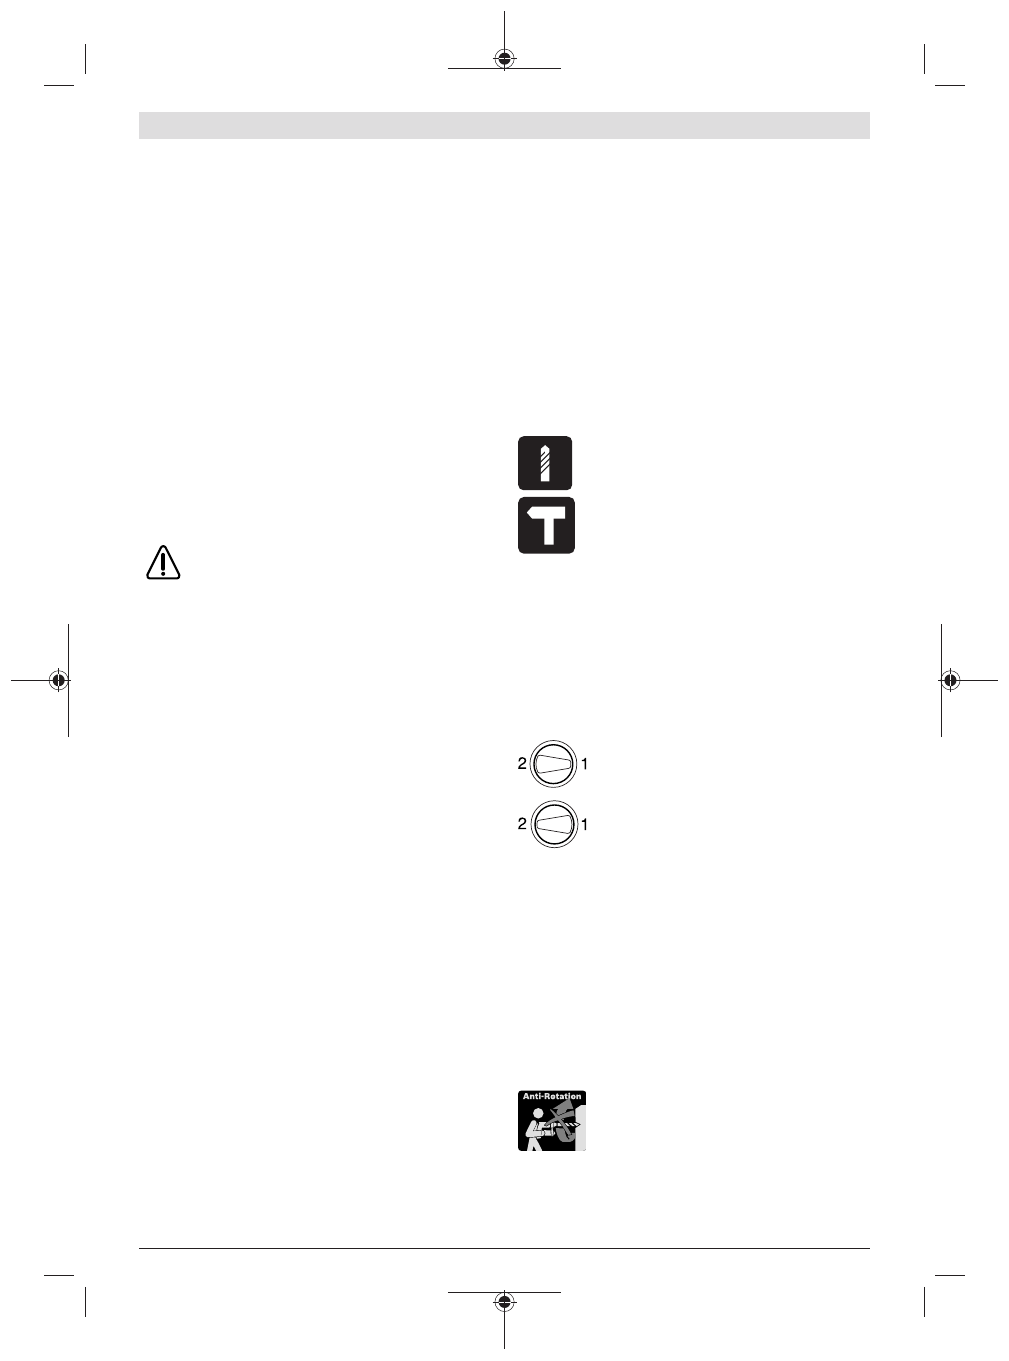
Setting the Operating Mode
Drilling and screwdriving
Set the selector switch
(2)
to the "drilling"
symbol.
Impact drilling
Set the selector switch
(2)
to the "impact
drilling" symbol.
The selector switch
(2)
clicks into place and
can also be actuated when the motor is running.
Mechanical Gear Selection
u
You can press the gear selector switch
(7)
with the
power tool running at a low speed. You should not do
this at full load or maximum torque, or when the tool is
not in use, however.
You can preselect two speed ranges with the gear selector
(7)
.
First gear:
Low speed range; for working with a large
drilling diameter or for screwdriving.
Second gear:
High speed range; for working with a small
drilling diameter.
If the gear selector
(7)
cannot be swivelled all the way to the
stop, turn the drive spindle slightly with the drill.
Switching on/off
To
start
the power tool, press and hold the on/off switch
(6)
.
Press the lock-on button
(4)
to
lock
the on/off switch
(6)
in
this position.
To
switch off
the power tool, release the on/off switch
(6)
;
or, if the switch is locked with the lock-on button
(4)
, briefly
press the on/off switch
(6)
and then release it.
Overload clutch
The power tool is equipped with an overload
clutch (anti-rotation) to limit high torque reac-
tions.
u
If the application tool jams or snags, the power trans-
mission to the drill spindle will be interrupted. Always
hold the power tool firmly with both hands to with-
Bosch Power Tools
1 609 92A 6RA | (16.09.2021)
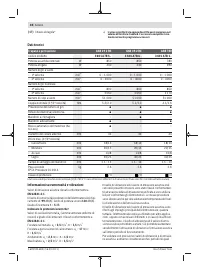
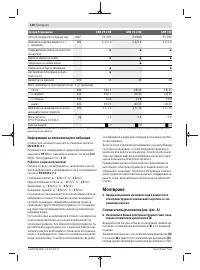
Содержание
- 107 Указания по технике безопасности; ЖДЕНИЕ
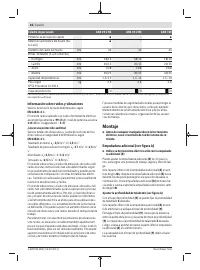
- 109 Указания по технике безопасности для дрелей; Описание продукта и услуг; Применение по назначению
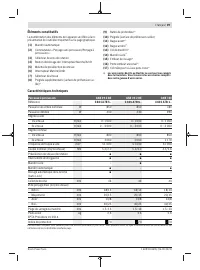
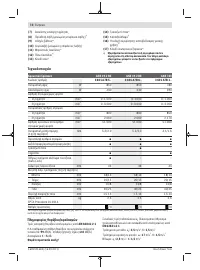
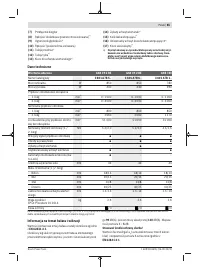
- 110 Технические данные; Данные по шуму и вибрации
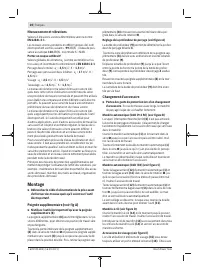
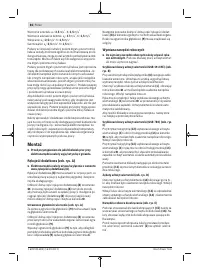
- 111 Сборка; Замена рабочего инструмента
- 112 Удаление пыли и стружки; Работа с инструментом; Включение электроинструмента
- 113 Указания по применению; Техобслуживание и сервис; Техобслуживание и очистка
- 114 Утилизация; Українська; Вказівки з техніки безпеки; ДЖЕННЯ


