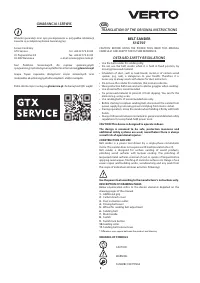
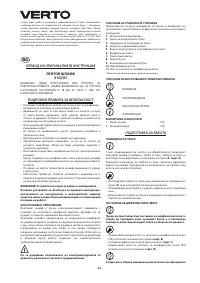
Шлифмашины VERTO 51G707 - инструкция пользователя по применению, эксплуатации и установке на русском языке. Мы надеемся, она поможет вам решить возникшие у вас вопросы при эксплуатации техники.
Если остались вопросы, задайте их в комментариях после инструкции.
"Загружаем инструкцию", означает, что нужно подождать пока файл загрузится и можно будет его читать онлайн. Некоторые инструкции очень большие и время их появления зависит от вашей скорости интернета.


10
INFORMATION
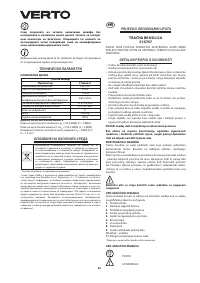
EQUIPMENT AND ACCESSORIES
1. Dust bag
- 1 pce
2. Endless belt
- 1 pce
PREPARATION FOR OPERATION
DUST EXTRACTION
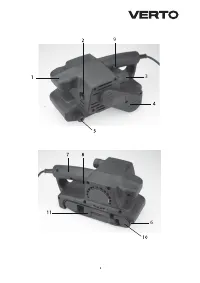
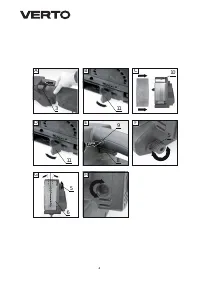
Equipment of belt sander includes dust bag that helps to maintain
the processed surface clean. The dust bag can be installed on the dust
outlet (
3
) (
fig. A
).
Empty the dust bag regularly, it will ensure efficient operation of the
sander. It is recommended to empty the dust bag when it is half full.
•
Slide the dust bag onto the dust outlet (
3
) to install it.
•
Pull the dust bag gently to check if it is well fixed.
•
Deinstallation of the dust bag is similar to installation, only the
sequence of actions is reversed.
INSTALLATION OF SANDING BELT
Prior to sanding belt installation ensure the switch is in the
off position and that power cord is disconnected from mains
network.
•
Move the sanding belt tension lever (
11
) to the end in the direction
shown by the arrow (
fig. B
).
•
Put sanding belt on rollers (
fig. C
).
•
Move the sanding belt tension lever (
11
) to its original position (
fig. D
).
Ensure the direction of the arrow located on the sanding paper
back surface matches direction of the arrow located on the belt
sander body.
OPERATION / SETTINGS
SWITCHING ON / SWITCHING OFF
Before connecting the belt sander to a power supply network,
always check that power supply voltage matches rated voltage
shown on the rating plate that is fixed to the power tool, and that
switch is in the off position.
During operation hold the sander firmly with both hands. Switch
on the belt sander only when it is lifted above the material that
you plan to process.
Switching on
– press the switch button (
8
) and hold in this position.
Switching off
– release pressure on the switch button (
8
).
Locking the switch (continuous operation)
Switching on:
•
Press the switch button (
8
) and hold in this position.
•
Press the switch lock button (
9
)
(fig. E
).
•
Release pressure on the switch (
8
).
Switching off:
•
Press and release the switch button (
8
).
ADJUSTMENT OF SANDING BELT POSITION (setting the guide
rollers parallel)
•
Switch the sander on.
•
During sanding belt movement turn the sanding belt adjustment
wheel (
5
) (
fig. F
) so the sanding belt runs smoothly and does not
move aside (
fig. G
).
If you allow the sanding belt to shift to the side (which would
mean that roller axes are not parallel), the belt will be damaged
soon.
When using the belt sander try to position the belt surface and surface
of processed material in parallel. Hold the additional grip (
1
) and main
handle (
7
) firmly and move the sander back and forth smoothly.
Do not press the belt sander too hard. Pressure must be moderate
and uniform on the whole surface of contact of belt and processed
material. Applying too big pressure causes undesirable drop of
belt speed, motor overheating, damage of processed material
and parts of the sander. Make periodic breaks in operation.
OPERATION AND MAINTENANCE
Remove the power cord plug from mains socket before
commencing any activities related to installation, adjustment,
maintenance or repair of power tool.
•
Always keep the sander and ventilation holes clean.
•
Use brush to remove sanding dust.
•
Clean the belt sander regularly, optimally after each use.
•
Do not use abrasive objects for cleaning the sander.
•
Use soft cloth for cleaning the body.
•
For cleaning never use petrol, solvents or detergents that could
damage plastic parts of the sander.
•
When the work is finished empty the dust bag, wash it in warm
water with soap and dry it thoroughly.
REPLACEMENT OF DRIVING BELT
Belt sander will not work properly if driving belt is worn. Belt
replacement is necessary.
•
Remove the dust bag.
•
Use screwdriver to unscrew fixing screw of driving belt cover (
4
) and
remove the cover.
•
Remove the driving belt by turning the wheels manually and
pulling the belt off.
•
To install new driving belt do as follows:
– put the belt onto bigger drive wheel,
– rotate wheels to draw the driving belt over smaller drive wheel.
•
Install driving belt cover (
4
) and fixing screw.
Ensure the driving belt is correctly set on both drive wheels.
CHECKING SANDING BELT
Due to loss in efficiency after long time of using the same sanding belt,
replace the belt immediately when you see it is excessively worn.
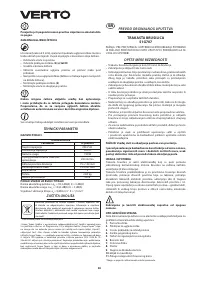
Характеристики

Остались вопросы?Не нашли свой ответ в руководстве или возникли другие проблемы? Задайте свой вопрос в форме ниже с подробным описанием вашей ситуации, чтобы другие люди и специалисты смогли дать на него ответ. Если вы знаете как решить проблему другого человека, пожалуйста, подскажите ему :)
