Пылесос Philips FC8913_01 - инструкция пользователя по применению, эксплуатации и установке на русском языке. Мы надеемся, она поможет вам решить возникшие у вас вопросы при эксплуатации техники.
Если остались вопросы, задайте их в комментариях после инструкции.
"Загружаем инструкцию", означает, что нужно подождать пока файл загрузится и можно будет его читать онлайн. Некоторые инструкции очень большие и время их появления зависит от вашей скорости интернета.


2
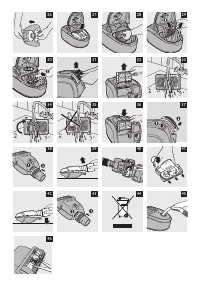
Take the HEPA 12 ilter out of the appliance (Fig. 32).
3
Rinse the pleated side of the HEPA 12 ilter under a hot slow-running tap.
-
Hold the ilter in such a way that the pleated side points upwards and the water lows parallel
to the pleats. Hold the ilter at an angle so that the water washes away the dir t inside the
pleats (Fig. 33).
-
Turn the ilter 180° and let the water low along the pleats in opposite direction (Fig. 34).
-
Continue this process until the ilter is clean.
Never clean the washable ilter with a brush (Fig. 35).
Note: Cleaning does not restore the original colour of the ilter, but does restore its iltration power.
4
Carefully shake the water from the surface of the ilter. Let the ilter dry at least 2 hours
before you put it back into the vacuum cleaner.
Note: Make sure that the ilter is completely dry before you put it back into the appliance.
5
Put the ilter back into the appliance (Fig. 36).
Note: Make sure that the two lugs of the HEPA ilter point downwards.
6
To close the HEPA ilter grille, irst align the top of the grille with the appliance (1). Then
press the tabs downwards until the grille locks into place (2) (‘click’) (Fig. 37).
Cleaning the mini turbo brush
To clean the brush inside the mini turbo brush, follow the steps below:
1
Turn the mini turbo brush upside down.
2
To unlock the mini turbo brush, turn the ring anticlockwise (1) and pull it towards you
(2) (Fig. 38).
3
Separate the two housing halves (Fig. 39).
4
Remove the hairs and dirt entangled around the brush. (Fig. 40)
Do not detach the brush and the parts inside the mini turbo brush.
5
Slide the three ridges of the bottom part into the three slots of the top part (Fig. 41).
6
Lower the bottom part onto the top part to close the turbo brush (Fig. 42).
7
To lock the mini turbo brush, slide the ring towards the housing (1) and turn it clockwise to
ix it (2) (Fig. 43).
Ordering accessories
To purchase dustbags, ilters or other accessories for this appliance, please visit www.philips.com,
consult the worldwide guarantee lealet or contact the Philips Consumer Care Centre in your
countr y.
Ordering dustbags
-
Philips Classic s-bag
`
synthetic dustbags are available under type number FC8021.
-
Philips Clinic s-bag
`
high iltration synthetic dustbags are available under type number FC8022.
-
Philips Anti-odour s-bag
`
synthetic dustbags are available under type number FC8023.
-
Reusable dustbags (some countries only) are available under code number 4322 004 93370.
Note: Please visit www.s-bag.com for more information about the s-bag.
ordering ilters
-
Washable HEPA 12 ilters are available under type number FC8044.
English
11
Содержание
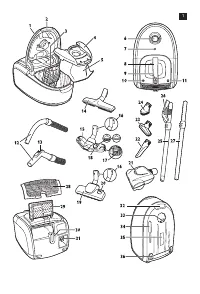
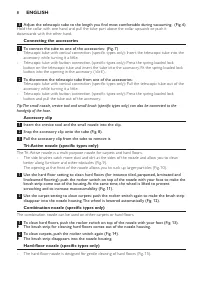
- 87 Перед первым использованием; Извлеките прибор и аксессуары из коробки.; Подготовка прибора к работе
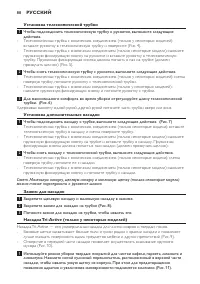
- 88 установка телескопической трубки; повернув трубку, потяните рукоятку с телескопической трубки.; установка дополнительных насадок; телескопическую трубку в насадку и слегка поверните трубку.; Зажим для насадок; Закрепите щелевую насадку и маленькую насадку в зажиме.
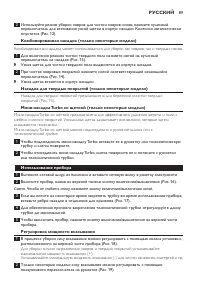
- 89 комбинированная насадка (только некоторые модели); Узкая щетка втянется в корпус насадки.; насадка для твердых покрытий (только некоторые модели); всасываются пылесосом.; использование прибора; трубки до минимальной.; регулировка мощности всасывания
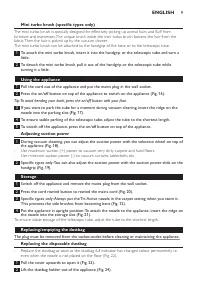
- 90 Хранение; минимальную длину трубки.; Замена/очистка мешка для пыли; инструкциям в разделе “Замена одноразового мешка для пыли”.
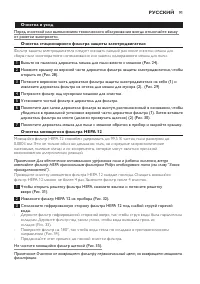
- 91 Очистка и уход; от розетки электросети.; Очистка стационарного фильтра защиты электродвигателя; Потрясите фильтр над мусорным мешком для очистки.; Очистка моющегося фильтра HePa 12; возникновения аллергических реакций.
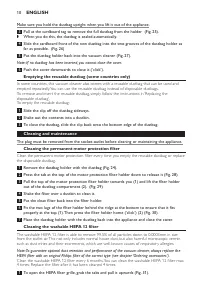
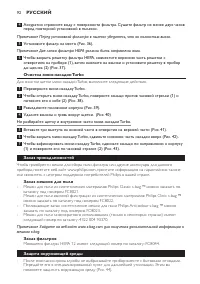
- 92 Очистка мини-насадки turbo; Не разбирайте щетку и внутренние части мини-насадки Turbo.; Заказ принадлежностей
- 93 гарантия и обслуживание; торговую организацию Philips.; Поиск и устранение неисправностей; Мощность всасывания недостаточна.


