
Пылесос Bosch EasyVac3 - инструкция пользователя по применению, эксплуатации и установке на русском языке. Мы надеемся, она поможет вам решить возникшие у вас вопросы при эксплуатации техники.
Если остались вопросы, задайте их в комментариях после инструкции.
"Загружаем инструкцию", означает, что нужно подождать пока файл загрузится и можно будет его читать онлайн. Некоторые инструкции очень большие и время их появления зависит от вашей скорости интернета.


English |
13
Bosch Power Tools
1 609 92A 43U | (6.9.17)
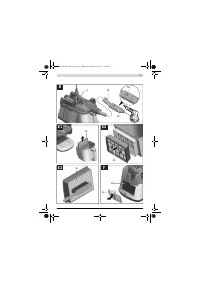
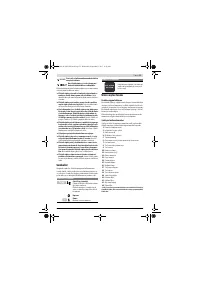
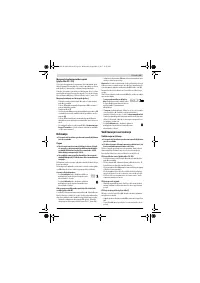
Extraction of dust resulting from running power tools
(see figure D)
A socket outlet with earthing contact
4
is integrated in the
vacuum cleaner. An external power tool can be connected
there. Observe the maximal allowable load of the connected
power tool.
– Fit the extraction adapter
12
(see “Fitting the extraction
adapter or curved nozzle”, page 12).
– Insert the extraction adapter
12
into the dust extraction
outlet for the power tool.
Note:
When working with power tools that have a low air feed
into the vacuum hose (e.g. jigsaws, sanders, etc.), the air dif-
fuser
20
of the vacuum hose
10
must be opened. This will im-
prove the total output of the vacuum cleaner and the power
tool.
To do so, turn the ring above the air diffuser
20
until the max-
imum opening is produced.
– To
start the operation
of the vac, switch on the power tool
connected to the socket
4
. The vacuum cleaner starts au-
tomatically.
– Switch the power tool off to
end
the
vacuuming
.
The delayed action shutdown of the Automatic Start/Stop
continues to run for up to 6 seconds in order to extract re-
sidual dust from the vacuum hose.
Maintenance and Service
Maintenance and Cleaning
Before any work on the vacuum cleaner itself, pull the
mains plug.
For safe and proper working, always keep the vacuum
cleaner and ventilation slots clean.
If the replacement of the supply cord is necessary, this has to
be done by Bosch or an authorized Bosch service agent in or-
der to avoid a safety hazard.
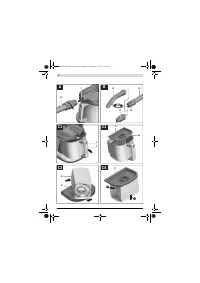
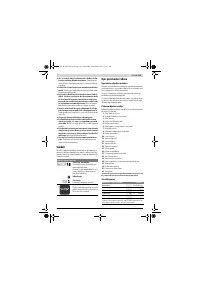
Cleaning the Filter Assembly (see figures E1 – E3)
– Press the release button
8
and pull the dust cup
9
out of
the vacuum cleaner.
– Remove the fabric filter
21
along with its filter basket and
brush down the fabric filter with a soft brush.
– Grasp the flat-fold filter
22
by the bars and remove it to-
gether with its filter basket.
Brush down the flat-fold filter using a soft brush or rinse it
out under running water and leave it to dry thoroughly.
– Re-insert the cleaned filters, ensuring that they are seated
correctly and securely.
Cleaning the Dust Cup
– Wipe the dust cup
9
from time to time using conventional,
non-abrasive detergent and then leave it to dry thoroughly.
Cleaning the permanent filter (see figure F)
Clean the permanent filter
24
from time to time in order to en-
sure that the vacuum cleaner continues to perform optimally.
– Open the exhaust air cover
23
and remove the permanent
filter
24
.
– Rinse out the permanent filter
24
under running water and
then leave it to dry thoroughly.
– Re-insert the cleaned filter, ensuring that it is seated cor-
rectly and securely. Close the exhaust air cover again.
Malfunctions
In the case of insufficient vacuuming performance, check the
following:
– Is the hose system clogged?
– Are the filters clogged with dust?
– Is the dust cup
9
full?
– Is the dust bag
18
full?
The vacuum cleaner switches off on overheating. Proceed as
follows:
– Leave the vacuum cleaner to cool down for 60 min.
– Briefly remove the mains plug from the socket and then re-
insert it.
– Make sure that the container
9
and dust bag
18
are empty
and that the vacuum hose
10
, filter
21/22
and permanent
filter
24
are not blocked.
Emptying at regular intervals ensures optimum vacuuming
performance.
If the vacuuming performance is not achieved thereafter, take
the vacuum cleaner to customer service.
Storage (see figure G)
– Open the elastic bands of the vacuum-hose holder
1
and
wrap the vacuum hose
10
around the vacuum cleaner.
Hook the elastic bands back in.
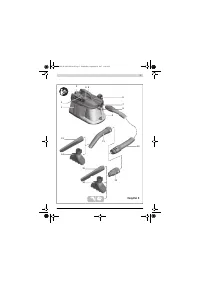
– Put the vacuuming accessories in the bracket
6
provided
for this purpose on the vacuum cleaner.
– Wind the mains cable around the cable holder
3
.
– Carry the vacuum cleaner only by the carrying handle
5
.
After-sales Service and Application Service
Our after-sales service responds to your questions concern-
ing maintenance and repair of your product as well as spare
parts. Exploded views and information on spare parts can al-
so be found under:
www.bosch-pt.com
Bosch’s application service team will gladly answer questions
concerning our products and their accessories.
In all correspondence and spare parts orders, please always
include the 10-digit article number given on the nameplate of
the product.
Great Britain
Robert Bosch Ltd. (B.S.C.)
P.O. Box 98
Broadwater Park
North Orbital Road
Denham
Uxbridge
UB 9 5HJ
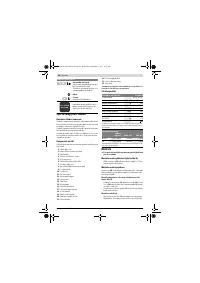
– To
activate the automatic
start/stop
of the vacuum cleaner, set
the mode selector switch
2
to the
“Automatic Start/Stop” symbol.
– To
switch off
the vacuum cleaner, set the
mode selector switch
2
to the “Off” symbol.
OBJ_BUCH-2992-002.book Page 13 Wednesday, September 6, 2017 11:43 AM
Характеристики

Остались вопросы?Не нашли свой ответ в руководстве или возникли другие проблемы? Задайте свой вопрос в форме ниже с подробным описанием вашей ситуации, чтобы другие люди и специалисты смогли дать на него ответ. Если вы знаете как решить проблему другого человека, пожалуйста, подскажите ему :)


