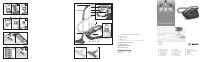
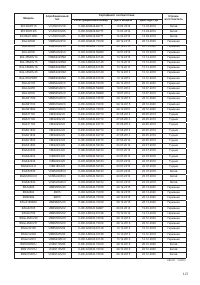
Пылесос Bosch BGS 6PRO4 - инструкция пользователя по применению, эксплуатации и установке на русском языке. Мы надеемся, она поможет вам решить возникшие у вас вопросы при эксплуатации техники.
Если остались вопросы, задайте их в комментариях после инструкции.
"Загружаем инструкцию", означает, что нужно подождать пока файл загрузится и можно будет его читать онлайн. Некоторые инструкции очень большие и время их появления зависит от вашей скорости интернета.


42
en
We are delighted that you have chosen to purchase a
Bosch vacuum cleaner from the GS6 0 model series
A variety of GS6 0 models are shown in this instruction
manual. It is therefore possible that not all of the ap-
pliance features and functions described match your
model. You should only use original accessories from
Bosch that were specially developed for your vacuum
cleaner, so that you achieve the best possible vacu-
uming results.
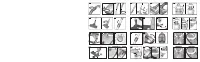
Fold out the picture pages.
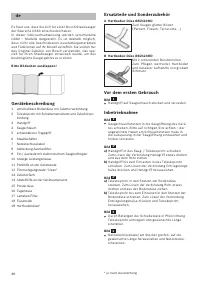
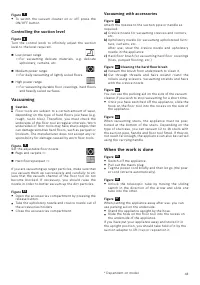
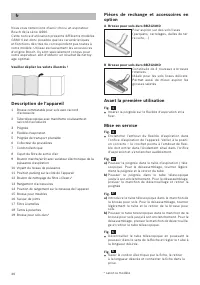
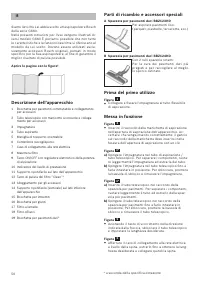
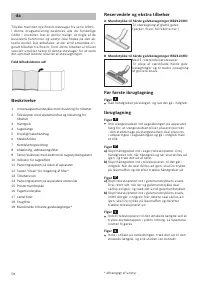
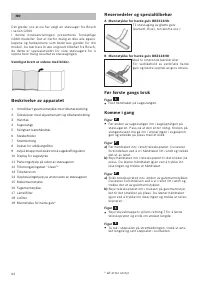
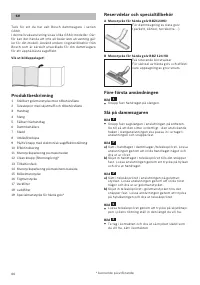
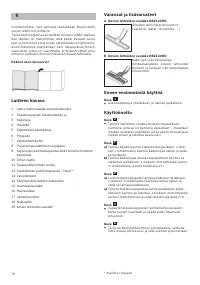
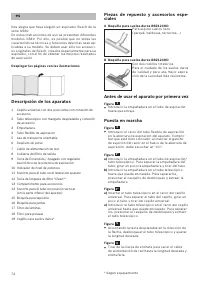
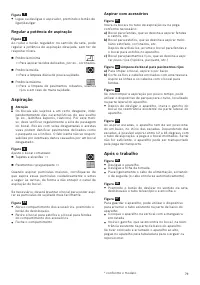
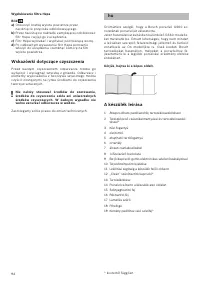
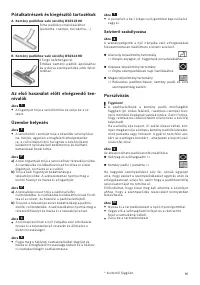
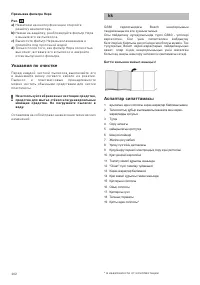
Your vacuum cleaner
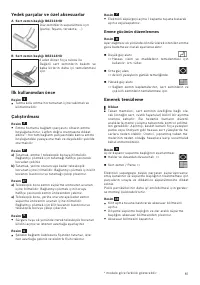
1
Adjustable floor tool with accessory connection
2
Telescopic tube with adjusting sleeve and accessory
connection
3
Handle
4
Flexible hose
5
Pivoting carrying handle
6
Dust container
7
Power cord
8
Exhaust filter cover
9
On/off button with electronic suction regulator
10
Power level indicator
11
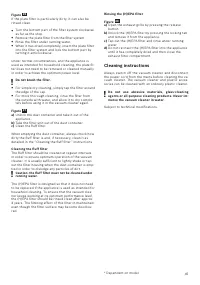
Parking aid on the side of the appliance
12
“Clean” filter cleaning button*
13
Accessories compartment
14
Storage aid on the underside of the appliance
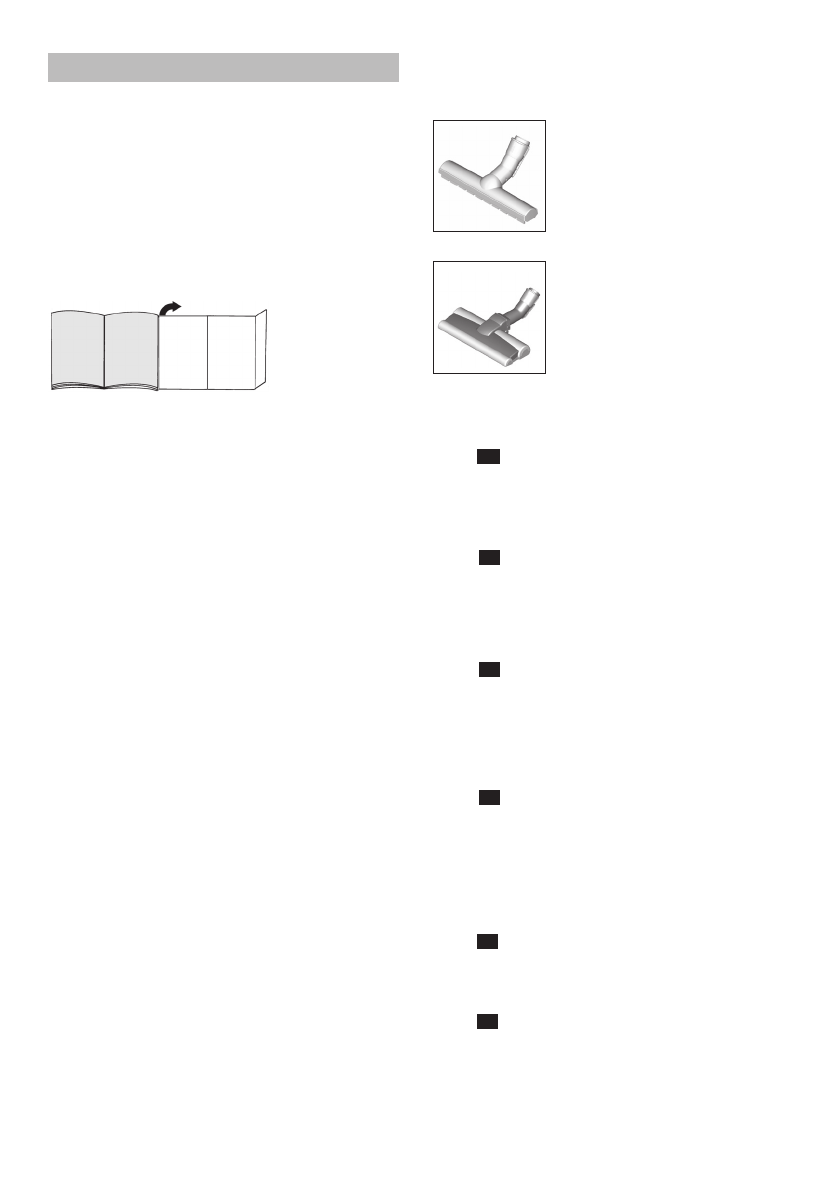
15
Upholstery nozzle
16
Crevice nozzle
17
Plate filter
18
Fluff filter
19
Hard-floor brush*
* Dependent on model
Replacement parts and special accesso-
ries
A Hard-floor nozzle BBZ123HD
For vacuuming hard floors
(parquet, tiles, terracotta, etc.)
B Hard-floor nozzle BBZ124HD
With 2 rotating brush rollers
For caring for expensive hard floors
and for the improved collection of
coarse dir t.
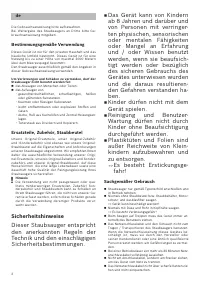
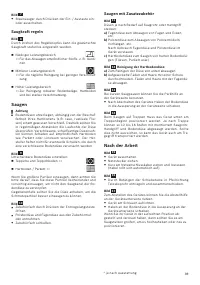
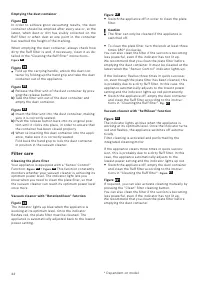
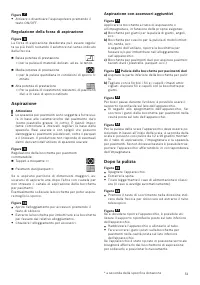
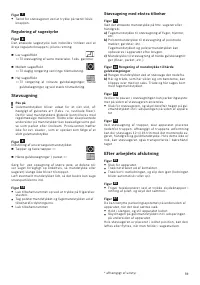
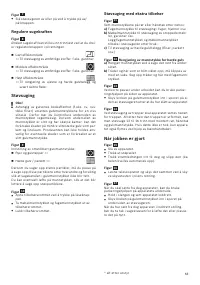
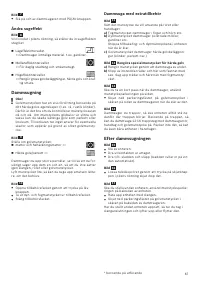
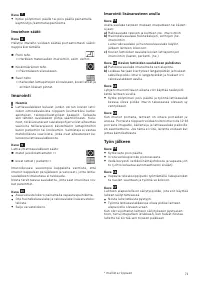
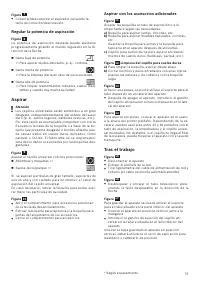
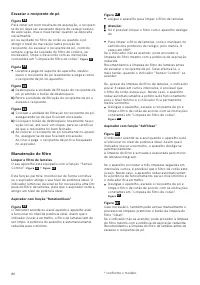
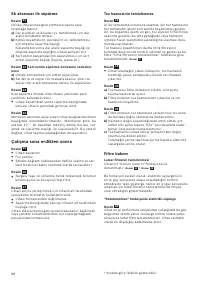
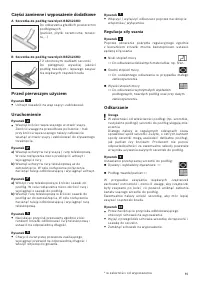
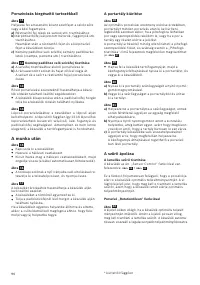
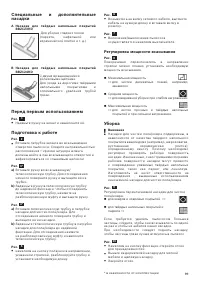
Before using your appliance for the first
time
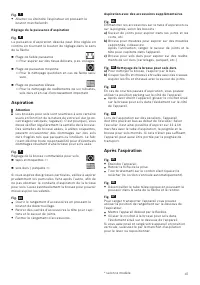
Figure
1
Push the handle onto the flexible hose and lock it in
place.
Initial use
Figure
2
Push the flexible tube adapter into the air intake
opening on the appliance. Check for correct seating
– the moulded hook on the tube adapter must fit into
the recess in the air intake opening and audibly click
into place.
Figure
3*
a)
Push the handle into the suction tube/telescopic
tube. To remove it, turn the handle slightly and pull
it out of the tube.
b)
Push the handle into the telescopic tube until it
engages. To release the connection, squeeze the
locking collar and pull out the handle.
Figure
4*
a)
Inser t the telescopic tube into the connecting piece
of the floor tool. To release the connection, turn the
tube slightly and pull it out of the floor tool.
b)
Push the telescopic tube into the connecting piece
of the floor tool until it engages. Press the locking
collar and pull out the telescopic tube to release
the connection.
Figure
5
Unlock the telescopic tube by moving the sliding
switch in the direction of the arrow and adjust to the
desired length.
Figure
6
Holding the power cord by the plug, pull out to the
required length and inser t the plug into the mains
socket.


