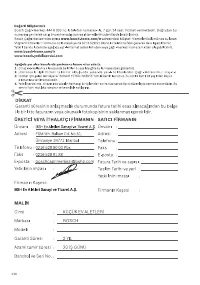
Пылесос Bosch BGL 85S330 - инструкция пользователя по применению, эксплуатации и установке на русском языке. Мы надеемся, она поможет вам решить возникшие у вас вопросы при эксплуатации техники.
Если остались вопросы, задайте их в комментариях после инструкции.
"Загружаем инструкцию", означает, что нужно подождать пока файл загрузится и можно будет его читать онлайн. Некоторые инструкции очень большие и время их появления зависит от вашей скорости интернета.


44
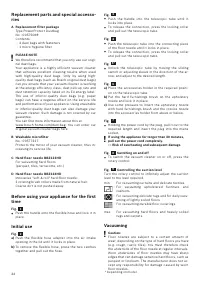
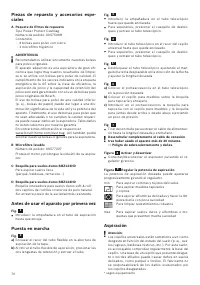
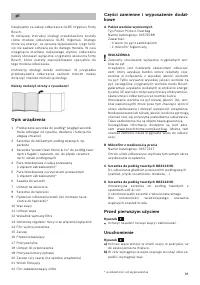
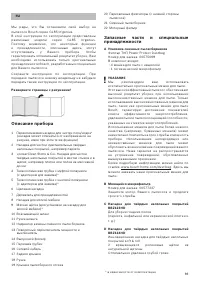
Replacement parts and special accesso-
ries
A Replacement filter package
Type PowerProtect Dustbag
No.:
0 0 5750 69
Contents:
- 4 dust bags with fasteners
- 1 micro-hygiene filter
!
PLEASE NOTE
We therefore recommend that you only use our origi-
nal dust bags.
Your appliance is a highly efficient vacuum cleaner
that achieves excellent cleaning results when used
with high-quality dust bags. Only by using high-
quality dust bags (such as Bosch original dust bags)
can you ensure that your vacuum cleaner is working
at the energy efficiency class, dust pick-up rate and
dust retention capacity listed on its EU energy label.
The use of inferior-quality dust bags (e.g. paper
bags) can have a negative effect on the ser vice life
and per formance of your appliance. Using unsuitable
or inferior-quality dust bags can also damage your
vacuum cleaner. Such damage is not covered by our
guarantee.
You can find more information about this at
www.bosch-home.com/dust-bag. You can order our
original vacuum cleaner bags here.
B Washable microfilter
No.:
0 0 577227
Protects the motor of your vacuum cleaner, thus in-
creasing its ser vice life.
C Hard-floor nozzle BBZ123HD
For vacuuming hard floors
(parquet, tiles, terracotta, etc.)
D Hard-floor nozzle BBZ124HD
Innovative "soft & roll" hard-floor nozzle:
2 rotating brush rollers made from natural hair.
Coarse dir t is not pushed away.
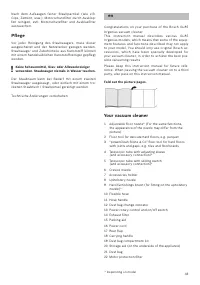
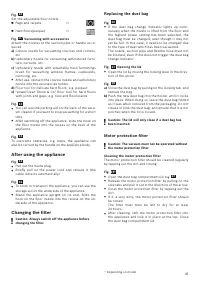
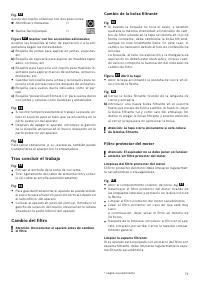
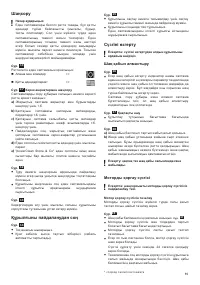
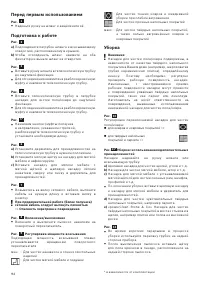
Before using your appliance for the first
time
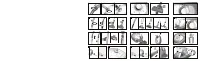
Fig.
1
Push the handle onto the flexible hose and lock it in
place.
Initial use
Fig.
2
a)
Push the flexible hose adapter into the air intake
opening in the lid until it locks in place.
b)
To remove the flexible hose, press the two catches
together and pull out the hose.
Fig.
3
Push the handle into the telescopic tube until it
locks into place.
To release the connection, press the locking collar
and pull out the telescopic tube.
Fig.
4
Push the telescopic tube into the connecting piece
of the floor nozzle until it locks in place.
To release the connection, press the locking collar
and pull out the telescopic tube.
Fig.
5*
Unlock the telescopic tube by moving the sliding
switch or adjusting sleeve in the direction of the ar-
row, and adjust to the desired length.
Fig.
6
a)
Place the accessories holder in the required positi-
on on the telescopic tube.
b)
Put the hard furnishings brush on the upholster y
nozzle and lock it in place.
c)
Use some pressure to inser t the upholster y nozzle
with hard furnishings brush and the crevice nozzle
into the accessories holder from above or below.
Fig.
7
Holding the power cord by the plug, pull it out to the
required length and inser t the plug into the mains
socket.
!
If using the appliance for longer than 30 minutes,
pull out the power cord completely.
>
=
Risk of overheating and subsequent damage.
Fig.
8
Switching on and off
To switch the vacuum cleaner on or off, press the
rotar y control.
Fig.
9
Controlling the suction level
Turn the rotar y control to infinitely adjust the suction
level to the level required.
min -
For vacuuming cur tains and delicate textiles
- For vacuuming upholstered furniture and
cushions
- For vacuuming delicate rugs und for daily vacu-
uming of lightly soiled floors
- For vacuuming durable floor coverings
ma x -
For vacuuming hard floors and heavily soiled
rugs and carpets
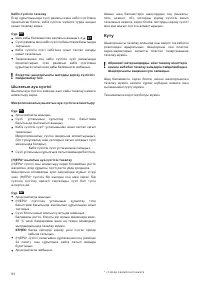
Vacuuming
!
Caution:
Floor nozzles are subject to a cer tain amount of
wear, depending on the type of hard floors you have
(e.g. rough, rustic tiles). You must therefore check
the underside of the floor nozzle at regular inter vals.
Worn undersides of floor nozzles may have sharp
edges that can damage sensitive hard floors, such as
parquet or linoleum. The manufacturer does not ac-
cept any responsibility for damage caused by worn
floor nozzles.
* Depending on model


