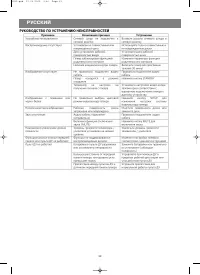
Проигрыватели VITEK VT-4055 - инструкция пользователя по применению, эксплуатации и установке на русском языке. Мы надеемся, она поможет вам решить возникшие у вас вопросы при эксплуатации техники.
Если остались вопросы, задайте их в комментариях после инструкции.
"Загружаем инструкцию", означает, что нужно подождать пока файл загрузится и можно будет его читать онлайн. Некоторые инструкции очень большие и время их появления зависит от вашей скорости интернета.
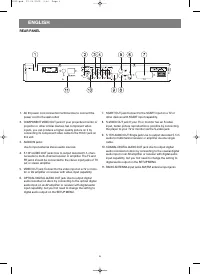

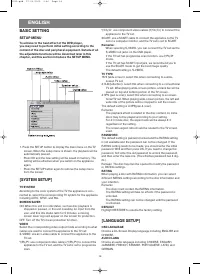


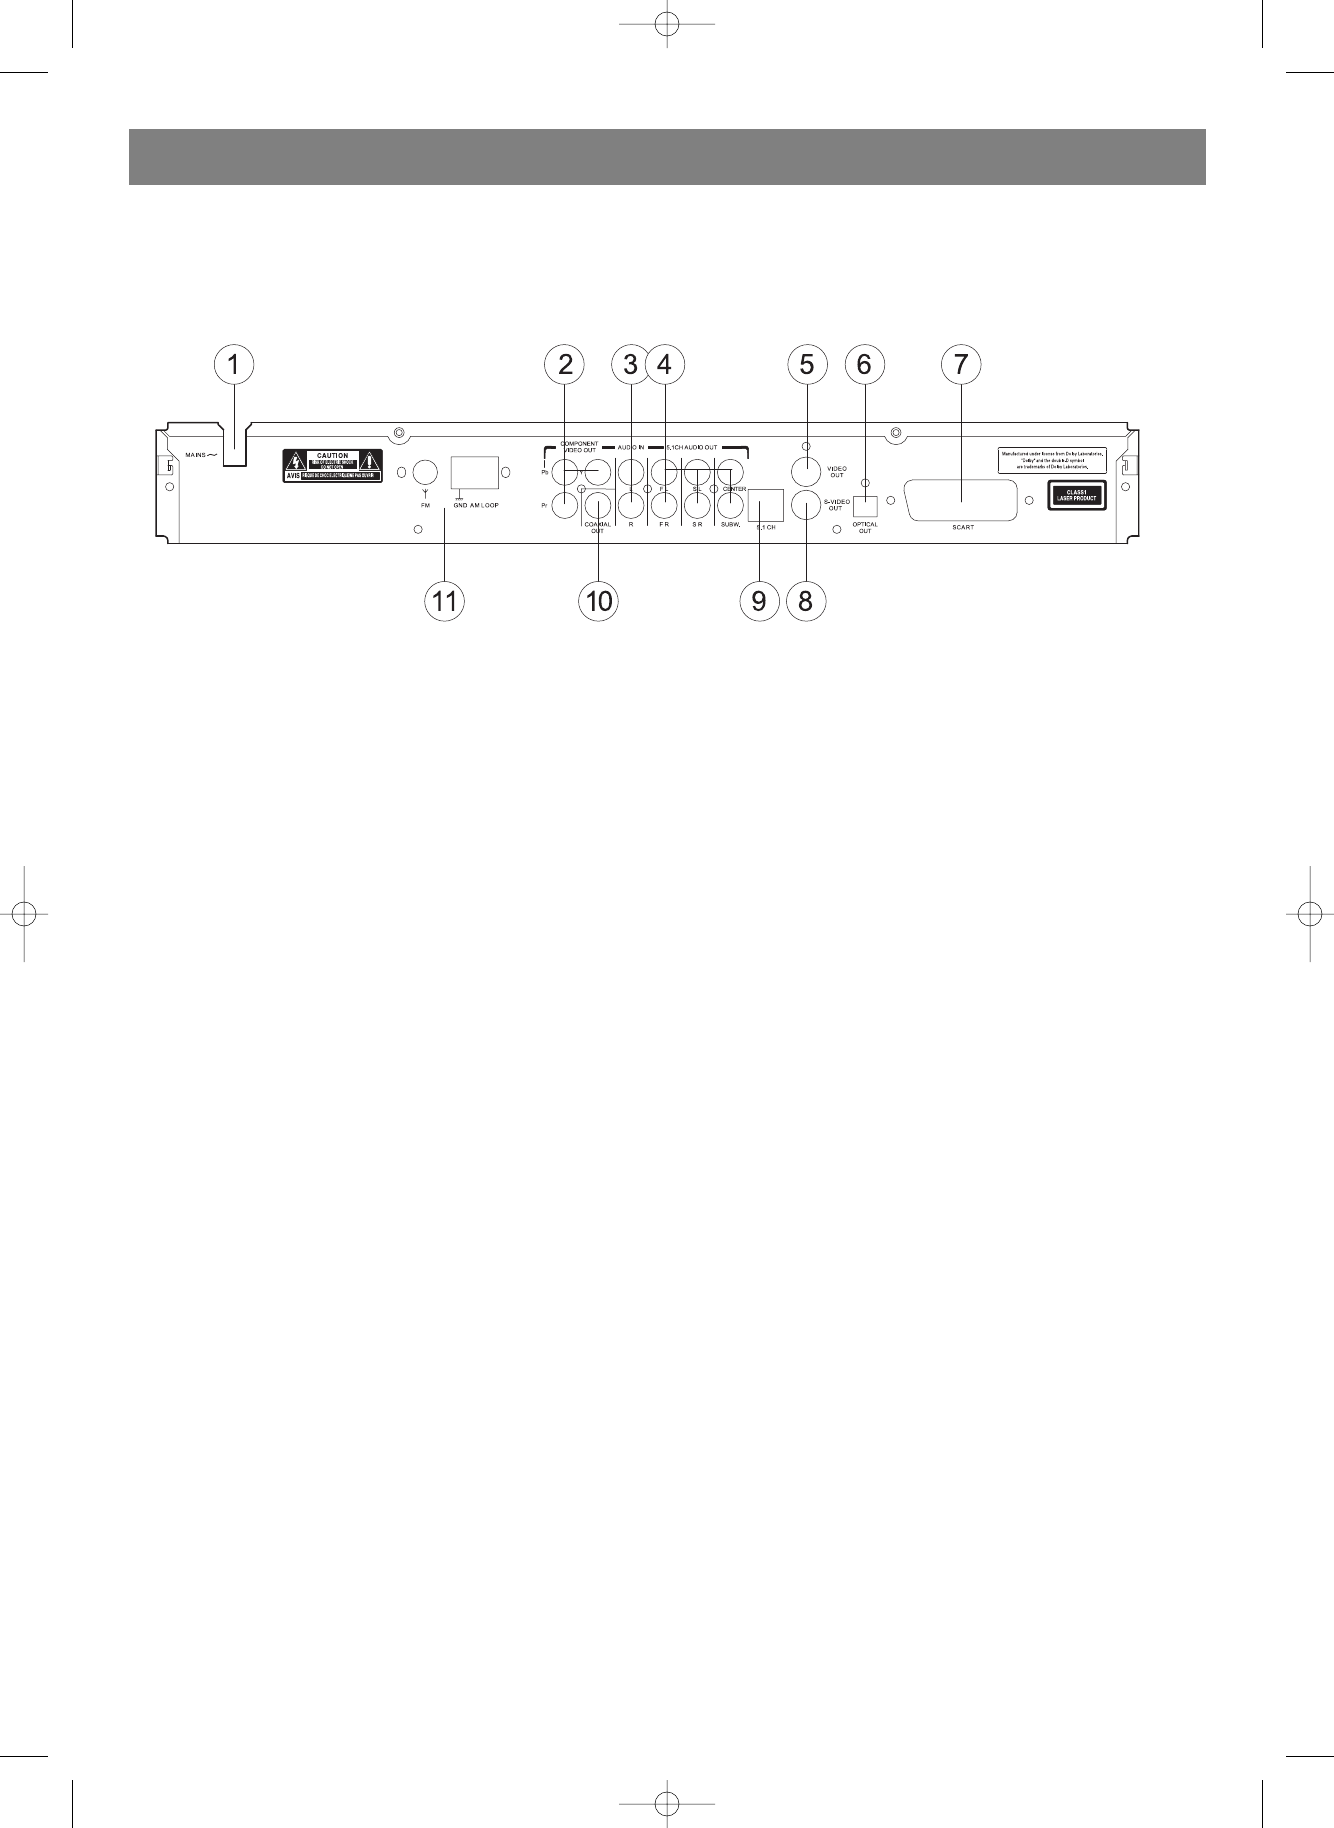
REAR PANEL
ENGLISH
6
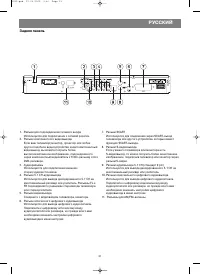
1. AC IN power cord connection terminal Use to connect the
power cord to the wall outlet.
2. COMPONENT VIDEO OUT jacks If your projective monitor or
projector or other similar devices has component video
inputs, you can produce a higher quality picture on it by
connecting its component video cable to the YCbCr jack on
this unit.
3. AUDIO IN jacks
Use to input external stereo audio sources.
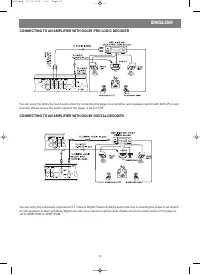
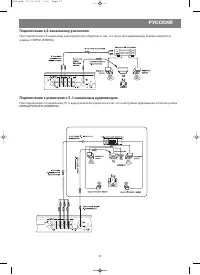
4. 5.1CH AUDIO OUT jacks Use to output decoded 5.1-chan-
nel audio to multi-channel receiver or amplifier. The FL and
FR jacks should be connected to the stereo input jacks of TV
set or stereo amplifier.
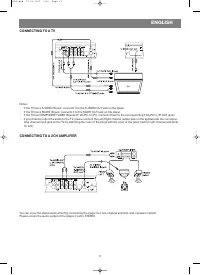
5. VIDEO OUT jack Connect to the video input on a TV or moni-
tor or AV amplifier or receiver with video input capability.
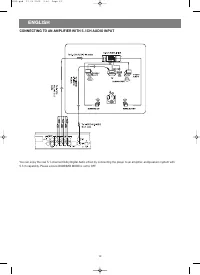
6. OPTICAL DIGITAL AUDIO OUT jack Use to output digital
audio recorded on discs by connecting to the optical digital
audio input on an AV amplifier or receiver with digital audio
input capability, but you first need to change the setting to
digital audio output on the SETUP MENU.
7. SCART OUT jack Connect to the SCART input on a TV or
other devices with SCART input capability.
8. S-VIDEO OUT jack If your TV or monitor has an S-video
input, better picture reproduction is possible by connecting
the player to your TV or monitor via the S-video jack.
9. 5.1CH AUDIO OUT Single jack Use to output decoded 5.1ch
audio to multichannel receiver or amplifier via one single
cable.
10. COAXIAL DIGITAL AUDIO OUT jack Use to output digital
audio recorded on discs by connecting to the coaxial digital
audio input on an AV amplifier or receiver with digital audio
input capability, but you first need to change the setting to
digital audio output on the SETUP MENU.
11. RADIO ANTENNA input jacks AM/FM antenna input jacks.
4055.qxd 27.09.2005 9:46 Page 6
Содержание
- 19 Основные функции; Введение в основные функции плеера.
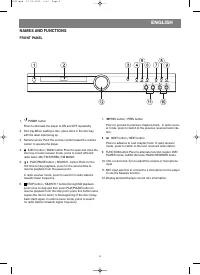
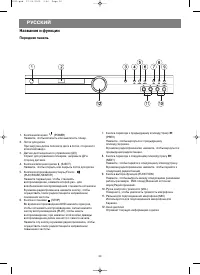
- 20 Названия и функции; Передняя панель
- 21 Задняя панель
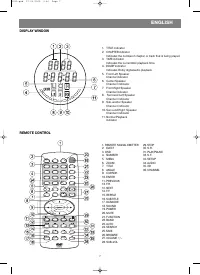
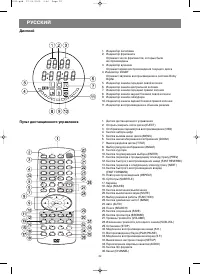
- 22 Дисплей; Пульт дистанционного управления
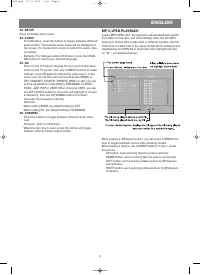
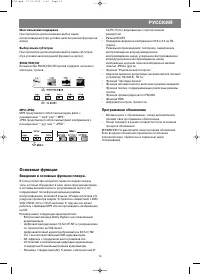
- 24 Воспроизведение MP3/JPEG
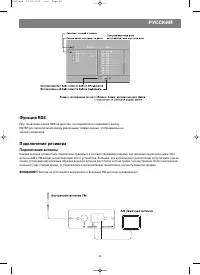
- 25 Функция RDS; Подключение антенны
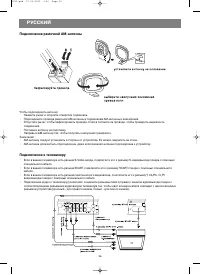
- 26 Подключение рамочной AM-антенны
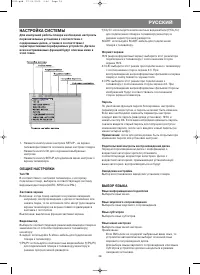
- 29 НАСТРОЙКА СИСТЕМЫ; ОБЩИЕ НАСТРОЙКИ
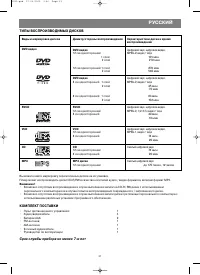
- 31 ТИПЫ ВОСПРОИЗВОДИМЫХ ДИСКОВ; Срок службы прибора не менее 7-и лет
- 33 ТЕХНИЧЕСКИЕ ХАРАКТЕРИСТИКИ


