Посудомоечные машины Oursson DW4001TD/DC - инструкция пользователя по применению, эксплуатации и установке на русском языке. Мы надеемся, она поможет вам решить возникшие у вас вопросы при эксплуатации техники.
Если остались вопросы, задайте их в комментариях после инструкции.
"Загружаем инструкцию", означает, что нужно подождать пока файл загрузится и можно будет его читать онлайн. Некоторые инструкции очень большие и время их появления зависит от вашей скорости интернета.


8
2. With increased water pressure, install a pressure
reducing valve at the inlet.
3. Connect the cold water supply hose to a ¾ ”threaded
line and make sure the connection is tight. Do not
use too much force so as not to damage the threads.
Note:
•
If the water pipes are new or have not been used for
a long period of time, let the water drain to make sure
that the water is clean and free from contamination.
Other wise, there is a risk that the water intake may
become blocked and the device may be damaged.
• Turn off the water supply if you are not using a
dishwasher.
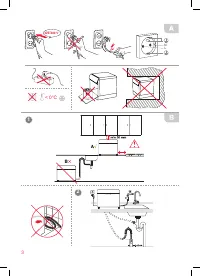
Af ter connecting the drain hose and the
water supply hose, plug in the device. Make
sure that there are no leaks any where af ter
the first wash cycle, Pic. B-5 .
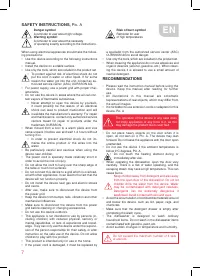
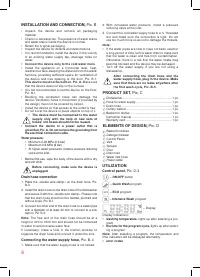
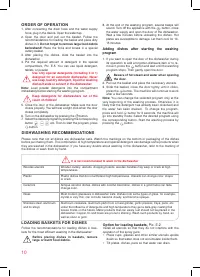
INSTALLATION AND CONNECTION,
Pic. B
•
Unpack the device and remove all packaging
material.
•
Check for accessories. The presence of water stains
and water stains inside the device is normal.
•
Retain the original packaging.
•
Inspect the device for defects and deformations.
•
It is recommended to install the device in the vicinity
of an existing water supply tap, drainage holes for
water.
• Сonnect the device only to the cold water main.
•
Install the appliance on a horizontal level, heat-
resistant sur face, keeping the distance from the walls/
furniture, providing sufficient space for ventilation of
the device and free opening of the door, Pic. B -1.
This device must not be built-in. Pic. A.
Make sure
that the device does not slip on the sur face.
• It is not recommended to set the device on the floor,
Pic. B -1.
•
Blocking the ventilation holes can damage the
device. Ventilation holes in the bottom (if provided by
the design) must not be covered by carpet.
•
Install the device so that access to the outlet is free.
•
Do not cover the device or place objects on top of it.
•
The device must be connected to the water
supply only with the help of new sets of
hoses; old hoses should not be reused.
•
Connect the device to a power outlet that is
grounded, Pic. A. Do not remove the grounding from
the electrical connection cable.
Water pressure:
•
Minimum 0.03 MPa (0.3 bar)
•
Maximum 0.6 MPa (6 bar)
•
At higher water pressures: install a pressure reducing
valve at the inlet.
• Before first use, wipe the body of the device with a dry
and soft cloth.
Before connecting, make sure the device is
unplugged.
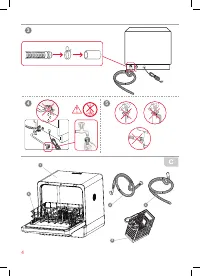
Drain hose connection
1. Place the «double wire clamp» on the drain hose, Pic.
B-3.
2. Install the drain hose on the drain hole of the dishwasher
and secure it with the «double wire clamp». Please note
that the drain hose should not be twisted, pinched and
without loops, Pic. B-1.
3. Connect the other end of the drain hose to a sewer pipe
with a diameter of at least 40 mm or connect to a sink
siphon, Pic. B-2.
Note:
The free end of the drain hose should be at a
height of 400 to 1000 mm and should not be immersed
in water to avoid reverse water flow.
If necessar y, make a hole in the kitchen worktop to
organize the drain hose and connect it under the sink.
Connecting the water supply hose,
Pic. B- 4
1. Make sure that the water supply hose is not kinked.
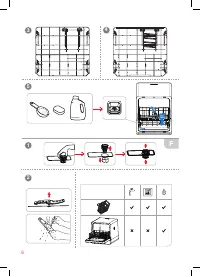
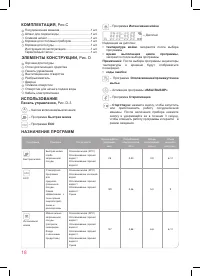
PRODUCT SET,
Рiс. C
Dishwasher ...........................................................1 pc.
Hose for water supply ..........................................1 pc.
Drain hose ...........................................................1 pc.
Cutlery basket ......................................................1 pc.
Basket for dishes .................................................1 pc.
Instruction manual ...............................................1 pc.
Warranty card ......................................................1 pc.
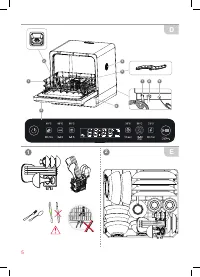
ELEMENTS OF DESIGN,
Рiс. D
Basket for dishes
Detergent drawer
Control Panel
Vent
Sprayer
Door
Drain hole
Water inlet hose
Power cable
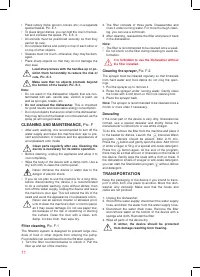
UTILIZATION
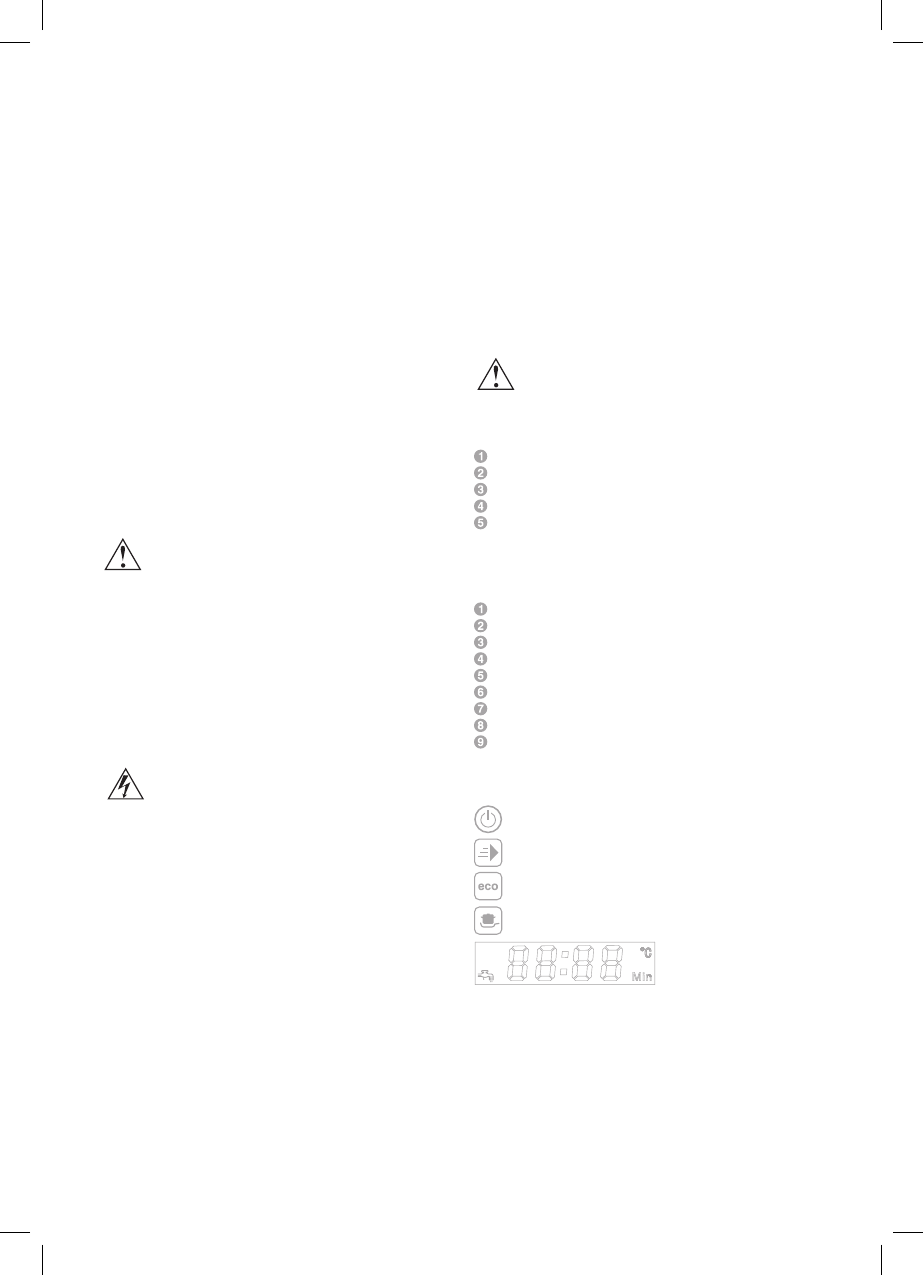
Control panel,
Pic. D-3
–
ON/OFF
button
–
Quick Wash
program
–
ECO
program
–
Intensive Wash
program
– Display
Display indications:
•
washing temperature,
lights up after selecting a pro-
gram
•
the time for the program cycle, l
ights up after select-
ing a program
Note:
After selecting a program, the temperature and
time indicators will be displayed alternately.
•
error codes
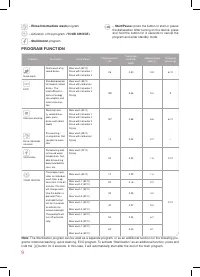
Содержание
- 17 Не превышайте максимальное количество 4; УСТАНОВКА И ПОДКЛЮЧЕНИЕ,
- 18 ECO
- 19 ПОРЯДОК РАБОТЫ; Не забудьте предва; Храните моющие средства для посудомоеч
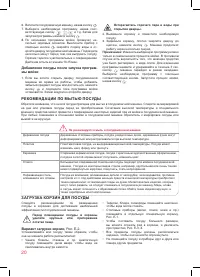
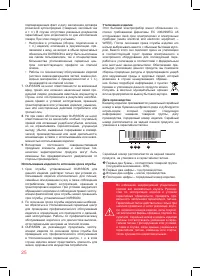
- 20 Остерегайтесь горячего пара и воды при; РЕКОМЕНДАЦИИ ПО МЫТЬЮ ПОСУДЫ; Не рекомендуется мыть в посудомоечной машине; Перед помещением посуды в корзины; Вариант загрузки корзин,
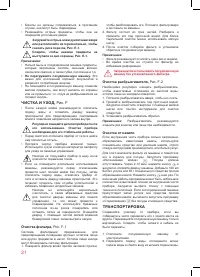
- 21 ТРАНСПОРТИРОВКА; Запрещается использовать посудомоечную; Очистка разбрызгивателя,
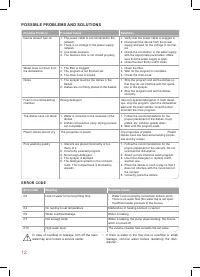
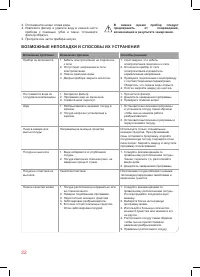
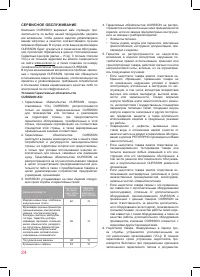
- 22 Отсоедините шланг слива воды.; ВОЗМОжНЫЕ НЕПОЛА ДКИ И СПОСОБЫ Их УСТРАНЕНИЯ; Возможная проблема
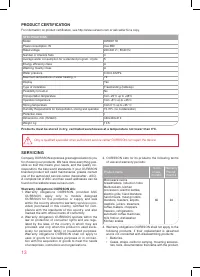
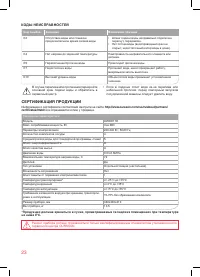
- 23 КОДЫ НЕИСПРАВНОСТЕй; Код ошибки; СЕРТИФИКАЦИЯ ПРОДУКЦИИ; сервисного центра OURSSON.
- 24 СЕРВИСНОЕ ОБСЛУжИВАНИЕ; Условия гарантийных обязательств
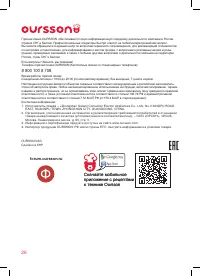
- 26 sson; Время работы горячей линии:
Характеристики

Остались вопросы?Не нашли свой ответ в руководстве или возникли другие проблемы? Задайте свой вопрос в форме ниже с подробным описанием вашей ситуации, чтобы другие люди и специалисты смогли дать на него ответ. Если вы знаете как решить проблему другого человека, пожалуйста, подскажите ему :)


