
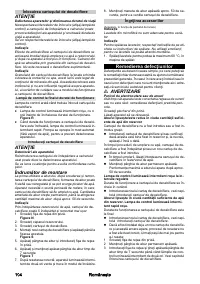
Пароочистители Karcher SC 2 Upright EasyFix - инструкция пользователя по применению, эксплуатации и установке на русском языке. Мы надеемся, она поможет вам решить возникшие у вас вопросы при эксплуатации техники.
Если остались вопросы, задайте их в комментариях после инструкции.
"Загружаем инструкцию", означает, что нужно подождать пока файл загрузится и можно будет его читать онлайн. Некоторые инструкции очень большие и время их появления зависит от вашей скорости интернета.


14
English
Note
The granulate in the decalcification cartridge may
change colour after it comes into contact with water.
This depends on the mineral content in the water. This
discolouration is harmless and does not have a nega-
tive effect on the device, the cleaning work or the func-
tionality of the decalcification cartridge.
Indicator light at end of the run time
The indicator light shows you when the decalcification
cartridge needs to be replaced.
●
The indicator light flashes red 1 hour before the run
time expires.
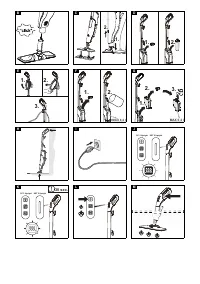
Illustration R
●
When the run time of the decalcification cartridge is
exhausted, the indicator light flashes quickly. The
pump switches off automatically (no water steam) to
prevent damage to the device.
Inserting the decalcification cartridge
ATTENTION
Device damage
There is a risk of damage to the device if the used de-
calcification cartridge is re-used.
Work carefully in order to prevent mixing up the cartridg-
es.
Installation information
When steaming for the first time after removing and re-
inserting the decalcification cartridge, the steam jet may
be weak or irregular, and individual drops of water may
be expelled. The device requires a short running-in pe-
riod in which the decalcification cartridge fills with water.
The steam volume that is expelled increases constantly
until the maximum steam volume has been reached af-
ter approx. 50 seconds.
Note
Removing the water reservoir makes it easier to remove
and install the decalcification cartridge.
1. Pull the mains plug out of the socket.
Illustration N
2. Remove the reservoir cover.
3. Remove the decalcification cartridge.
4. Insert the new decalcification cartridge and press it
firmly into place.
Illustration S
5. Press the steam lever and insert the mains plug into
a socket.
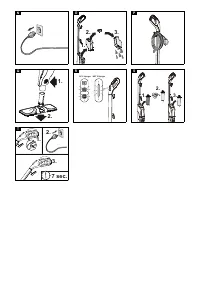
6. Keep the steam lever pressed for 7 seconds.
Illustration T
7. After a successful reset, the device flashes green
twice and then switches to heating mode.
8. Press and hold the steam lever for approximately 50
seconds to vent the decalcification cartridge.
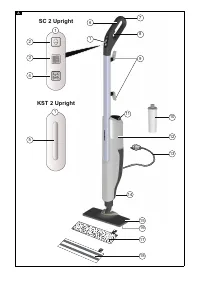
Care of accessories
(Accessories - depending on scope of delivery)
Note
The micro fibre cloths are not suitable for dryer.
Note
Observe the instructions on the washing tag when
washing the cloths. Do not use any liquid softeners as
this will affect the ability of the cloths to pick up dirt.
1. Wash the floor cleaning cloths in a washing machine
at a max. temperature of 60 °C.
Troubleshooting guide
Malfunctions often have simple causes that you can
remedy yourself using the following overview. When in
doubt, or in the case of malfunctions not mentioned
here, please contact your authorised Customer Service.
몇
WARNING
Risk of electric shock and burns
Trying to eliminate faults while the appliance is connect-
ed to the mains or has not yet cooled down is always
dangerous.
Remove the mains plug.
Allow the appliance to cool down.
No steam / little steam although there is sufficient
water in the reservoir
The decalcification cartridge has not been inserted or
has been inserted incorrectly.
Fit the decalcification cartridge and/or check that the
decalcification cartridge sits tightly in the reservoir
and press in again if necessary.
The decalcification cartridge has been removed when
filling with water and/or a new decalcification cartridge
has been fitted
Always leave the decalcification cartridge in the wa-
ter reservoir during filling.
Press and hold the steam lever constantly.
The full steam output is reached after approximately
50 seconds.
The indicator light flashes red at regular intervals
Run time of the decalcification cartridge ends soon.
Fit a new decalcification cartridge, see chapter
In-
serting the decalcification cartridge
.
No steam although there is sufficient water in the
reservoir. The indicator light flashes red quickly.
Run time for the decalcification cartridge has expired
Fit a new decalcification cartridge, see chapter
In-
serting the decalcification cartridge
.
If a new decalcification cartridge has already been
installed and this error still occurs, the reset process
has probably not been carried out correctly. Please
follow the steps below to reset it:
1
Pull the mains plug out of the socket.
2
Press and hold the steam lever constantly.
3
Plug in the mains plug and hold the steam lever for
7 seconds until the indicator lights flash green twice.
See chapter
Replacing the decalcification cartridge
.
Warranty
The warranty conditions issued by our relevant sales
company apply in all countries. We shall remedy possi-
ble malfunctions on your appliance within the warranty
period free of cost, provided that a material or manufac-
turing defect is the cause. In a warranty case, please
contact your dealer (with the purchase receipt) or the
next authorised customer service site.
(See overleaf for the address)
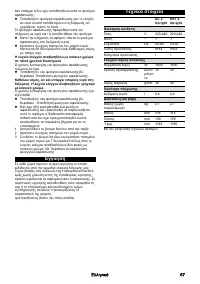
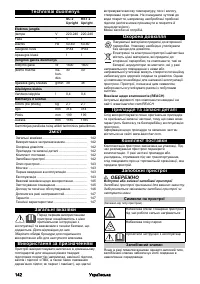
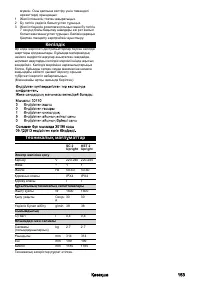
Характеристики

Остались вопросы?Не нашли свой ответ в руководстве или возникли другие проблемы? Задайте свой вопрос в форме ниже с подробным описанием вашей ситуации, чтобы другие люди и специалисты смогли дать на него ответ. Если вы знаете как решить проблему другого человека, пожалуйста, подскажите ему :)


