
Обогреватели Timberk T-IR2000-A12SI - инструкция пользователя по применению, эксплуатации и установке на русском языке. Мы надеемся, она поможет вам решить возникшие у вас вопросы при эксплуатации техники.
Если остались вопросы, задайте их в комментариях после инструкции.
"Загружаем инструкцию", означает, что нужно подождать пока файл загрузится и можно будет его читать онлайн. Некоторые инструкции очень большие и время их появления зависит от вашей скорости интернета.


IM2022
14
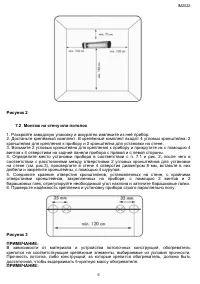
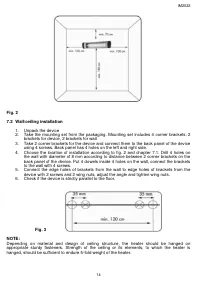
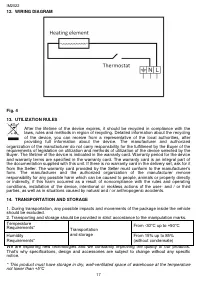
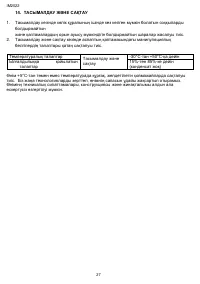
Fig. 2
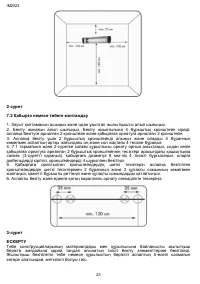
7.2 Wall/ceiling installation
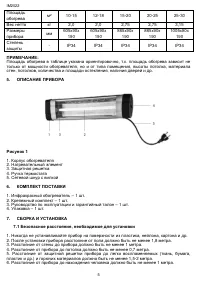
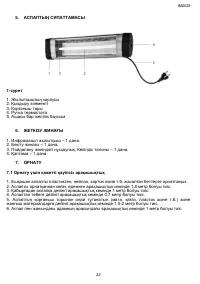
1. Unpack the device
2. Take the mounting set from the packaging. Mounting set includes 4 corner brackets: 2
brackets for device, 2 brackets for wall
3. Take 2 corner brackets for the device and connect them to the back panel of the device
using 4 screws. Back panel has 4 holes on the left and right side.
4. Choose the location of installation according to fig. 2 and chapter 7.1. Drill 4 holes on
the wall with diameter of 8 mm according to distance between 2 corner brackets on the
back panel of the device. Put 4 dowels inside 4 holes on the wall, connect the brackets
to the wall with 4 screws.
5. Connect the edge holes of brackets from the wall to edge holes of brackets from the
device with 2 screws and 2 wing nuts, adjust the angle and tighten wing nuts.
6. Check if the device is strictly parallel to the floor.
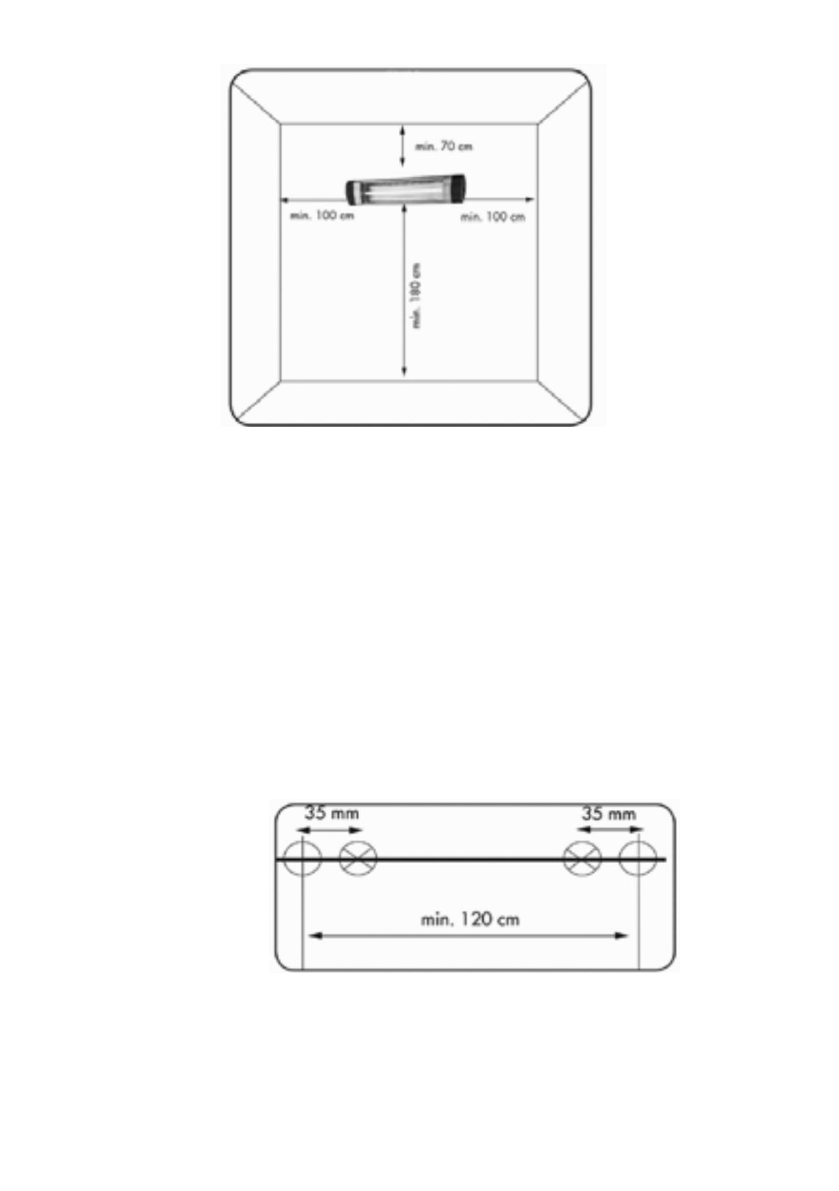
Fig. 3
NOTE:
Depending on material and design of ceiling structure, the heater should be hanged on
appropriate sturdy fasteners. Strength of the ceiling or its elements, to which the heater is
hanged, should be sufficient to endure 5-fold weight of the heater.


