
Обогреватели Hyundai H-HV1-15-UI563 - инструкция пользователя по применению, эксплуатации и установке на русском языке. Мы надеемся, она поможет вам решить возникшие у вас вопросы при эксплуатации техники.
Если остались вопросы, задайте их в комментариях после инструкции.
"Загружаем инструкцию", означает, что нужно подождать пока файл загрузится и можно будет его читать онлайн. Некоторые инструкции очень большие и время их появления зависит от вашей скорости интернета.


8.
Electric convector
EN
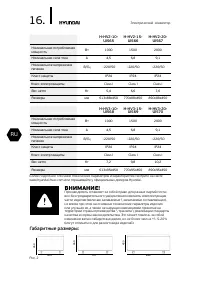
WARNING!
The power outlet should be rated at least 10A for models with a
maximum capacity of up to 2000 W and at least 12 A for models with a
maximum capacity of 2500 watt.
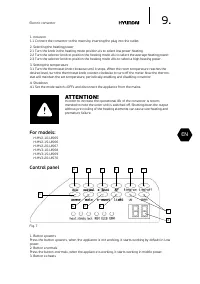
6. OPERATION
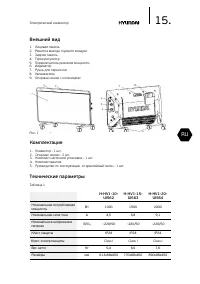
For models:
H-HV1-10-UI562
H-HV1-15-UI563
H-HV1-20-UI564
5. CONNECTING TO THE MAINS
1. Convector is designed for connection to the plug with single-phase ~220 V, 50 Hz.
2. Before connecting, make sure that the voltage is correct as speciied on the nameplate with the
technical data of the device.
3. Convector when connected to the plug must comply with applicable electrical codes.
4. Electric outlet must be properly grounded. The receptacle must be rated for at least 10A.
Electrical plug and socket must always be kept dry to prevent electrical leakage. Regularly check
that the electrical plug is irmly connected to the outlet. Veriication is performed in the following
order: Insert the mains plug into the socket. Ater half an hour, turn of the convector and unplug
the power cord, check with the hand, whether the plug is not heated.
If the plug is heated to a temperature above 50 °C, in order to avoid damage, accidents, ire, due
to poor electrical contact replace the socket with help of a specialist.
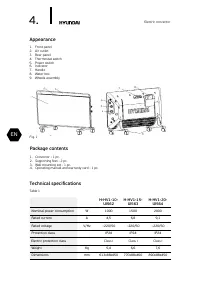
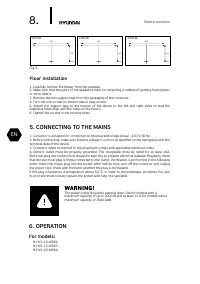
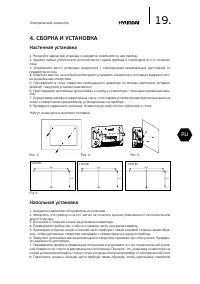
Floor installation
1. Carefully remove the heater from the package.
2. Make sure that the parts of the appliance have no remaining crumbles of packing foam plastic
or other debris.
3. Remove the two support legs from the packaging of the convector.
4. Turn the unit so that its bottom was in easy access.
5. Attach the support legs to the bottom of the device to the let and right sides so that the
fastening holes align with the holes on the ixture.
6. Tighten the screws in the existing holes.
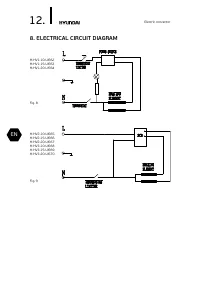
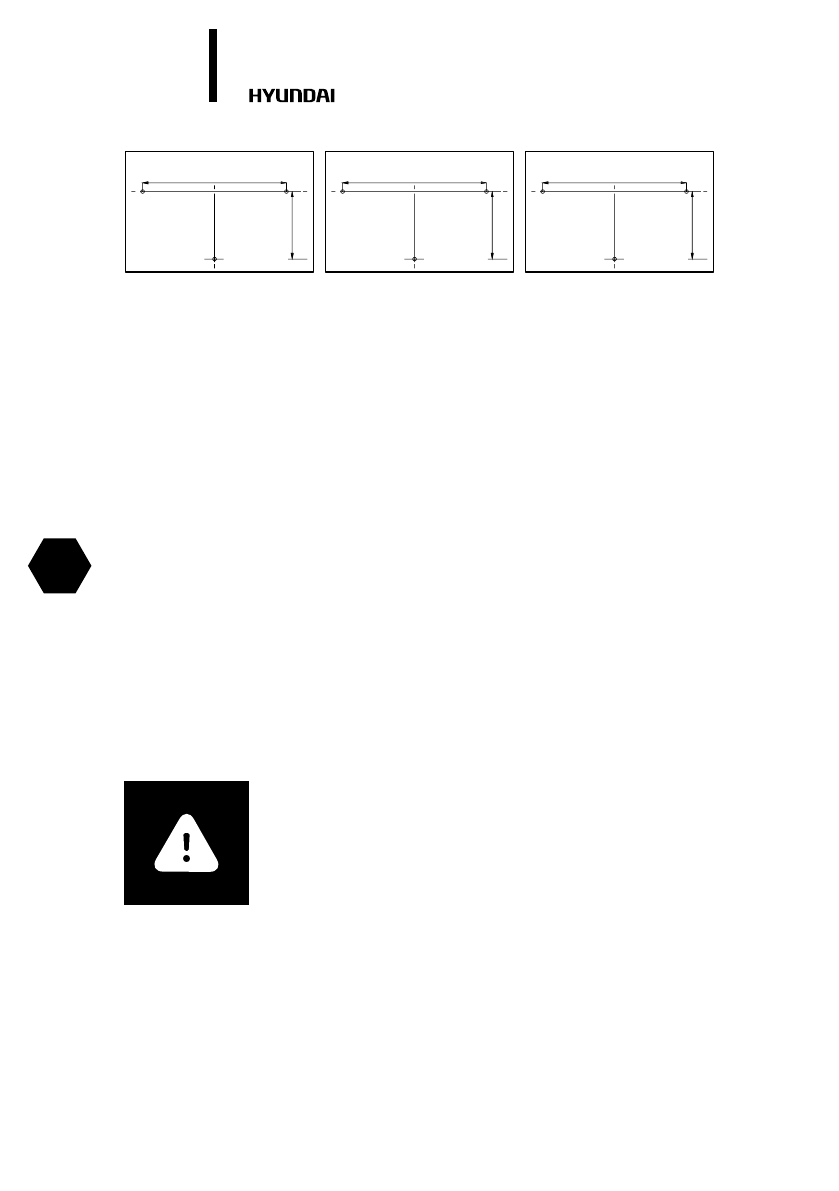
Fig. 6
1000 W
300
494
600
118
110
119
1500 W
2000 W
Содержание
- 14 Содержание
- 15 Описание
- 16 Внешний вид
- 18 ОБЩИЕ ПРАВИЛА БЕЗОПАСНОСТИ
- 20 СБОРКА И УСТАНОВКА; Настенная установка
- 21 ПОДКЛЮЧЕНИЕ К ЭЛЕКТРИЧЕСКОЙ СЕТИ
- 22 Панель управления
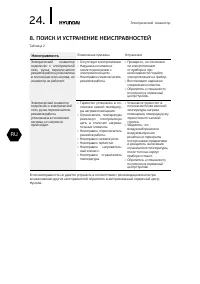
- 25 ПОИСК И УСТРАНЕНИЕ НЕИСПРАВНОСТЕЙ; Неисправность
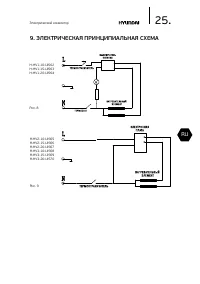
- 26 ЭЛЕКТРИЧЕСКАЯ ПРИНЦИПИАЛЬНАЯ СХЕМА
- 27 ТРАНСПОРТИРОВКА И ХРАНЕНИЕ
- 28 УВАЖАЕМыЙ ПОКУПАТЕЛЬ!
- 30 Гарантийные обязательства
- 31 Заполнение гарантийного талона
- 32 Изготовитель оставляет за собой право:; Общие правила установки, подключения и запуска в эксплу
- 33 Гарантийные обязательства не распространяются на
- 34 Изготовитель не несет гарантийных обязательств за изделие; Особые условия гарантийного обслуживания для отдельных
- 35 Водонагревательное оборудование
- 37 Кондиционеры, устройства с компрессором
- 38 Электрические обогреватели
- 39 Cтандартные гарантийные сроки для изделий,; Кондиционеры воздуха:
- 42 Сведения об установке изделия
- 45 Отрывной талон «A»; Отрывной талон «В»; Отрывной талон «Г»
- 46 Профилактическое обслуживание изделия.
- 48 Вниманию покупателей!


